Conversation


🥳 Feedback Received!
Thanks for taking a moment to share your thoughts — it genuinely helps us make each chapter sharper.
What happens next:
- Your feedback goes straight to our product team.
- We’ll use it to refine lessons, clarify examples, and make the program even more useful.
Appreciate you helping make this program better for everyone.
Ready for your next challenge? 👇
Project: Google Merchant Center
Overview
Google Merchant Center (GMC) is the foundation for running Google Shopping Ads, enabling you to showcase your products across Google’s platforms.
This project guides you through creating a GMC account, linking it to Google Ads, and syncing your product data to prepare for Shopping Ads.
Shopping is a bit like Performance Max where you have limited customization options and it is mostly about trusting the algorithm, but the first step is ensuring Google has the product data to work with.
The key steps are:
- Create a Google Merchant Center account.
- Link your Merchant Center account with your Google Ads account.
- Sync your product database with Google Merchant Center (e.g., via Shopify or Google Sheets).
- Wait for product approval (typically 1–3 days).
- Prepare to create a Shopping campaign in Google Ads.
Phase 1: Create a Google Merchant Center account
- Sign up for GMC:
- Visit https://business.google.com/merchant-center/ and create an account using the same email associated with your Google Ads account (or an admin email with access).
- Follow the prompts to set up your business name, address, and contact information.
- Add your tax and shipping information:
- Specify tax rates and shipping options for your regions (e.g., U.S., UK). If using an e-commerce platform like Shopify, it often handles this automatically—otherwise, enter manually in GMC under Settings > Shipping and Tax.
- Example: For a landscaping equipment store, set flat-rate shipping ($5–$20 USD) and state-specific tax rates (e.g., 8% in California).
Phase 2: Link Google Merchant Center with Google Ads
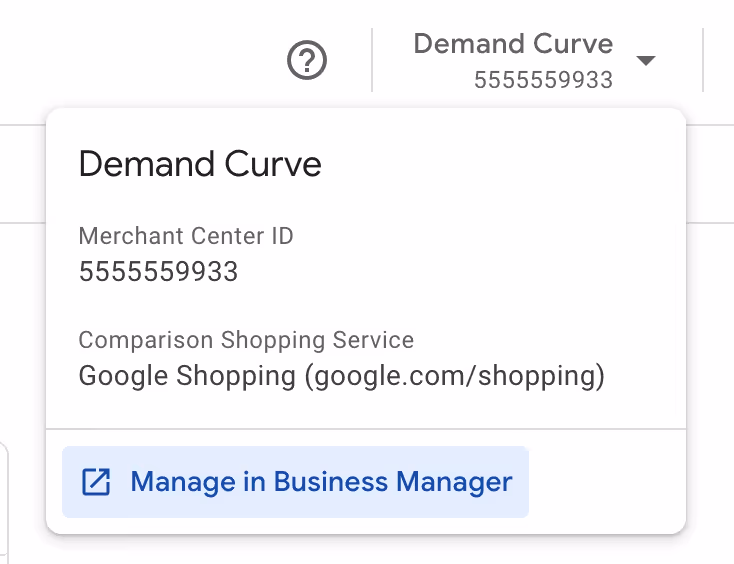
- In Google Merchant Center, click your business name in the top-right
- Click on Manage in Business Manager
- Under Google Services click on Add Service then select Google Ads
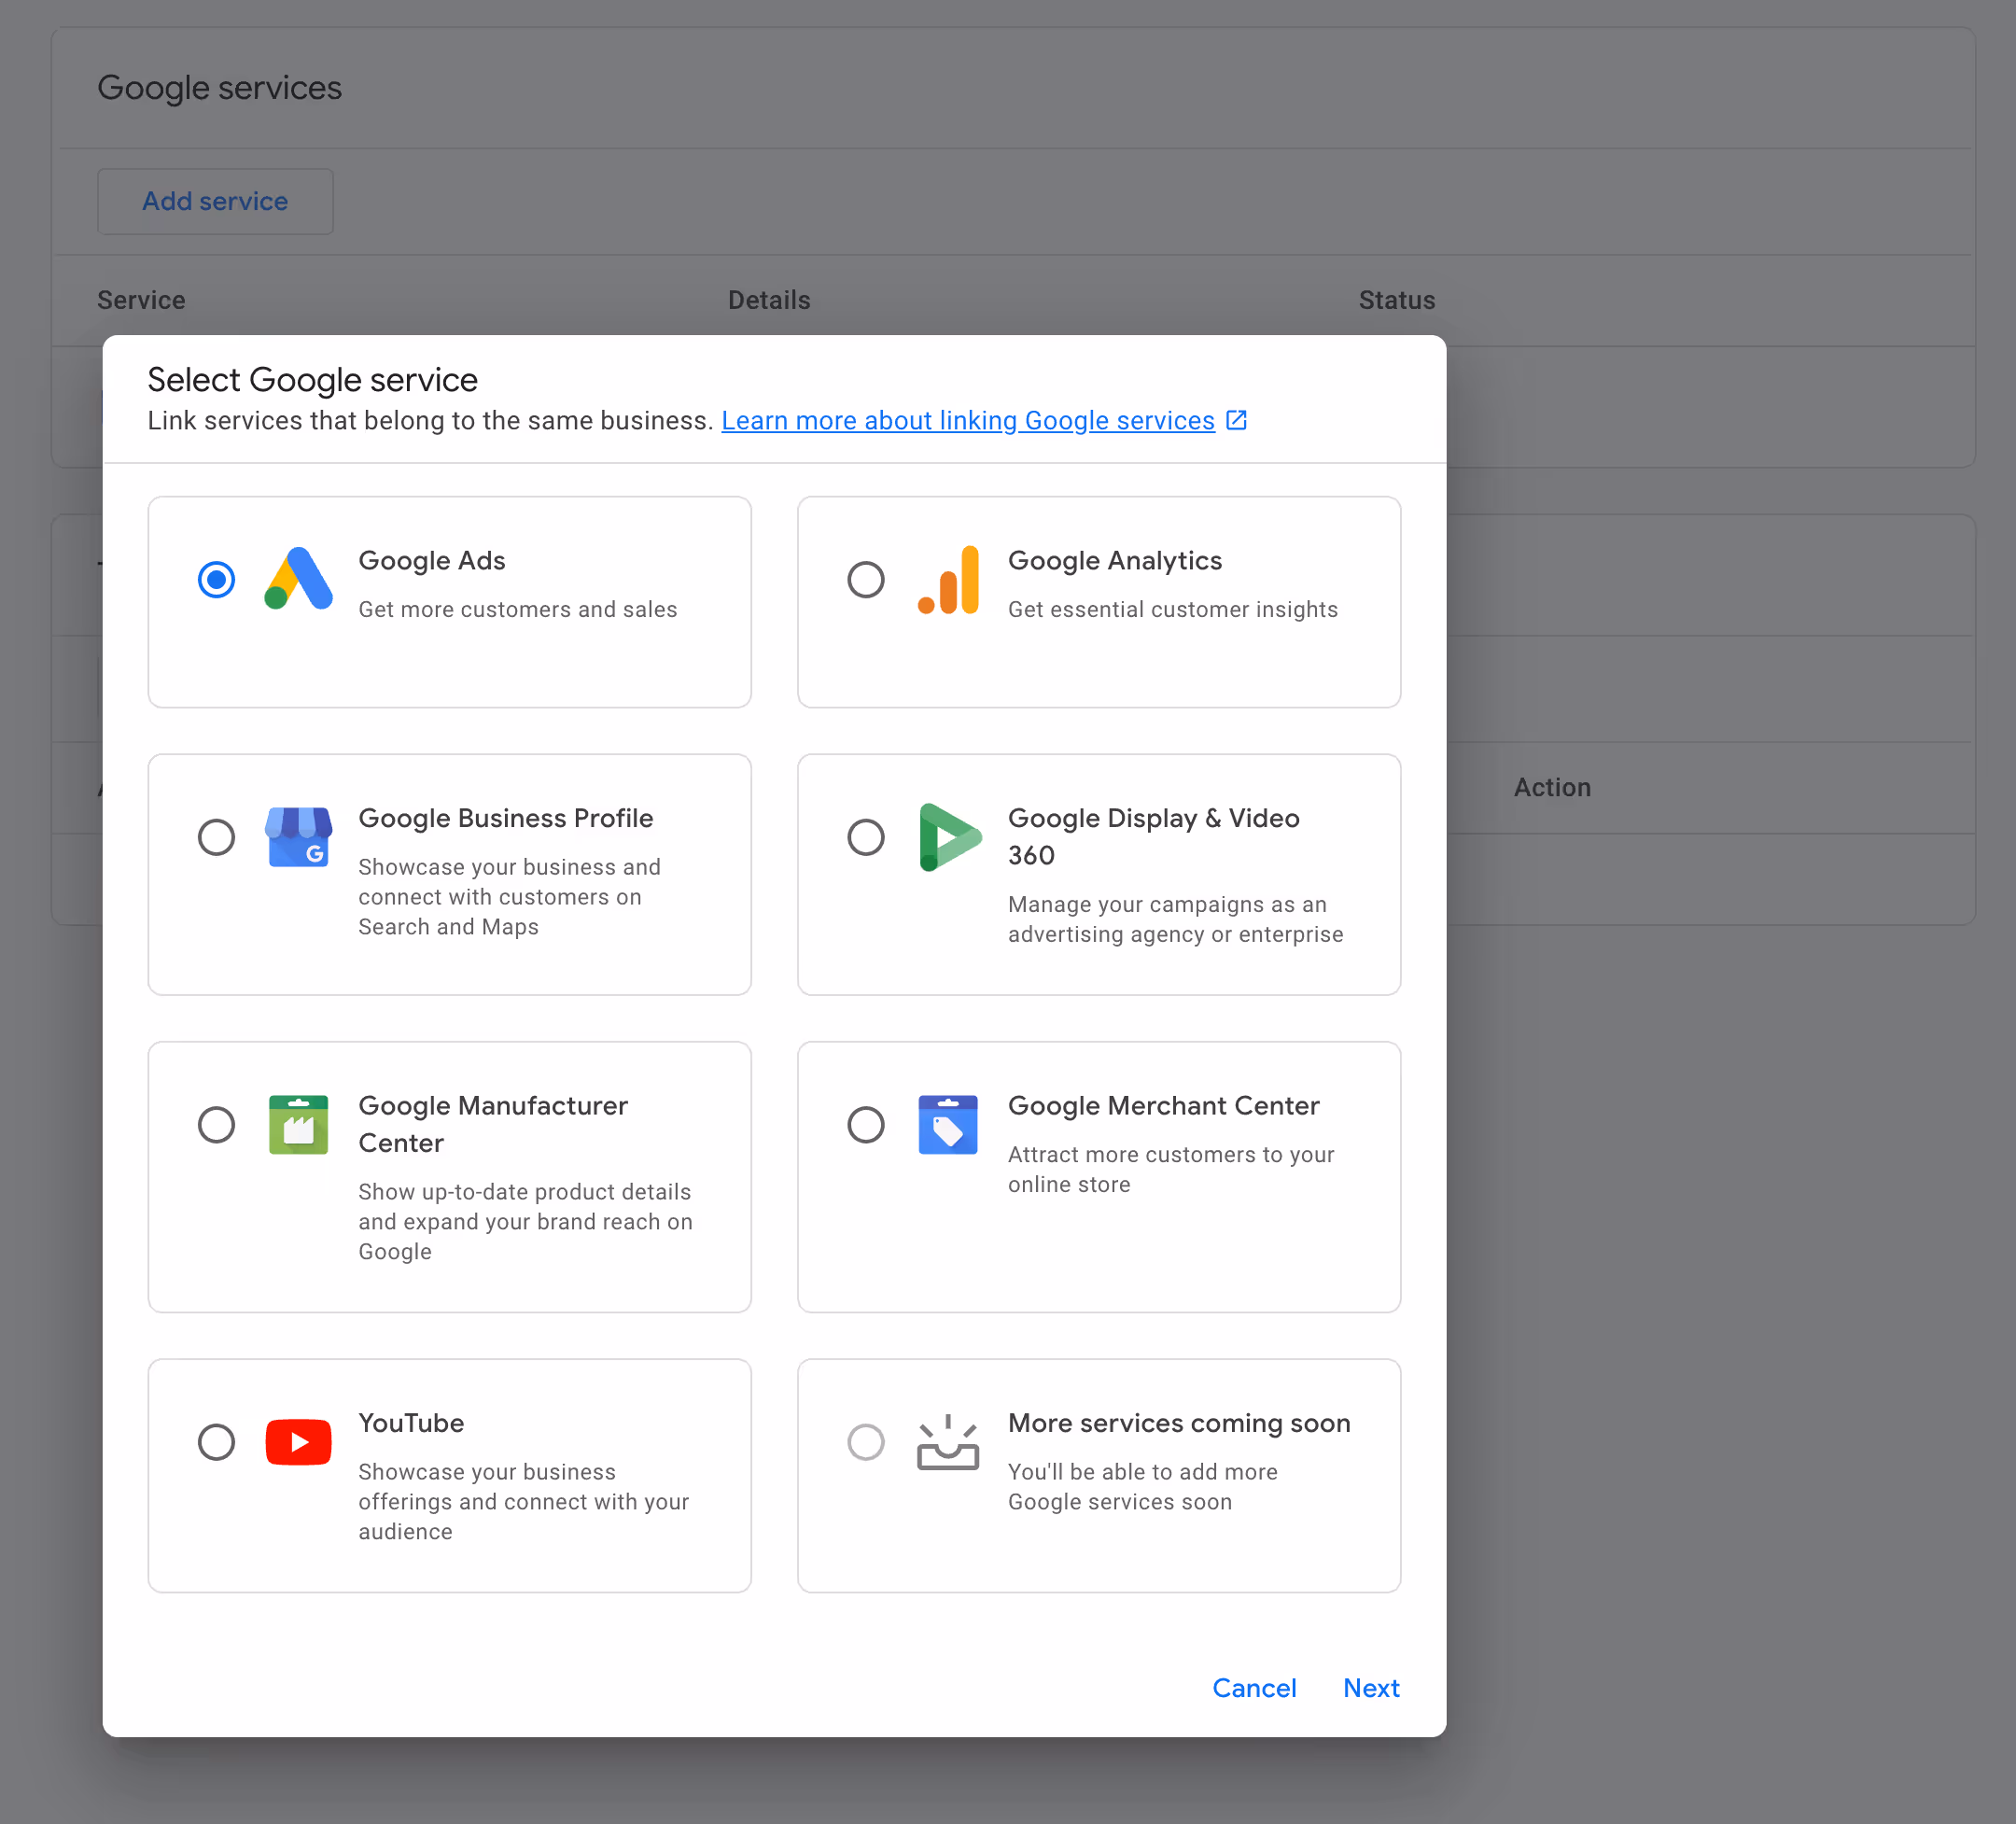
- Connect your account
- Make sure it matches the account ID of your Google Ads account
Phase 3: Link your product database with Google Merchant Center
Sync your product data automatically or manually, depending on your setup.
We don't recommend the manual or API options unless you have very few products or developers on the team to build this.
The two options we recommend are:
Option 1: Ecommerce platform integration (preferred)
Use Shopify or similar platforms:
- If you use Shopify (or BigCommerce, WooCommerce, etc.), install the Google Shopping app or plugin to sync products directly with GMC.
- Steps for Shopify:
- Go to apps.shopify.com/google-shopping, click Add app, and install it on your store.
- Configure the app by linking your GMC account, setting shipping details, and syncing products.
- Use default product titles and descriptions from Shopify, pulling SEO-optimized versions for Google Ads.
- Requirements: Ensure your store has a refund policy, terms of service, contact information, and eligible products (e.g., no prohibited items like alcohol or gambling—see Google’s Shopping Ads policies).
- Manage products:
- In Shopify, go to Products > All Products, select products, and edit Availability - Google Shopping to include/exclude items (e.g., exclude gift cards, bundles, or wholesale products).
- Configure product fields in GMC (e.g., Google product category, condition) via the app if needed.
Option 2: Google Sheets (manual setup, simpler for startups)
- Create a Google Sheet feed:
- In Google Merchant Center, go to Products > Feeds > Primary feeds > click the blue + button.
- Choose your primary country (e.g., United States) and language (e.g., English), name the feed (e.g., “Google Sheets Feed”), and select “Google Sheets” as the method.
- Set “Generate a new Google spreadsheet from a template,” configure an import schedule (e.g., daily), and grant permission to connect GMC and Google Sheets.
- Open the generated Google Sheet template, which includes required columns (e.g., ID, title, description, link, price, availability, image link).
- Populate the Google Sheet:
- Add your product data in the required format (see Google’s GMC documentation for details):
- ID: Unique identifier for each product (e.g., SKU, custom code).
- Title: Compelling, keyword-rich name (e.g., “Eco-Friendly Lawn Mower, 24V Battery” for landscaping—150 characters max, front-load key terms).
- Description: Detailed, keyword-relevant text (e.g., “Efficient, quiet lawn mower for green yards”—5,000 characters max, prioritize first 160–500 for visibility).
- Link: Working URL to your product page.
- Condition: Set as “New” (unless used or refurbished).
- Price: Include decimals and currency (e.g., “249.99 USD”).
- Availability: “In stock” or appropriate status (e.g., “Out of stock”).
- Image link: URL to a high-quality product image (PNG/JPEG, 150 DPI, no borders, white/transparent background—see Google’s image guidelines).
- Google product category: Use Google’s format (e.g., “Home & Garden > Lawn & Garden > Lawn Mowers”).
- Optional fields: Brand, product type (e.g., “Home > Lawn Care > Mowers”) for organization.
- Force an immediate sync: In GMC > Products > Feeds > select your feed > click FETCH NOW.
- Add your product data in the required format (see Google’s GMC documentation for details):
- Advantages: Manual control over product data for Google Ads, ideal for startups without e-commerce platforms.
- Downside: Requires ongoing updates—set a recurring schedule (e.g., weekly) to maintain accuracy.
Avoid complex methods
- Skip manual uploads, scheduled fetches, or Content API unless you have developers—focus on Shopify or Google Sheets for ease and efficiency.
Phase 4: Wait for product approval (1–3 days)
- After syncing, Google reviews your products for eligibility and formatting (e.g., correct titles, images, categories). This typically takes 1–3 days.
- Check Products > Needs Attention in GMC for approval status or issues (e.g., missing fields, ineligible categories like healthcare or alcohol—see Google’s Shopping Ads policies).
- Resolve issues (e.g., update titles, add images) and resubmit. Contact Google support if problems persist.
And when things are approved, you’re ready to start running Shopping Ads!
Let's dive into those :)