Conversation


🥳 Feedback Received!
Thanks for taking a moment to share your thoughts — it genuinely helps us make each chapter sharper.
What happens next:
- Your feedback goes straight to our product team.
- We’ll use it to refine lessons, clarify examples, and make the program even more useful.
Appreciate you helping make this program better for everyone.
Ready for your next challenge? 👇
Project: Set up TikTok Ads
Overview
In this project, you'll go through the steps to set up your TikTok ads account and launch your first campaign.
What you'll do:
- Set up your TikTok ads account
- Upload creatives
- Generate custom audiences
- Set up a campaign
- Build ad sets
- Choose creatives
- Review and submit
- Go live
Step 1: Set up your TikTok ads account
Step 1a: Create a TikTok Business Manager account
First things first, head over to ads.tiktok.com to set up your TikTok For Business account.
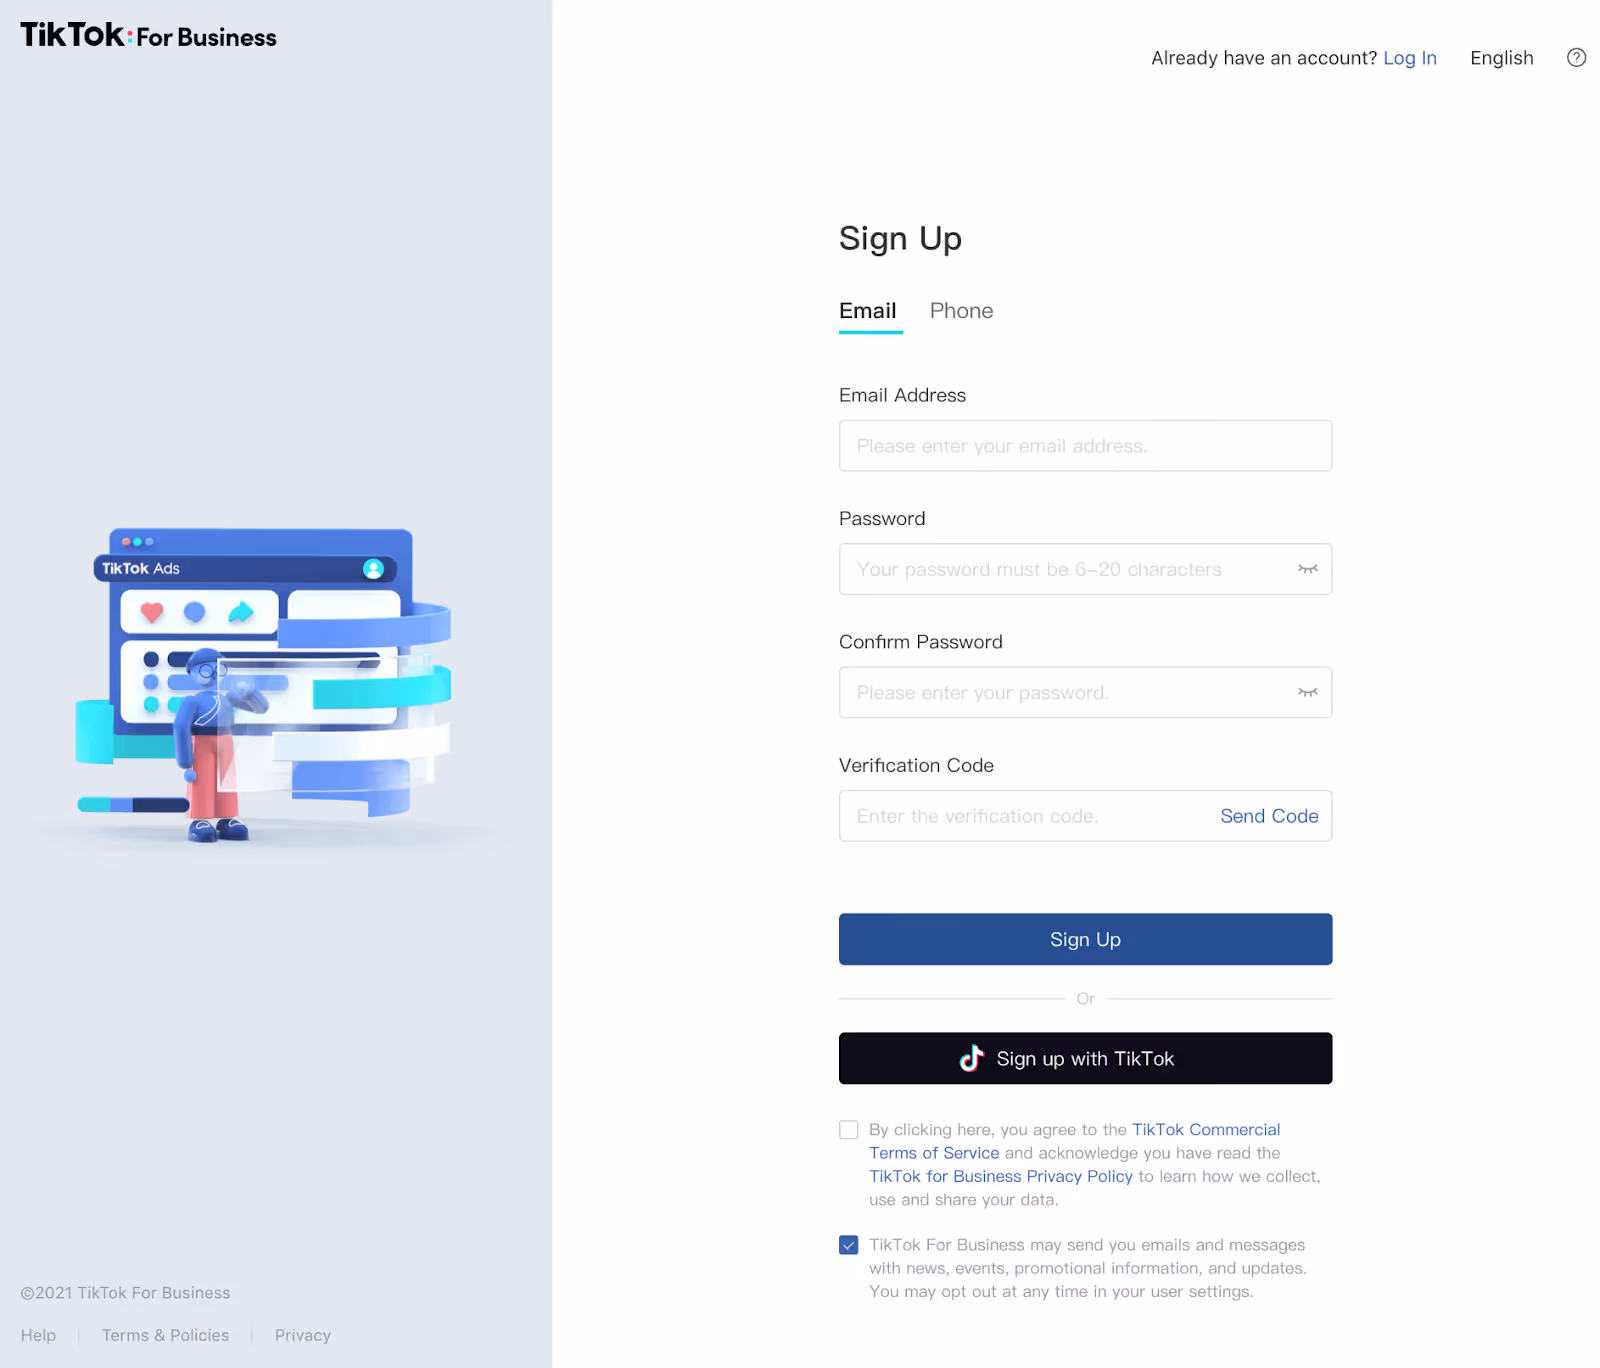
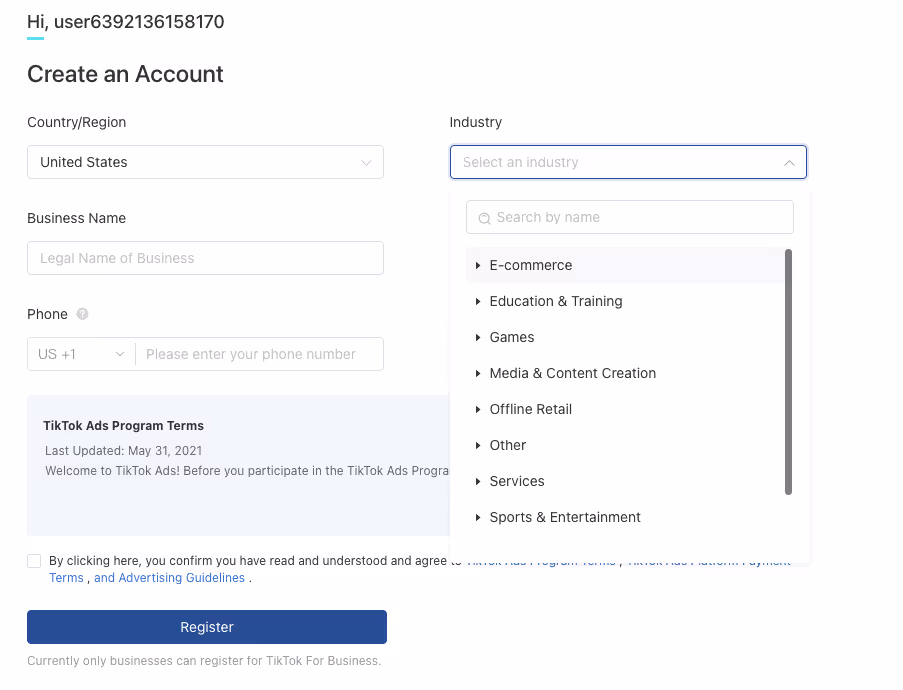
Enter your account information and contact details.
On the next page, you should fill in:
- Country/region
- Industry
- Business name
- Time Zone
- Phone
- Currency
Click Register and wait for TikTok to approve your account (usually within one business day).
On the next screen, enter your business details and billing information.
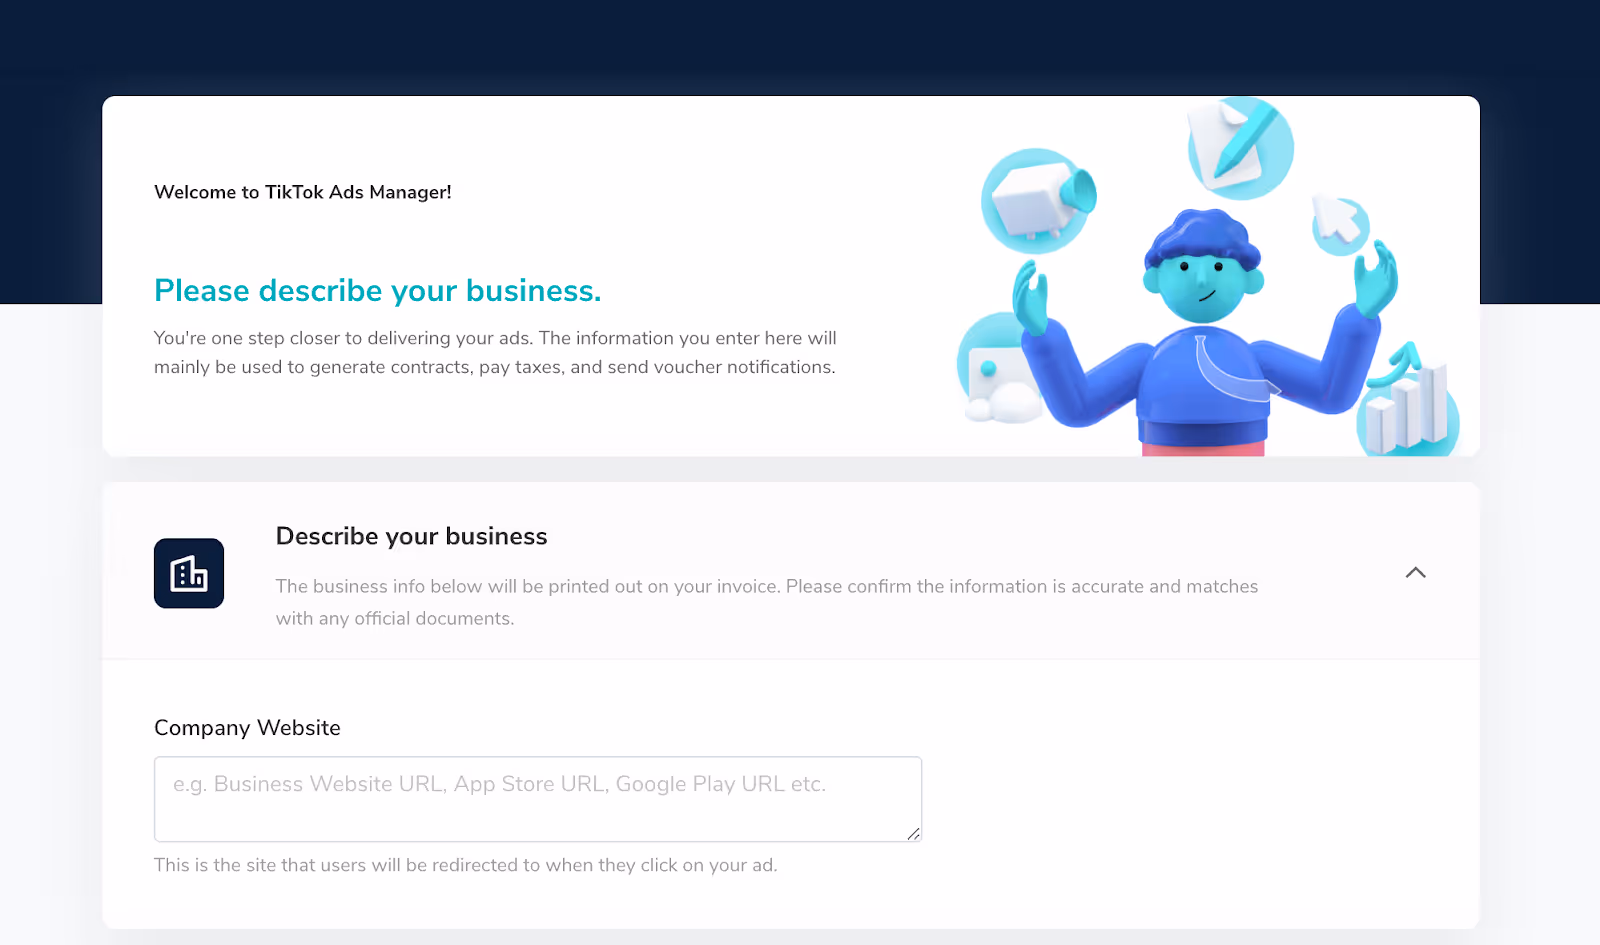
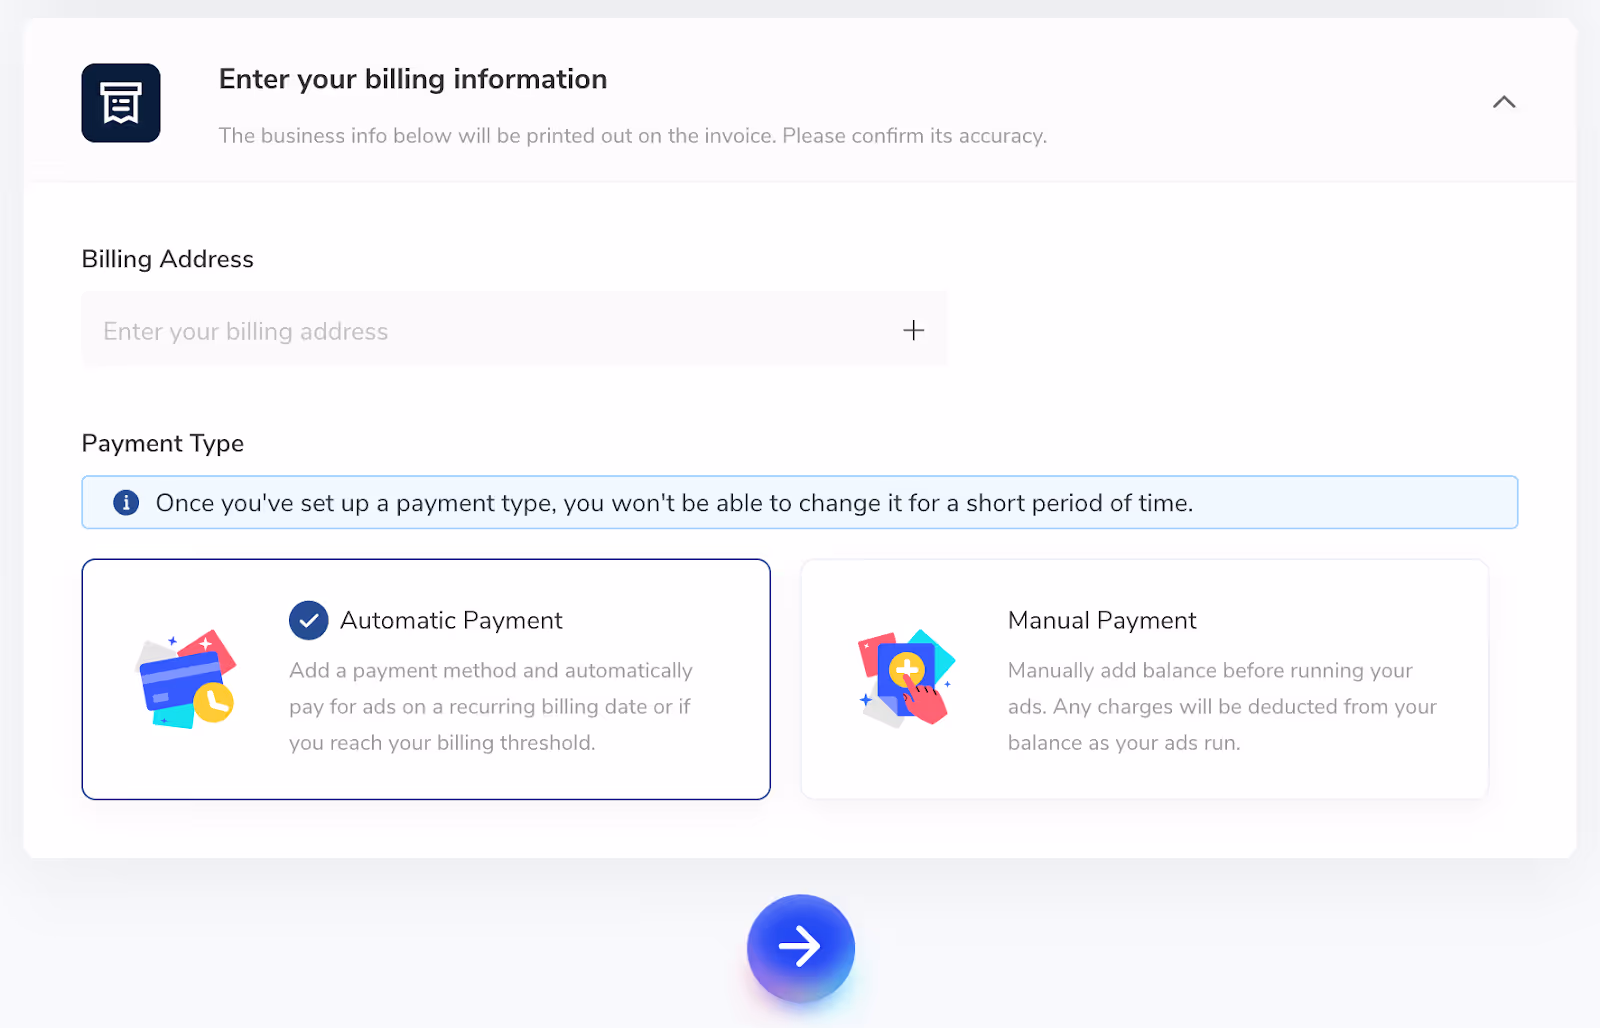
Click the right arrow to continue.
Now, choose the Ads Manager mode you want to start with.
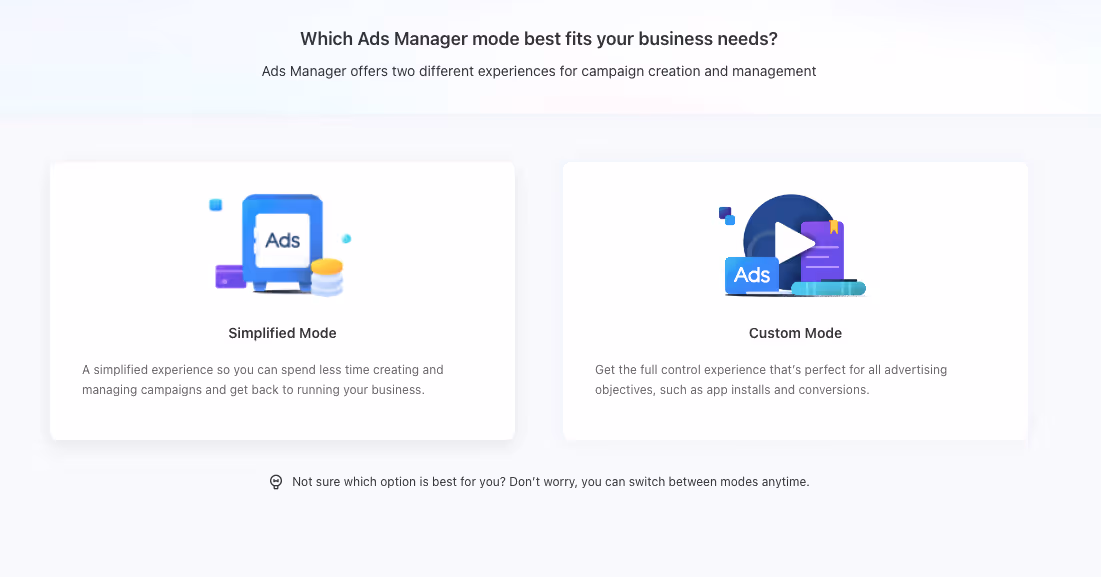
- Simplified Mode is a streamlined ads process that lets you create and launch ads quickly with fewer features and settings.
- Custom Mode gives you more ad types, targeting options, and other advanced features—use this one.
Select Custom Mode, and you’ll be redirected to the main TikTok Ads Manager campaign creation screen.
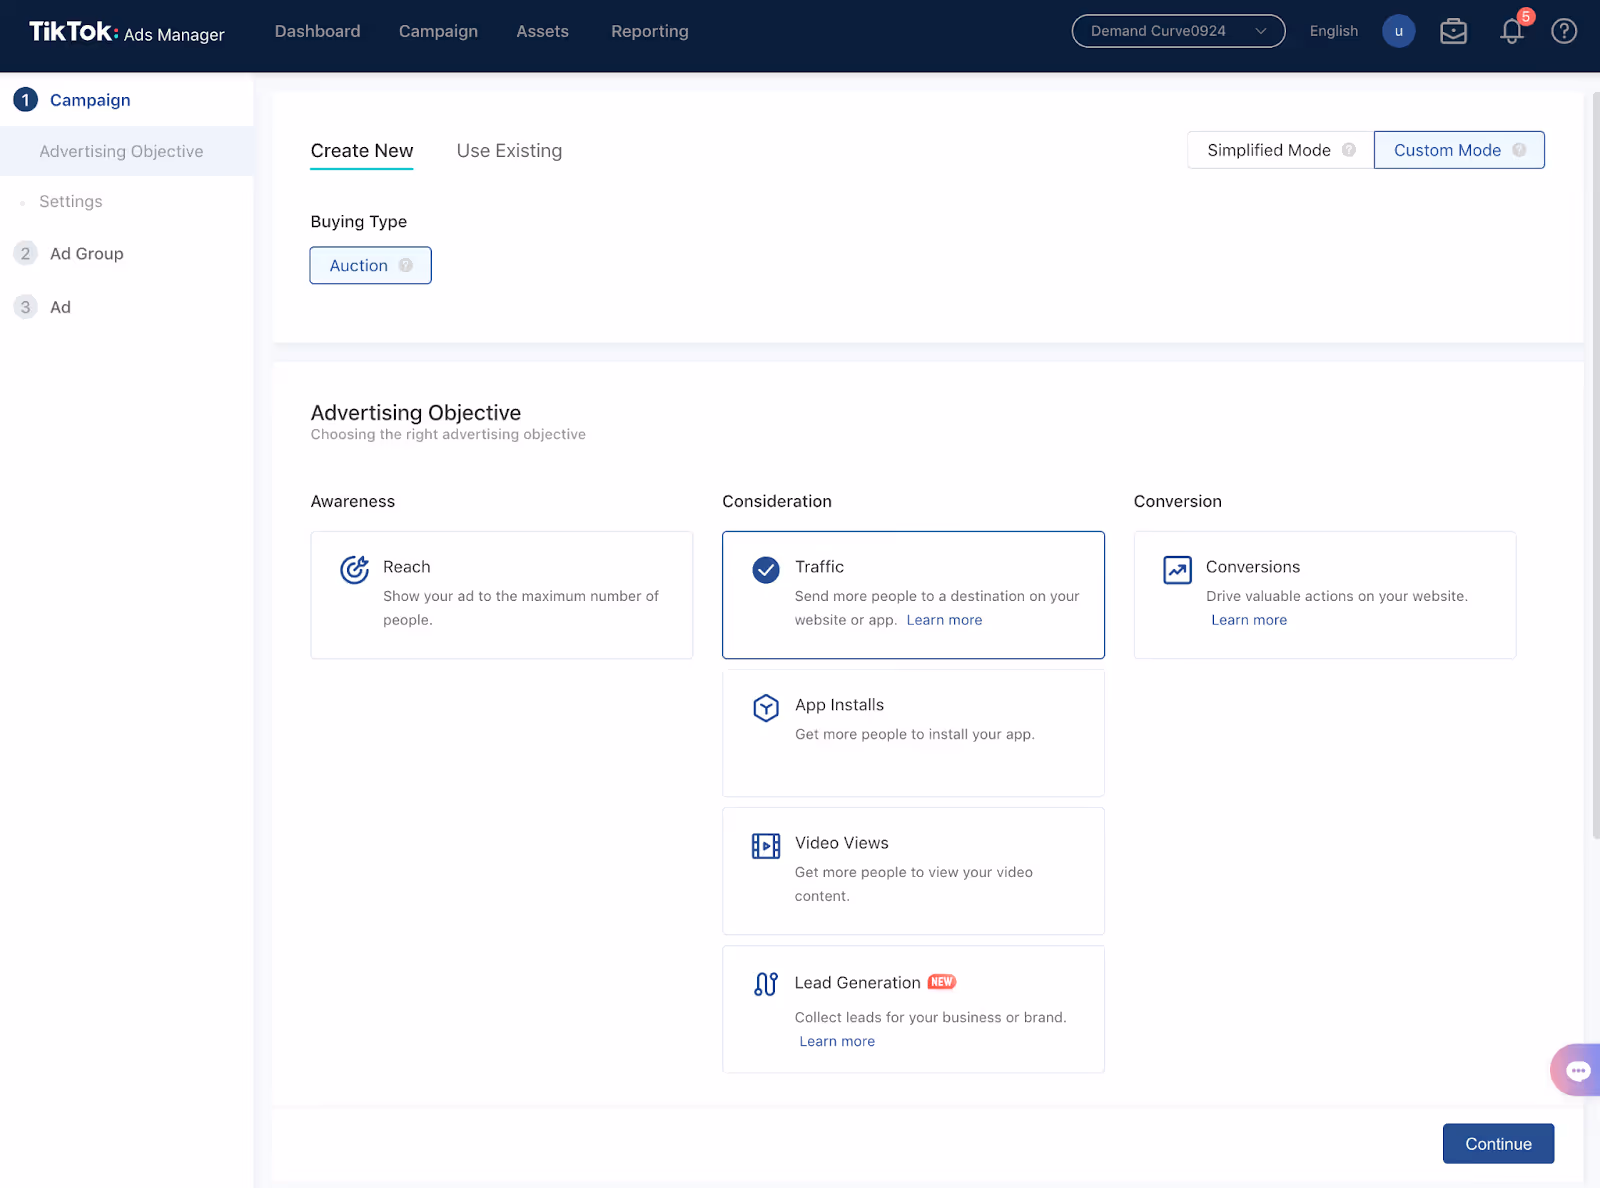
You're in. Now, go ahead and select your campaign objective.
- If you sell an app, you will choose App Installs.
- If you sell products online, select Conversions.
Make your selection and click Continue.
Step 1b: Set up and install TikTok pixel on your website
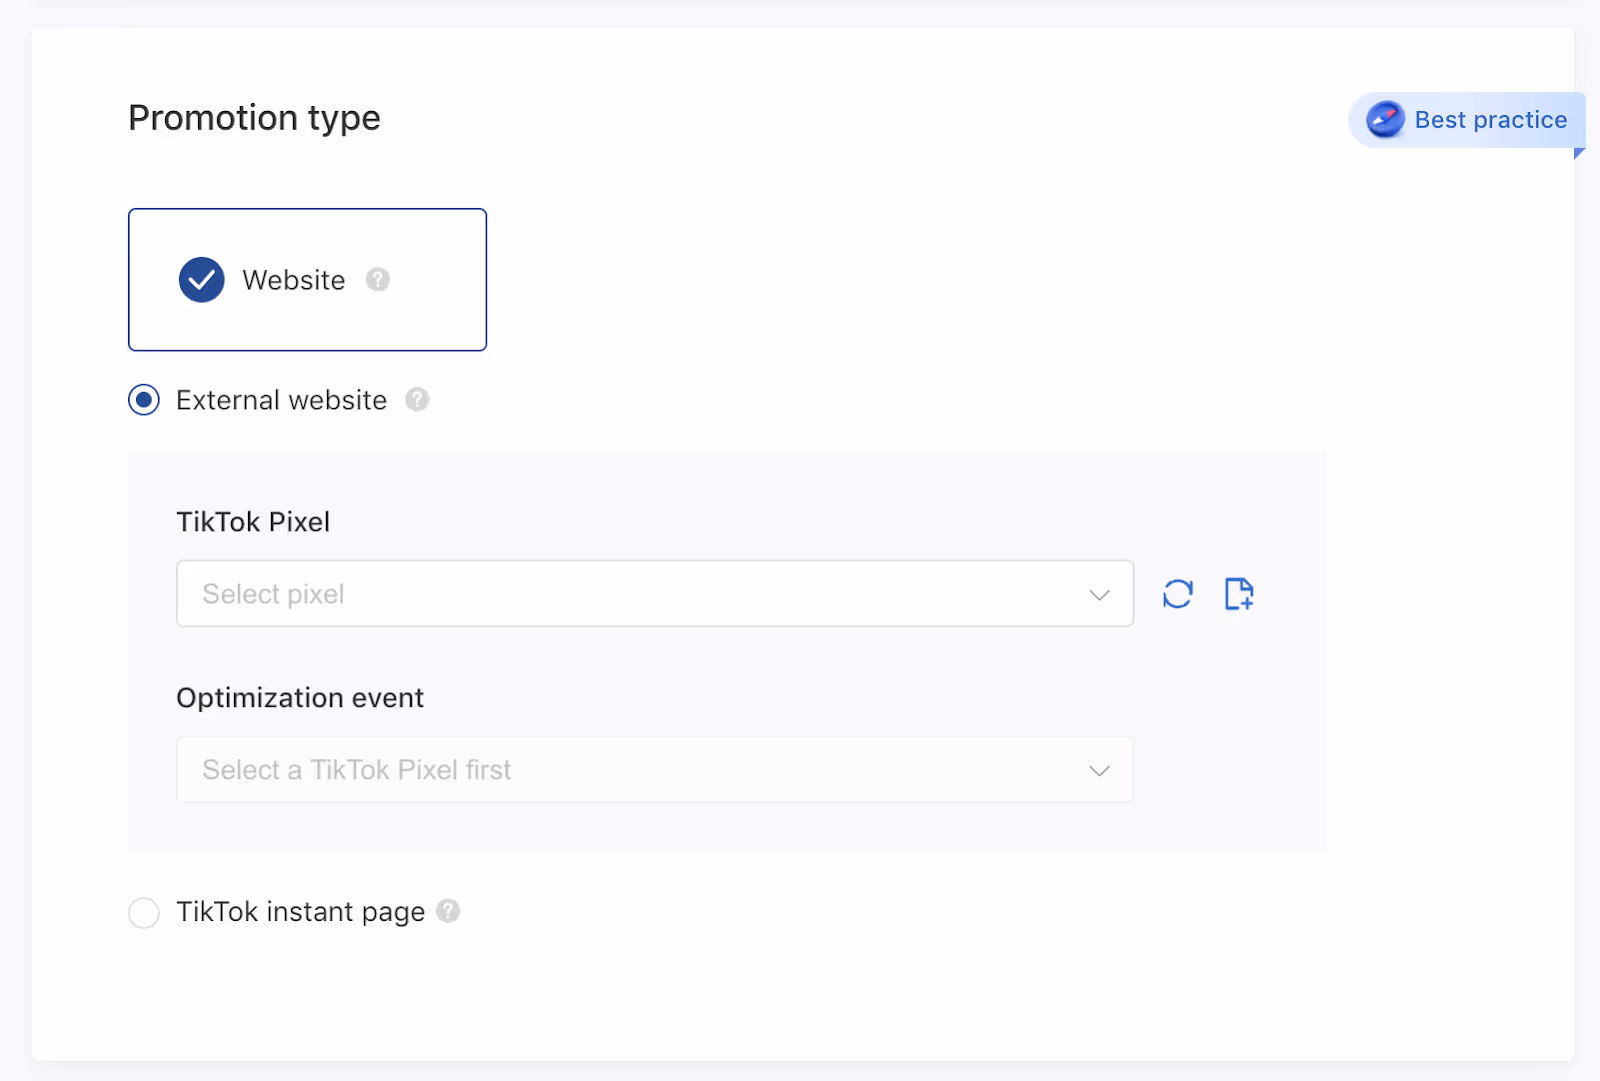
In a conversion campaign, you can choose from several Optimization events such as Add to Cart and Place an Order. But before we can select an optimization event, we need to set up conversion tracking with TikTok Pixel.
If you’ve already set up conversion tracking on another ads channel, you know the drill.
Tracking pixels help you:
- Measure your campaign performance: See how traffic performs on your website
- Optimize and improve ad delivery: Show ads to people who are likely to convert
- Build custom audiences: You can use the data from your website to create audiences for retargeting.
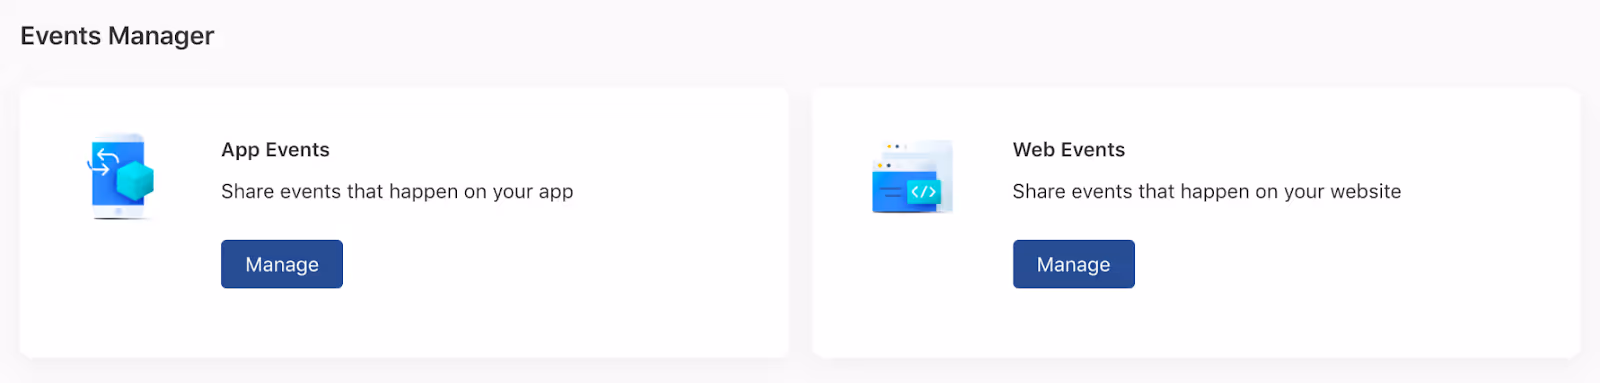
To install TikTok Pixel on your website:
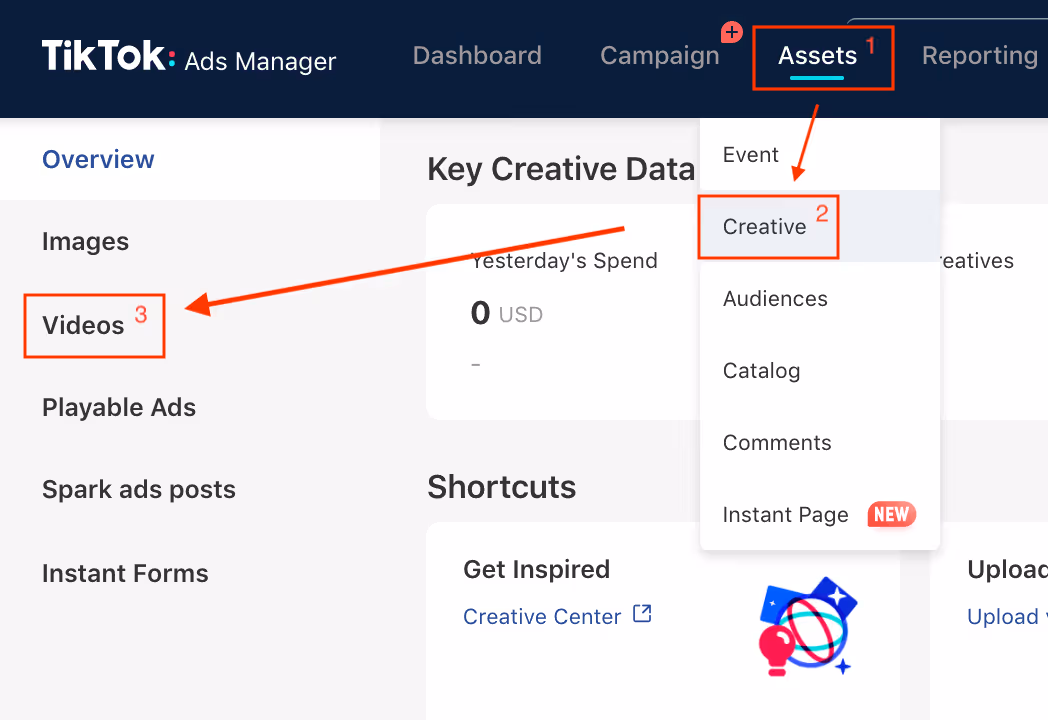
- Navigate to the top menu and select Assets > Event
- Click Manage under the Web Events option.
Click Create Pixel and decide whether to add the pixel to your website manually or via Third-Party Integration.
Give your Pixel a name, then choose between:
- Manual Install: For TikTok’s official documentation on installing your pixel code manually on your website, click here.
- 3rd Party Installation: TikTok has integrations with several platforms (e.g., Shopify, Google Tag Manager) that make installation a breeze.
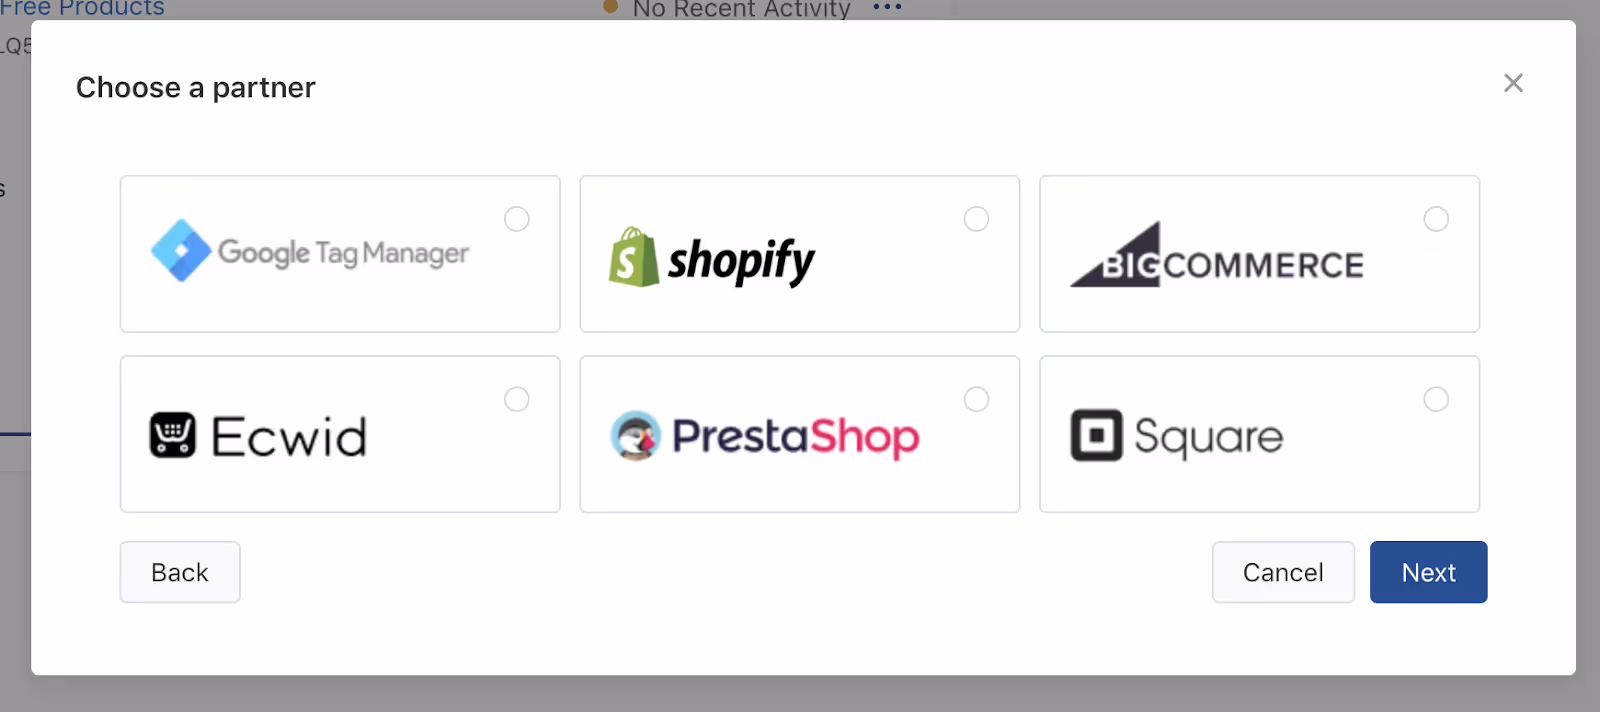
- Click here for detailed instructions on each.
Instructions for mobile apps
To set up mobile conversion tracking, you need to paste your TikTok App ID inside the Mobile Measurement Provider (MMP) that integrates with your app. Here’s TikTok’s documentation on how to set up and manage your TikTok App ID
Links to MMP-TikTok setup documentation:
Give your pixel a few days to start collecting data. Once it's ready to begin recording conversion events in your campaigns, your pixel will switch to Active.
Step 1c. Set up conversion rules
You've installed TikTok Pixel. Now you need to set up some conversion event rules.
- Navigate to Assets > Event and click Manage Pixel.
- Click into the pixel you created in Step 1b.
- Click Custom Events
TikTok Pixel enables you to track all kinds of conversion events, including:
- Purchase
- Pageviews
- Add to cart
- Sign-ups
- Multiple events combine (page view + purchase)
- And many, many more
The conversion events you choose will ultimately depend on your business and goals.
- For more guidance on setting up your conversion events and rules, see TikTok’s documentation.
Step 2: Copy and creative
Step 2a: Plan copy
TikTok ads are very similar to Snapchat ads and Instagram Reels. They feature UGC vertical video (full-screen) and hardly have any copy at all. So this won’t take long.
Every TikTok ad requires:
- Display Name: Up to 20 characters with spaces (i.e., your company name).
- Ad Copy: Up to 48 characters in length. Anything longer will be truncated and changed from a static text string into a looped scroll of text. (i.e., product description, campaign slogan/tagline, brand ethos, etc.).
These two elements are obligatorily included in the ad. They show up in tiny point sizes towards the lower left-hand corner of the screen. Like this:

Space is limited, so consider what copy needs to be visible in the ad creative to get the message across.
Note: On TikTok, social handles and URLs are not permitted to appear as the brand name or headline.
Step 2b. Plan creative
Make a new doc with your plan for each ad and keep your campaign objective in mind.
Ads have to be created for the campaign objective they will serve, of which there are 6:
- Reach: Show your ad to the maximum number of people
- Traffic: Send more people to a destination on your website or app.
- App Installs: Get more people to install your app.
- Video Views: Get more people to view your video content.
- Lead Generation: Collect leads for your business or brand.
- Conversions: Drive valuable actions on your website.
Spec out your UTM Tags for each creative and ad set. Reference our template. (We usually add them to a Google sheet.)
Step 2c. Upload creatives to your asset library
Before you start building a campaign in earnest, you need to fill up your asset library with creatives.
Navigate to Assets > Creative > Videos to access your video library.
- If you’re uploading a ready-made video to TikTok ads manager, click Upload.
- If you’re creating one from scratch, choose Create to explore TikTok's Creative Tools suite. Here are the official spec guidelines to be aware of as you get started.
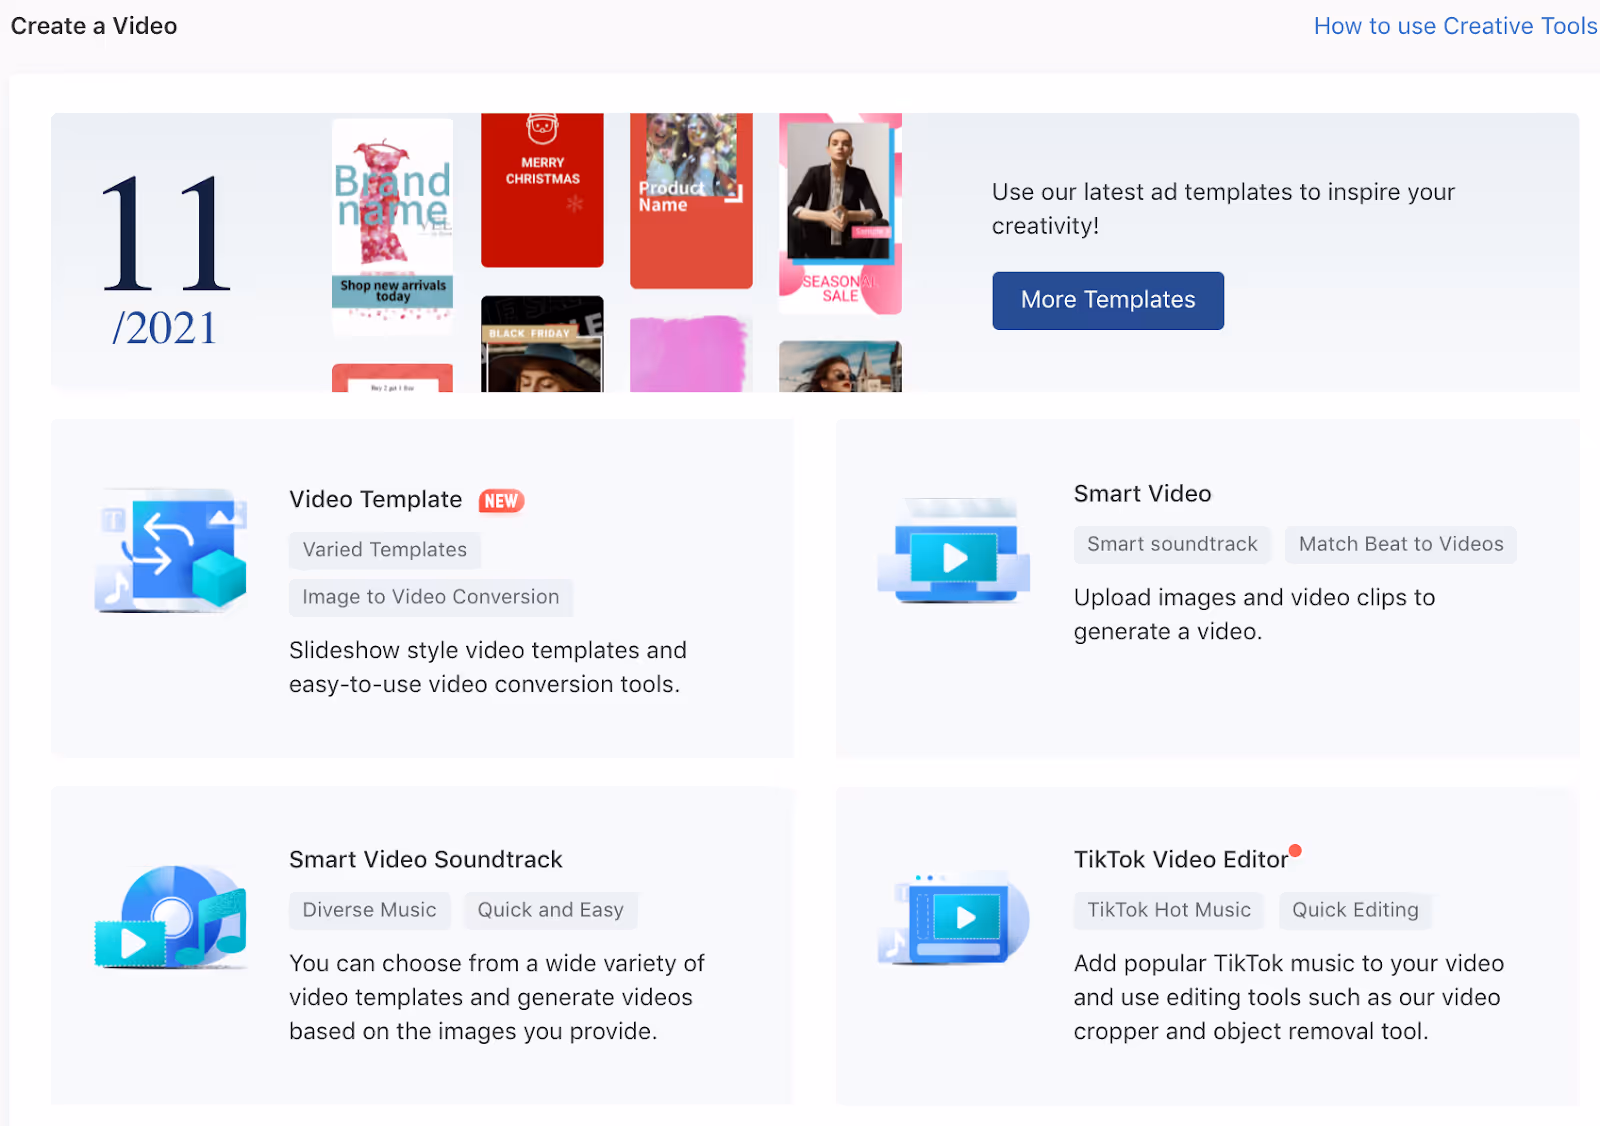
TikTok has four ways to create and edit video:
- Video Template lets you build a carousel-style ad using still images, closed captioning, and audio. This is a handy feature, but most accounts don't have access to carousel ads yet, so we can skip this one.
- Smart Video lets you upload images and video clips to generate a video automatically. TikTok layers on preset visual effects and audio. This is a convenient way to whip up an ad in a hurry, but not optimal.
- Smart Video Soundtrack lets you upload video creatives and test different background music. “Smart” because TikTok makes three audio recommendations based on your creative. These are usually hit or miss.
- TikTok Video Editor is a full-featured editing suite. We recommend this option because it gives you the most control over the finished product. It’s where you’ll upload raw footage and turn it into a fully-fledged TikTok using copyright-free music, text overlays, video transitions, effects, and stickers. Here’s TikTok’s official documentation with instructions on using each of these features.
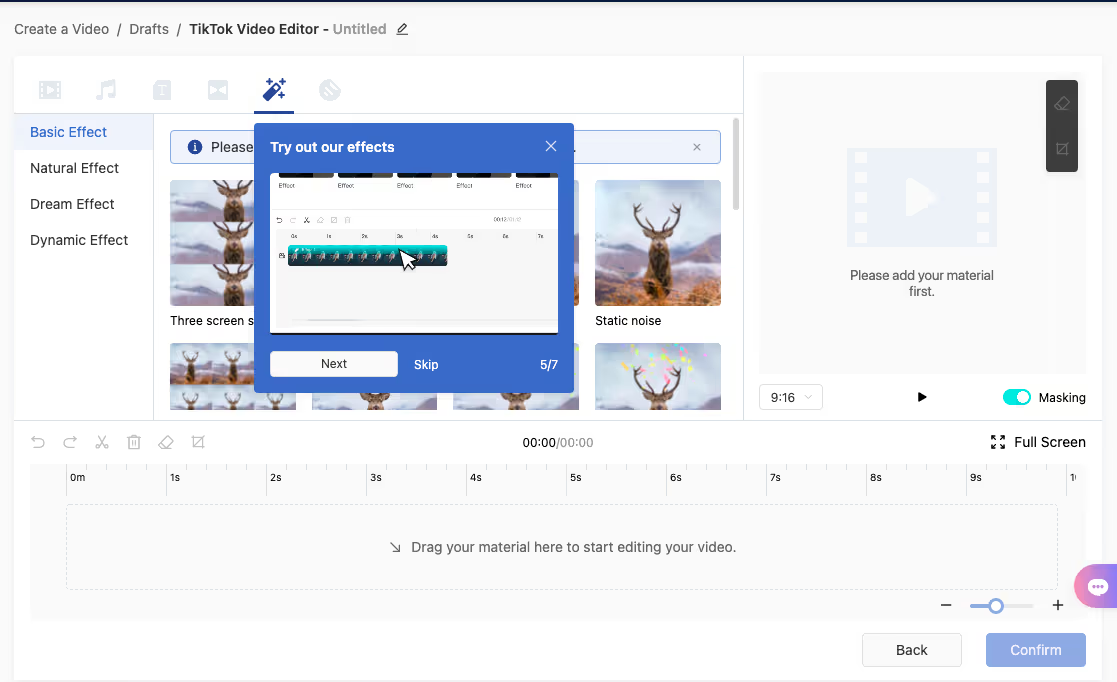
Once you’re satisfied with your creation, click Confirm and add it to your asset library.
Use this time to upload, edit, and load all creatives into your asset library. That way, you’ll have everything you need to build a campaign and add individual creatives into your ad sets all in one fell swoop.
But before we build a campaign, we’ll want to generate a few audiences.
Step 3. Generate custom audiences
TikTok doesn’t let you create custom audiences on the fly, so we’ll want to make them in advance and have them ready when it’s time to build a campaign.
To get started, navigate to Assets > Audiences, and you’ll have the option to create a Custom Audience or Lookalike Audience.
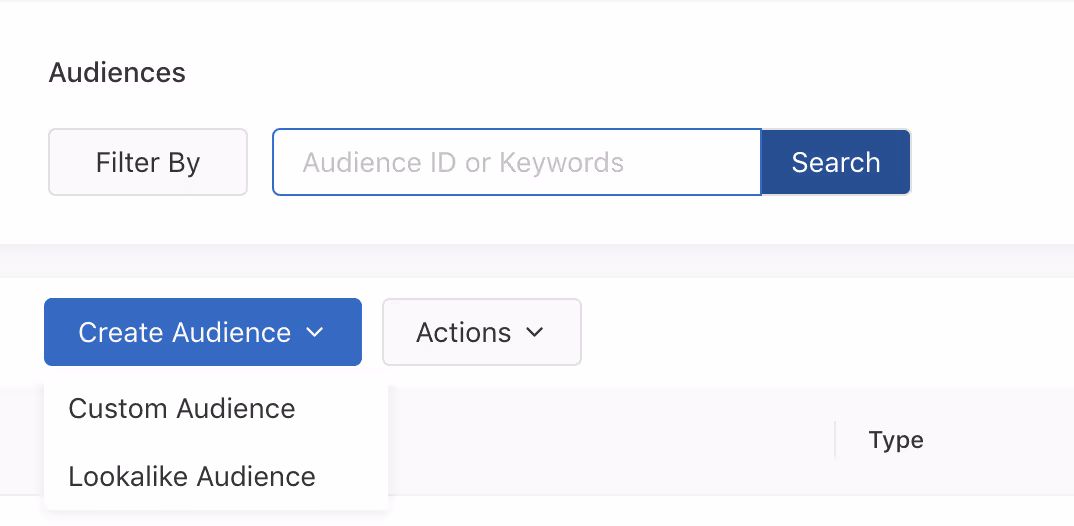
Click Create Audience, and you’ll see five options:
- Customer File: Upload a customer file to match your customers with people on TikTok, who will then be used to create an audience.
- Engagement: Create a list of people who saw, clicked, or engaged with your content.
- App Activity: Create a list of people who downloaded your app or took specific actions, such as making a purchase.
- Website Traffic: Use TikTok Pixel to create a list of people who visited or took specific actions on your website.
- Lead Generation: Create a list of people who viewed or submitted an instant form in a lead generation ad.
For now, we want to use an existing customer list to create a Lookalike Audience, so click the Customer File option.
Important → Unlike most platforms, TikTok doesn’t let you upload email lists, names, or phone numbers. Instead, your only option is to upload Customer Files using MAID (Mobile Ad ID) - either Apple IDFA (Identifier for Advertisers) or GAID (Google Advertising ID).
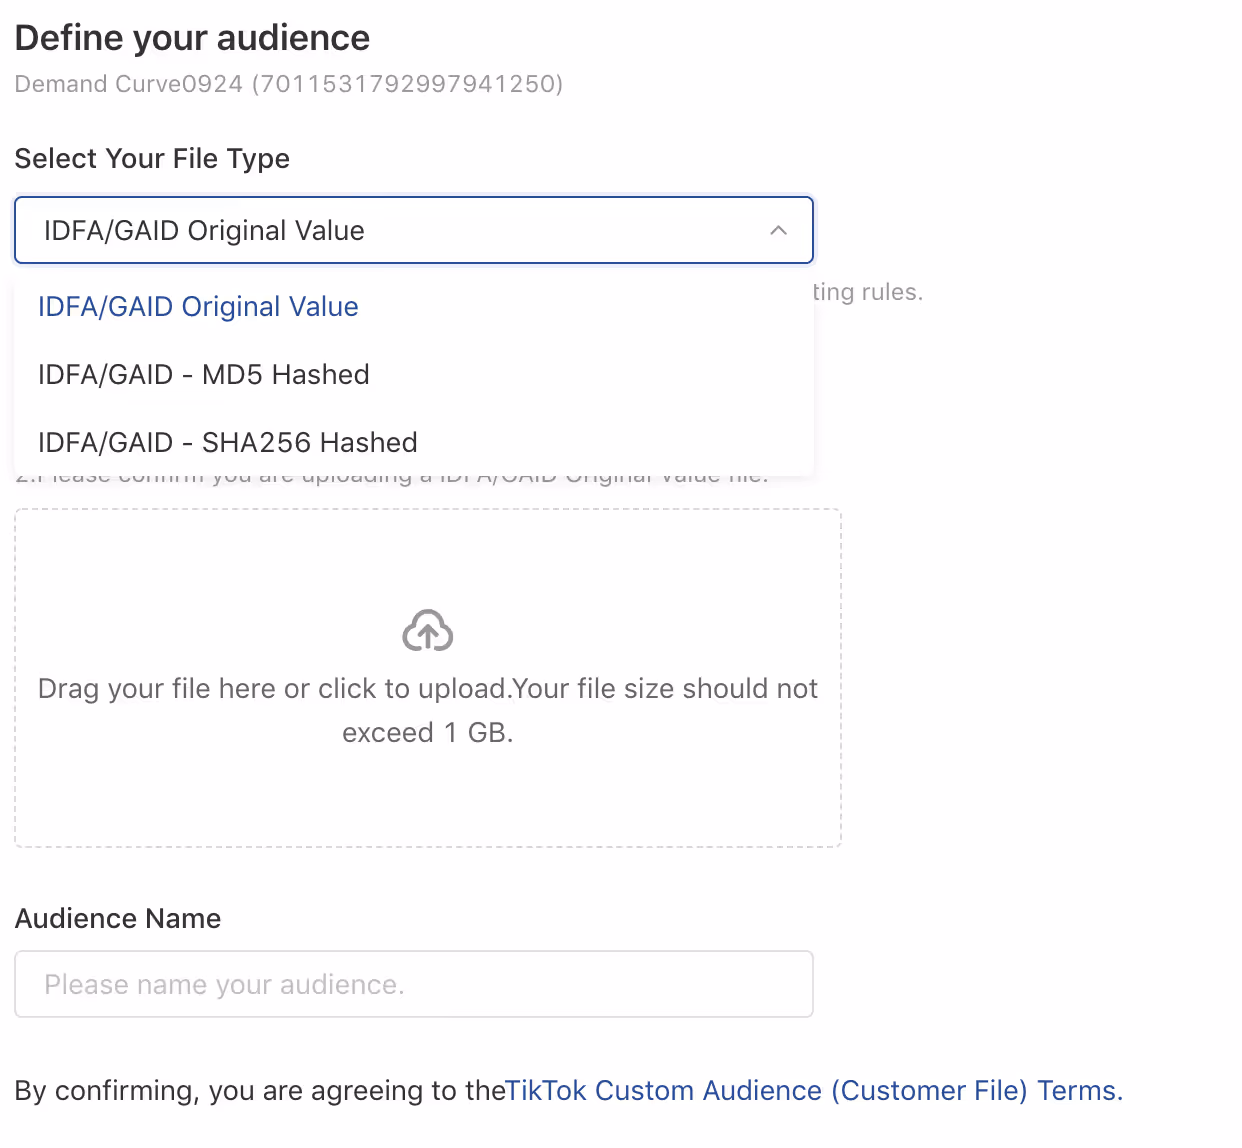
If you have this customer data available, upload a compatible file type and give your custom audience a name.
Step 3a. Lookalike audience
In this step, we’ll create custom lookalike audiences using the seed audience you uploaded in the previous step.
To create a Lookalike audience (LaL), navigate to:
Assets → Audience → Create Audience → Lookalike Audience
From the dropdown menu, choose the Customer List that you uploaded previously in Step 3.
Select TikTok under the Placement dropdown, and enter the country or countries your audience is located in.
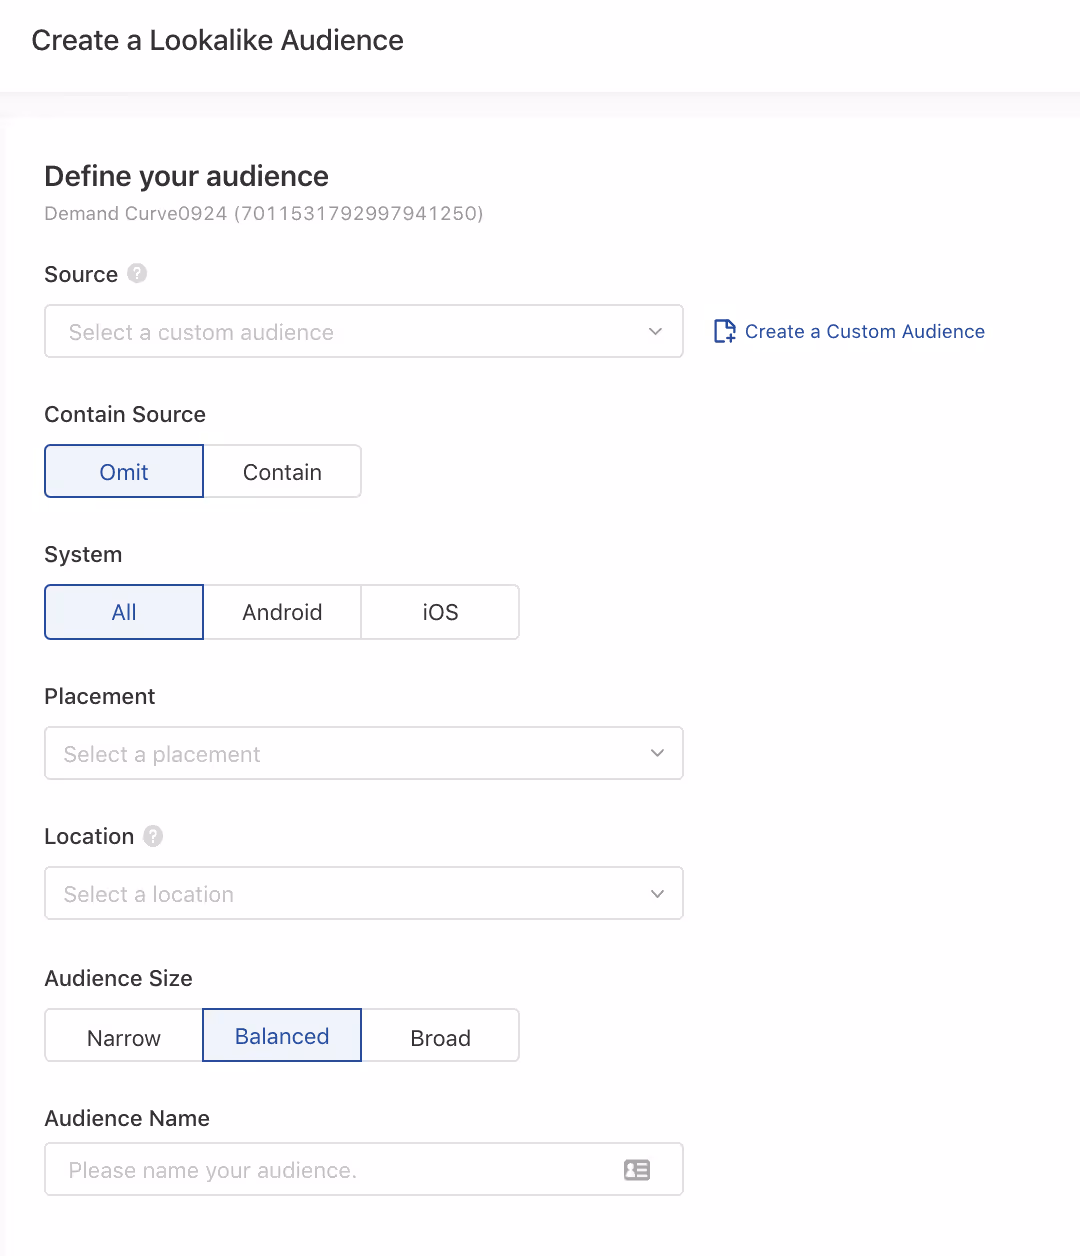
In the next field, you’ll see three Lookalike Types to choose from:
- Narrow is equivalent to a 1% lookalike from Facebook (most similar to your existing customers). This will be a much smaller audience but will have the closest resemblance to your seed audience.
- Balanced is equivalent to a 5% lookalike audience from Facebook (similar to your existing customers, but a wider audience). This will be a blend of Reach and Similarity. This option typically yields the most favorable conversion rates, but it’s a good idea to test all three.
- Broad is equivalent to a 10% lookalike on Facebook. This will be your largest audience, with the broadest similarity to your seed audience.
Choose Narrow because we want to target people who are the most similar to our existing customers.
Click Create.
Step 3b. Website traffic
Note: If you haven’t installed your TikTok Pixel yet, pause and go complete Step 1b first.
We’ll be targeting people who have visited your website for this custom audience.
After installing your Pixel:
- Navigate to Create Audience → Custom Audience → Website Traffic
- Select Page Views from the dropdown menu and target everyone who has visited your site in the last seven days (the shortest window).
- Give your audience a name like “7-Day Visitors'' and leave Auto-Refresh toggled ON (blue). That way, your new audience will automatically refresh as your pixel accumulates more user data.
Now repeat the process for 30 and 90-day visitors.
Step 4. Set up a campaign
Your asset library is newly filled with ad creatives, your pixel is firing, and you have at least one custom audience to use in your upcoming campaigns.
Now, let's build a campaign.
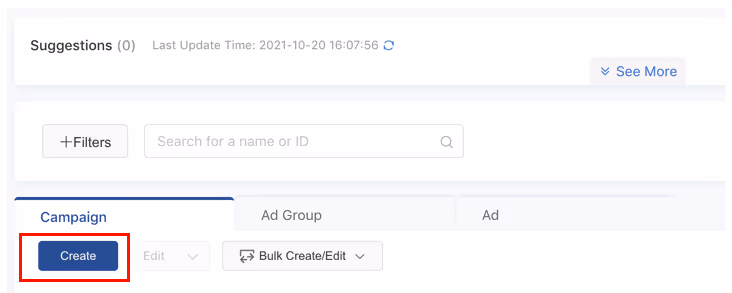
Click Campaign from the top menu bar and click Create under the Campaign tab.
Back where it all started. In the next view, you’ll see a selection of six Advertising Objectives to choose from.
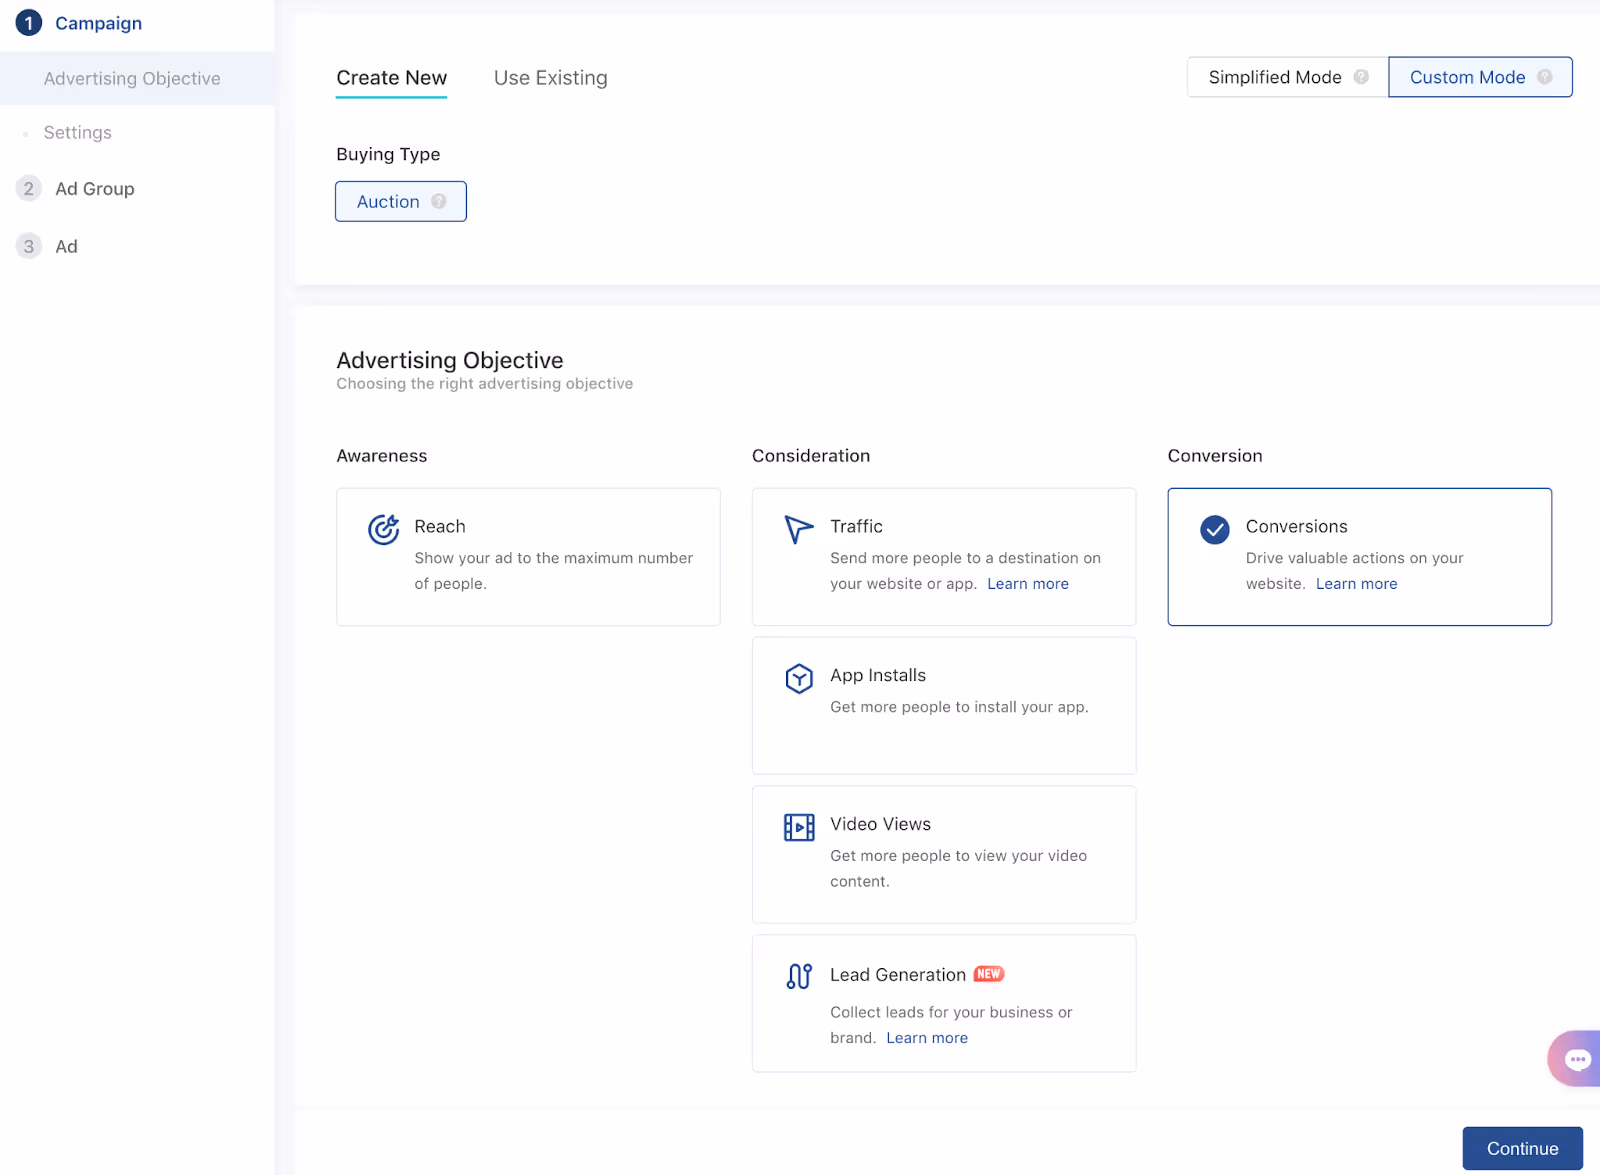
- Reach: Show your ad to as many people as possible.
- Traffic: Send people to a destination on your website or app.
- App Installs: Get people to install your app.
- Video Views: Get people to watch your video content.
- Conversions: Drive specific actions on your website (e.g., add-to-cart or purchase)
- Lead Generation: Collect leads for your business or brand.
- Community Engagement: Get more page follows or profile visits.
Select Conversions (if you sell products) or App Installs (if your company sells a game or mobile app).
- Give your campaign a name (e.g., Prospecting or Creative Testing).
- Keep Campaign Budget Optimization toggled OFF. TikTok reps recommend optimizing the budget at the ad set level while starting—this gives you more control and better performance if you’re on a smaller budget.
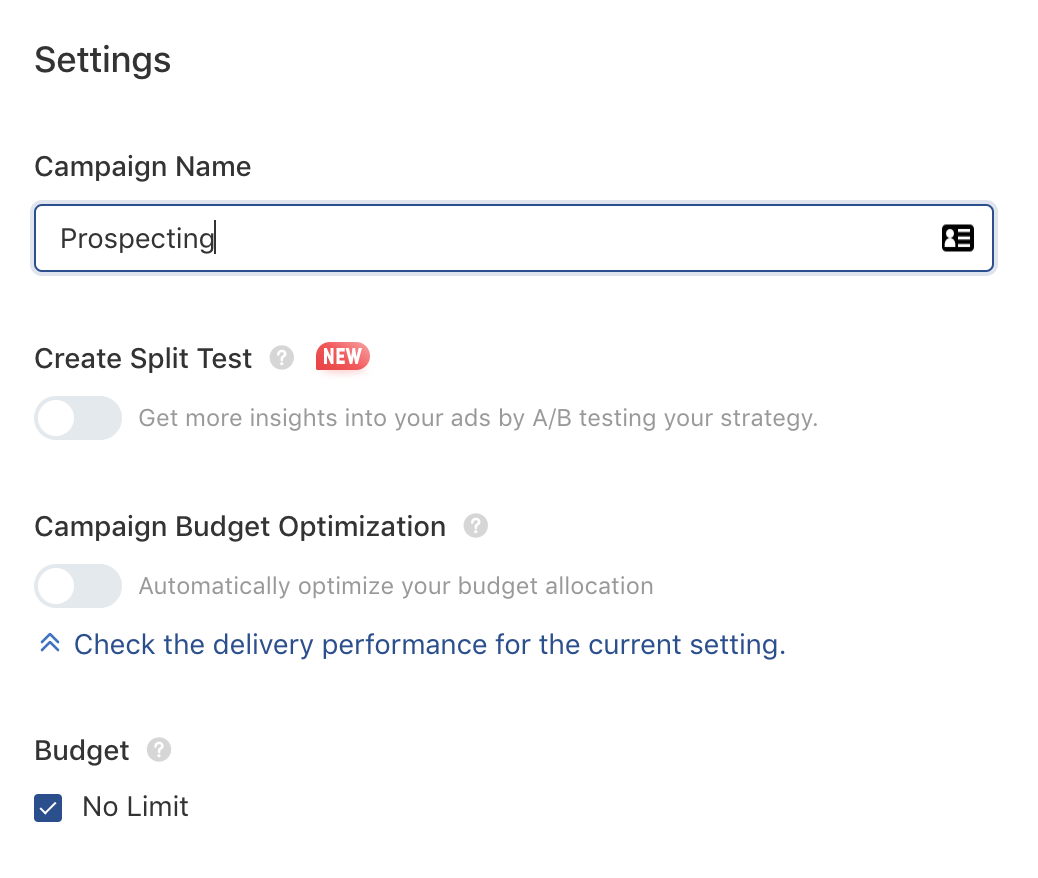
Check the “No Limit” box under Budget, then click Continue to make your way to the Ad Group level.
Step 5. Build ad sets
Within a campaign, there are ad sets (‘ad groups’ in TikTok). Let's build the first one.
Step 5a. Ad group settings
To start, give your ad group a name.

Step 5b. Promotion type
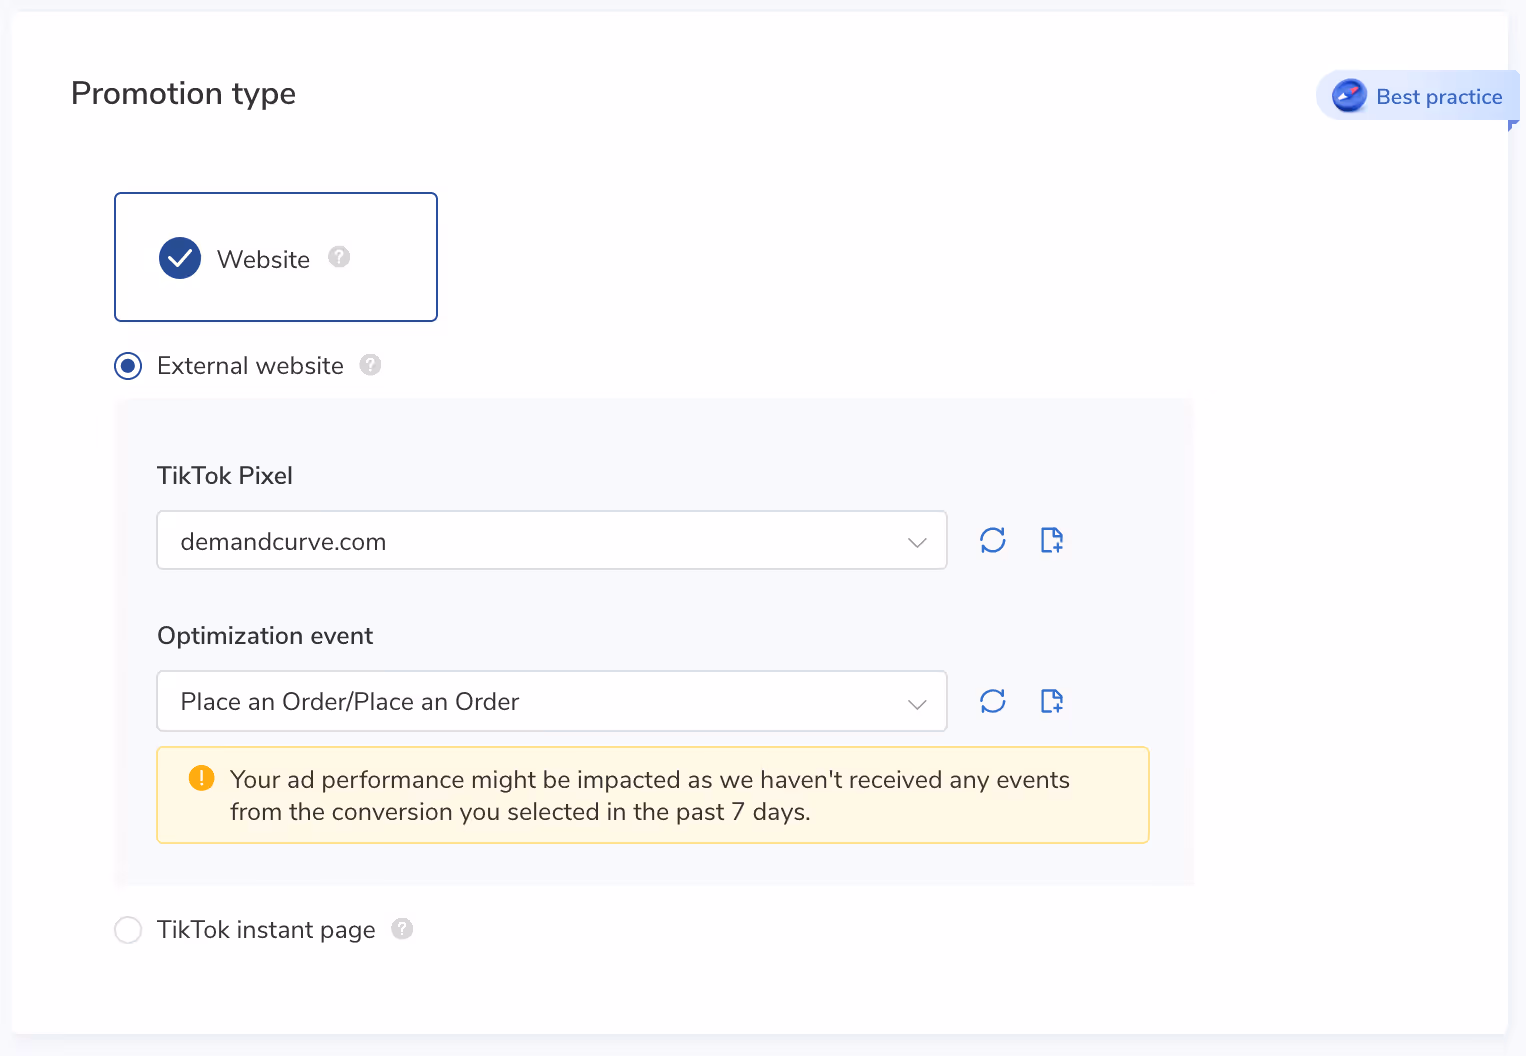
If you chose Conversions as your Campaign Objective, there's only one Promotion type—Website.
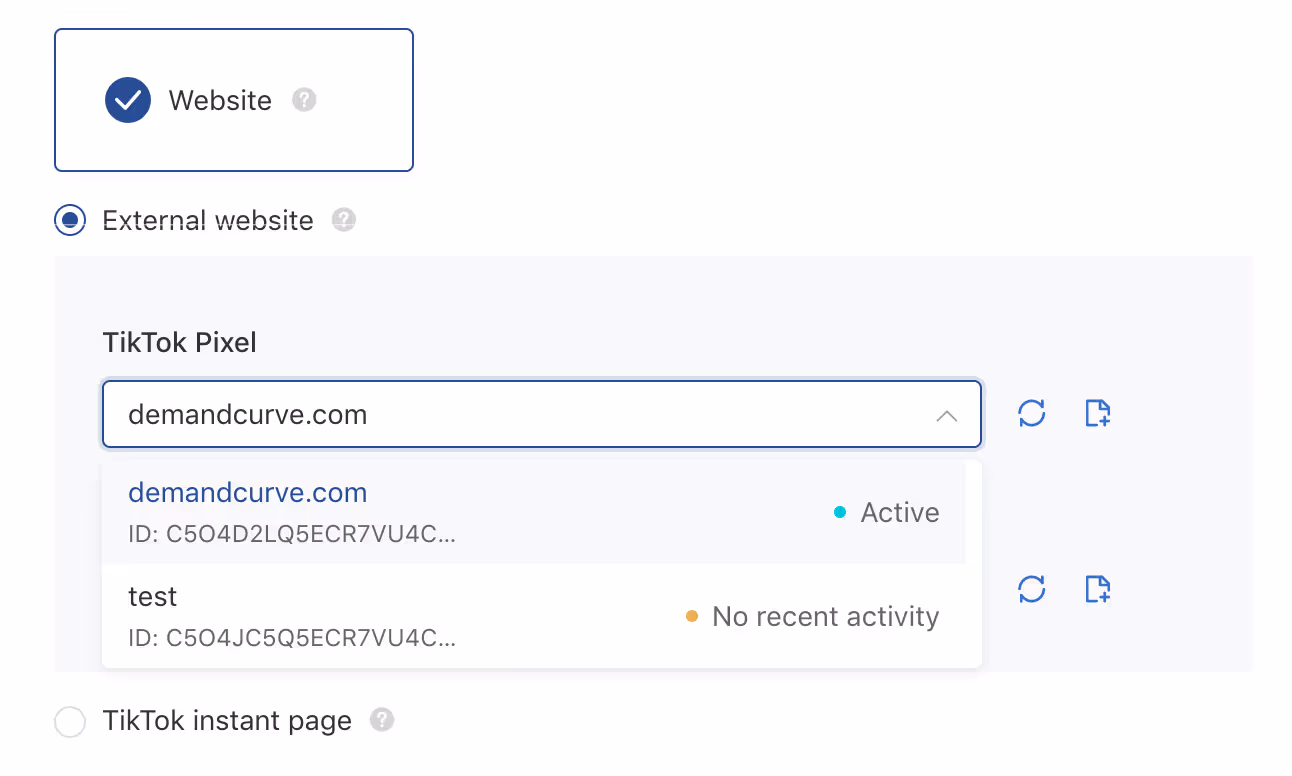
- Select the TikTok Pixel you set up in Step 1b, and choose your Optimization event.
- Starting out, we recommend optimizing for Add to Cart until you reach 50 pixel purchases within a 7-day window, then optimize toward Place an Order.
Step 5c. Placements and creative type
Here, you'll choose where you want your ads to display.
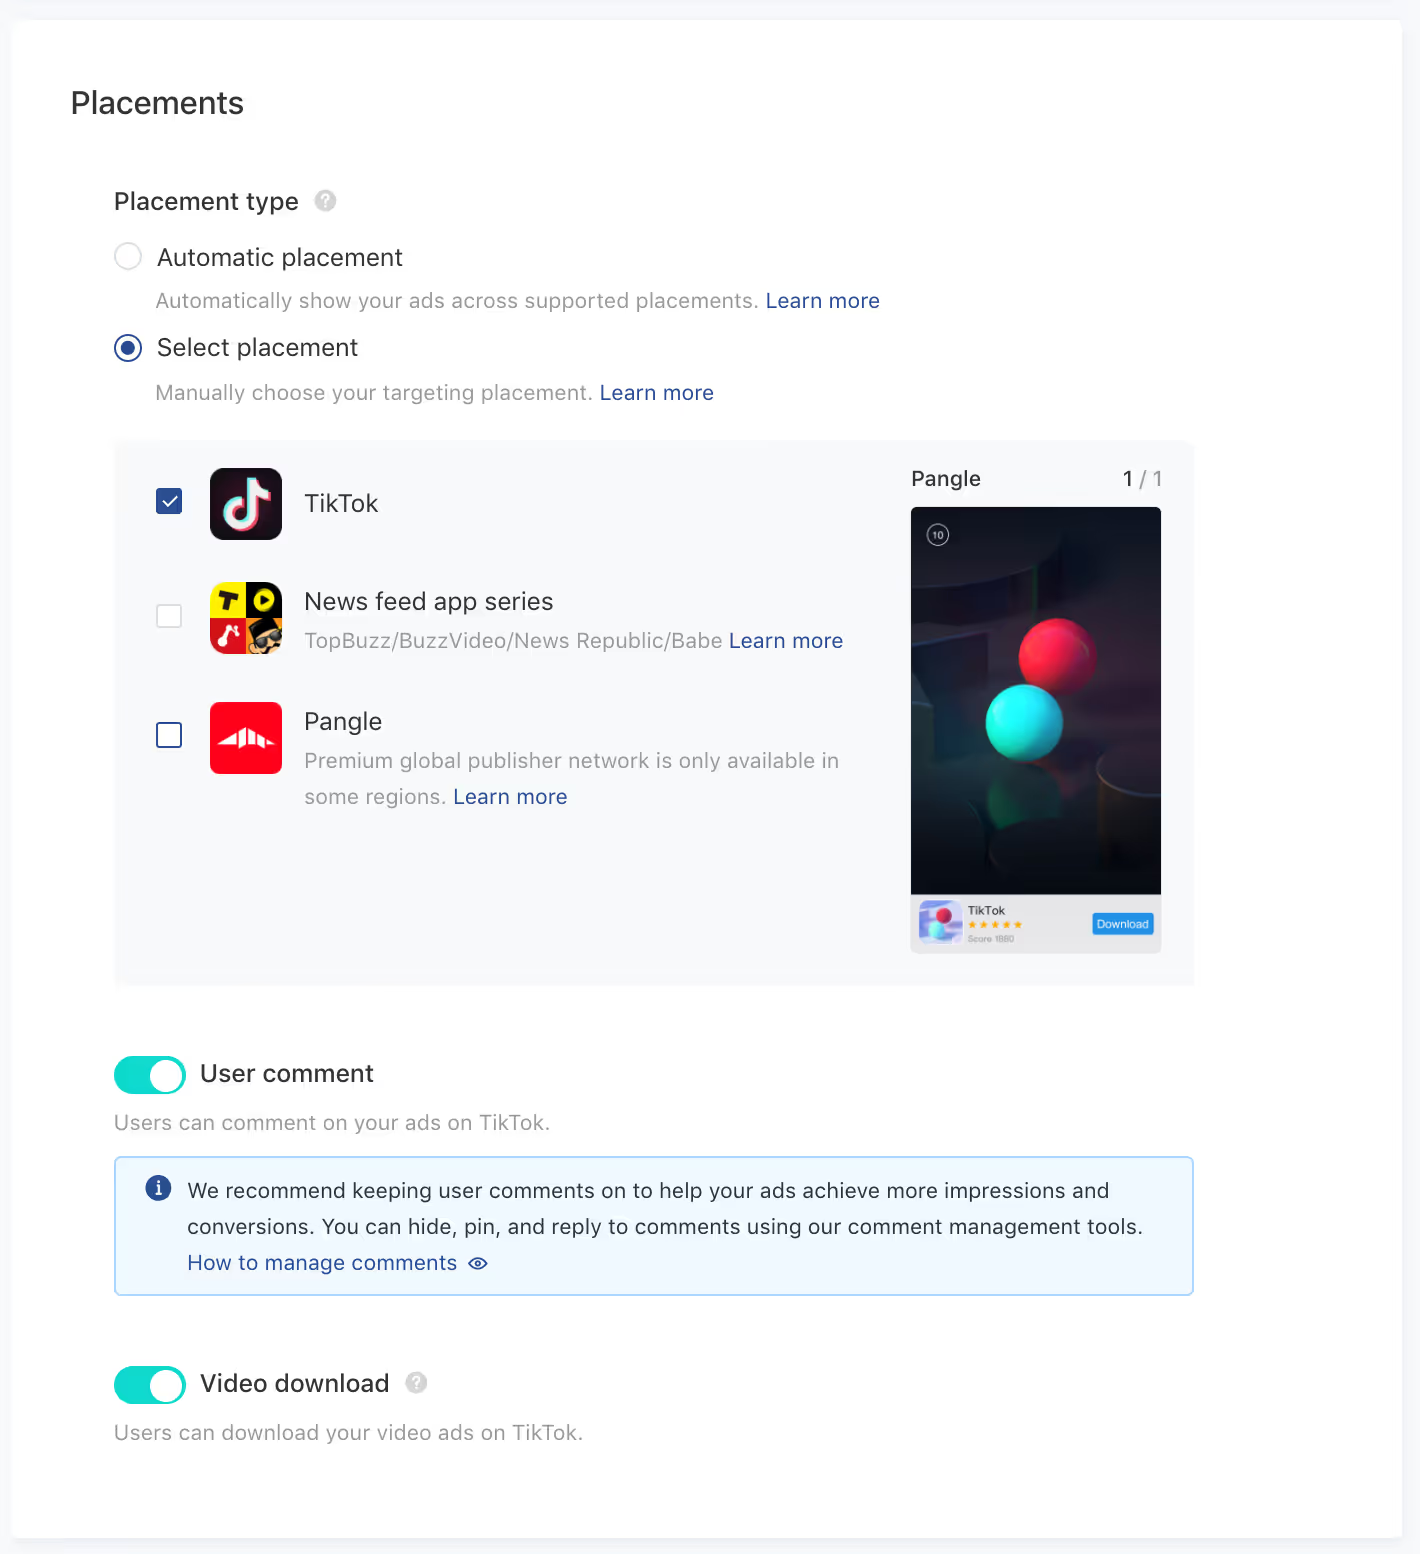
Since we're interested in optimizing for TikTok ads conversions, select TikTok as your sole placement.
If you do business internationally and have the bandwidth to alter your ads to fit the creative requirements of each placement (which are different from TikTok ad creatives), consider exploring these additional placements. For more information on Placements, read TikTok’s documentation.
Toggle User Comment ON and Video Download ON.
- 79% of users take the time to read the comments on videos. The comments section is where brands and users can interact. Comments also impact how users perceive an ad. If people like your ad and it resonates, they'll applaud your efforts to create the "right" kind of TikTok ad by calling out things they like and asking questions. Conversely, if users find your ad disingenuous, distasteful, or simply bad, they'll let you know in the comments. Either way, comments can help propel your ads in the auction (along with other engagement signals such as likes, shares, and saves).
Step 5d. Audience and demographics targeting
As you learned in the main curriculum, you’ll want to start with broad targeting on TikTok. Here's how to do it:
- Choose the location where you acquire customers.
- Set Gender to All and Ages to 18+.
Yep, that's it. Seriously.
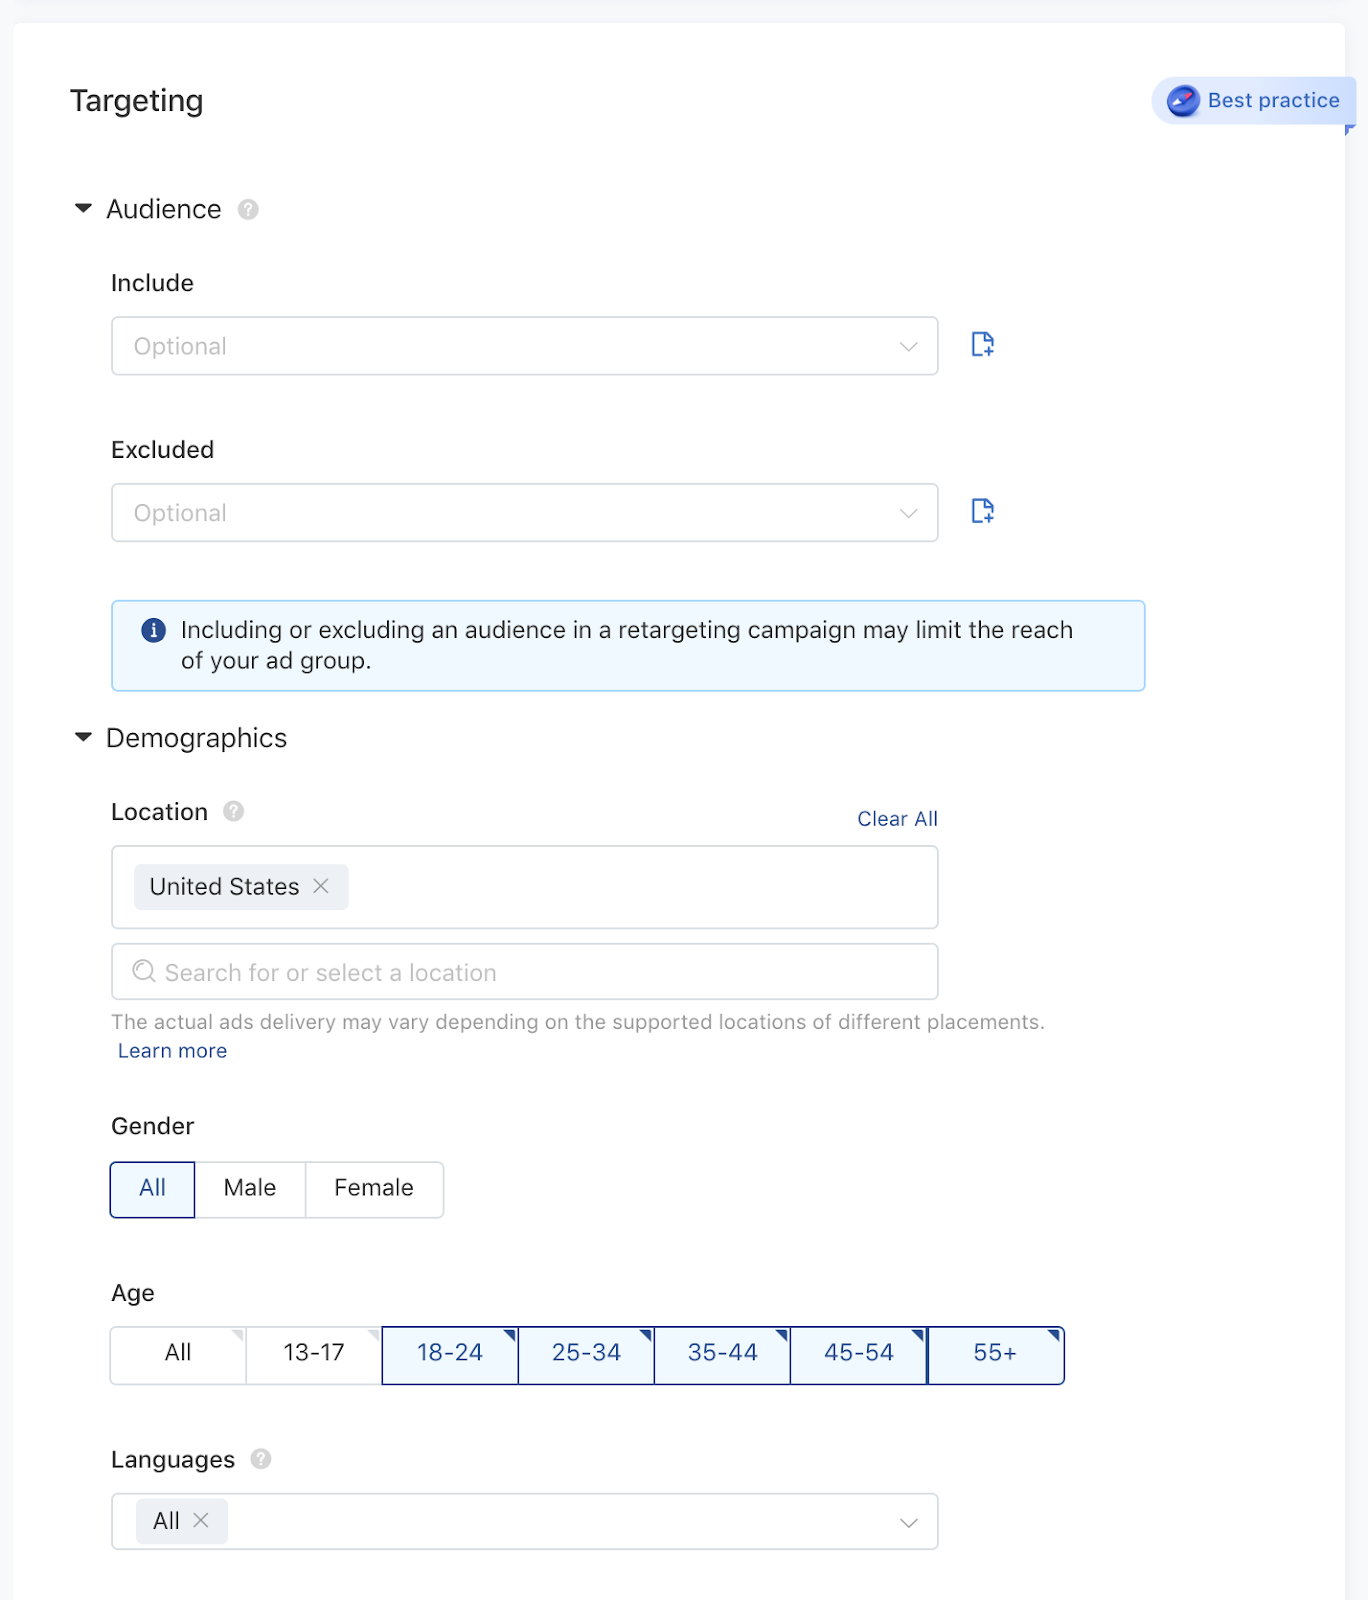
The only exception is If your business serves a specific gender. If so, select it from the options. And if there are age groups you specifically do not want to reach, make your selection accordingly.
Otherwise, your settings should match the screenshot above, using your specific location.
If you want a deeper understanding of how to approach Location, Age, Gender, and Language targeting can affect your campaigns, click here.
Step 5e. Interest and behavior targeting
For your first campaign, leave all interest and behavior targeting options
This is what 'open targeting' means.
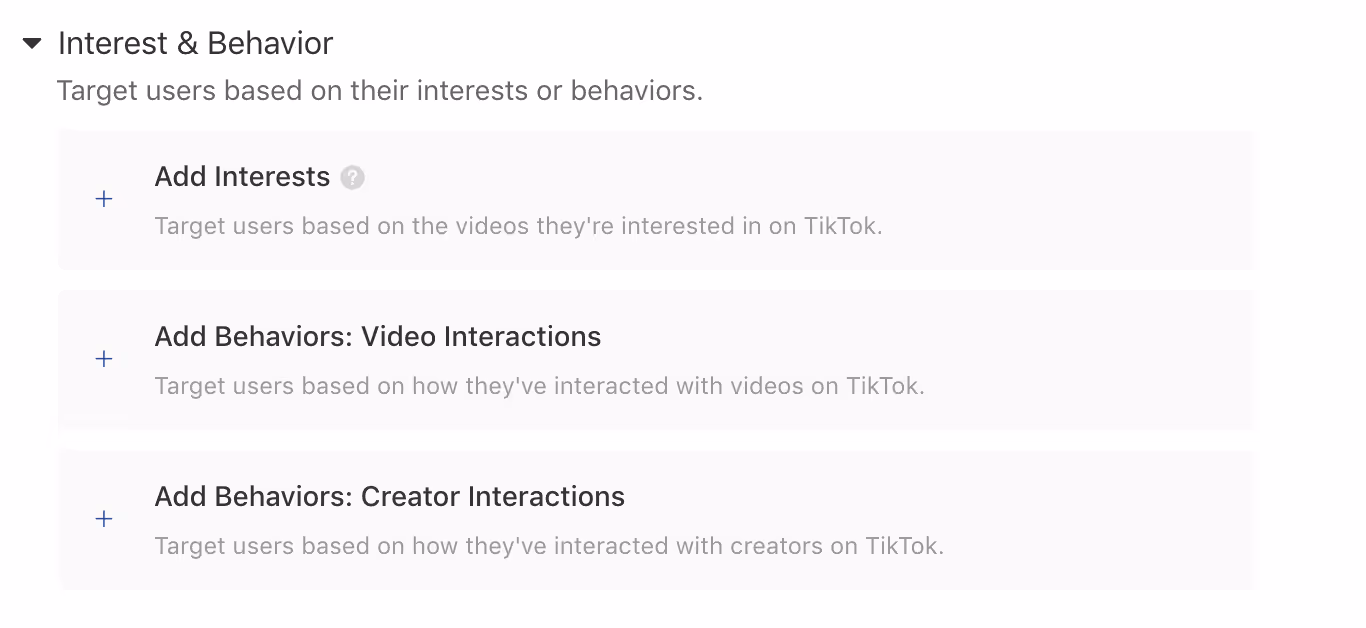
Interests are defined by data on long-term user engagement based on longer-term machine learning audiences and interests based on how people engage with the platform. Think of interests as long-term patterns of use.
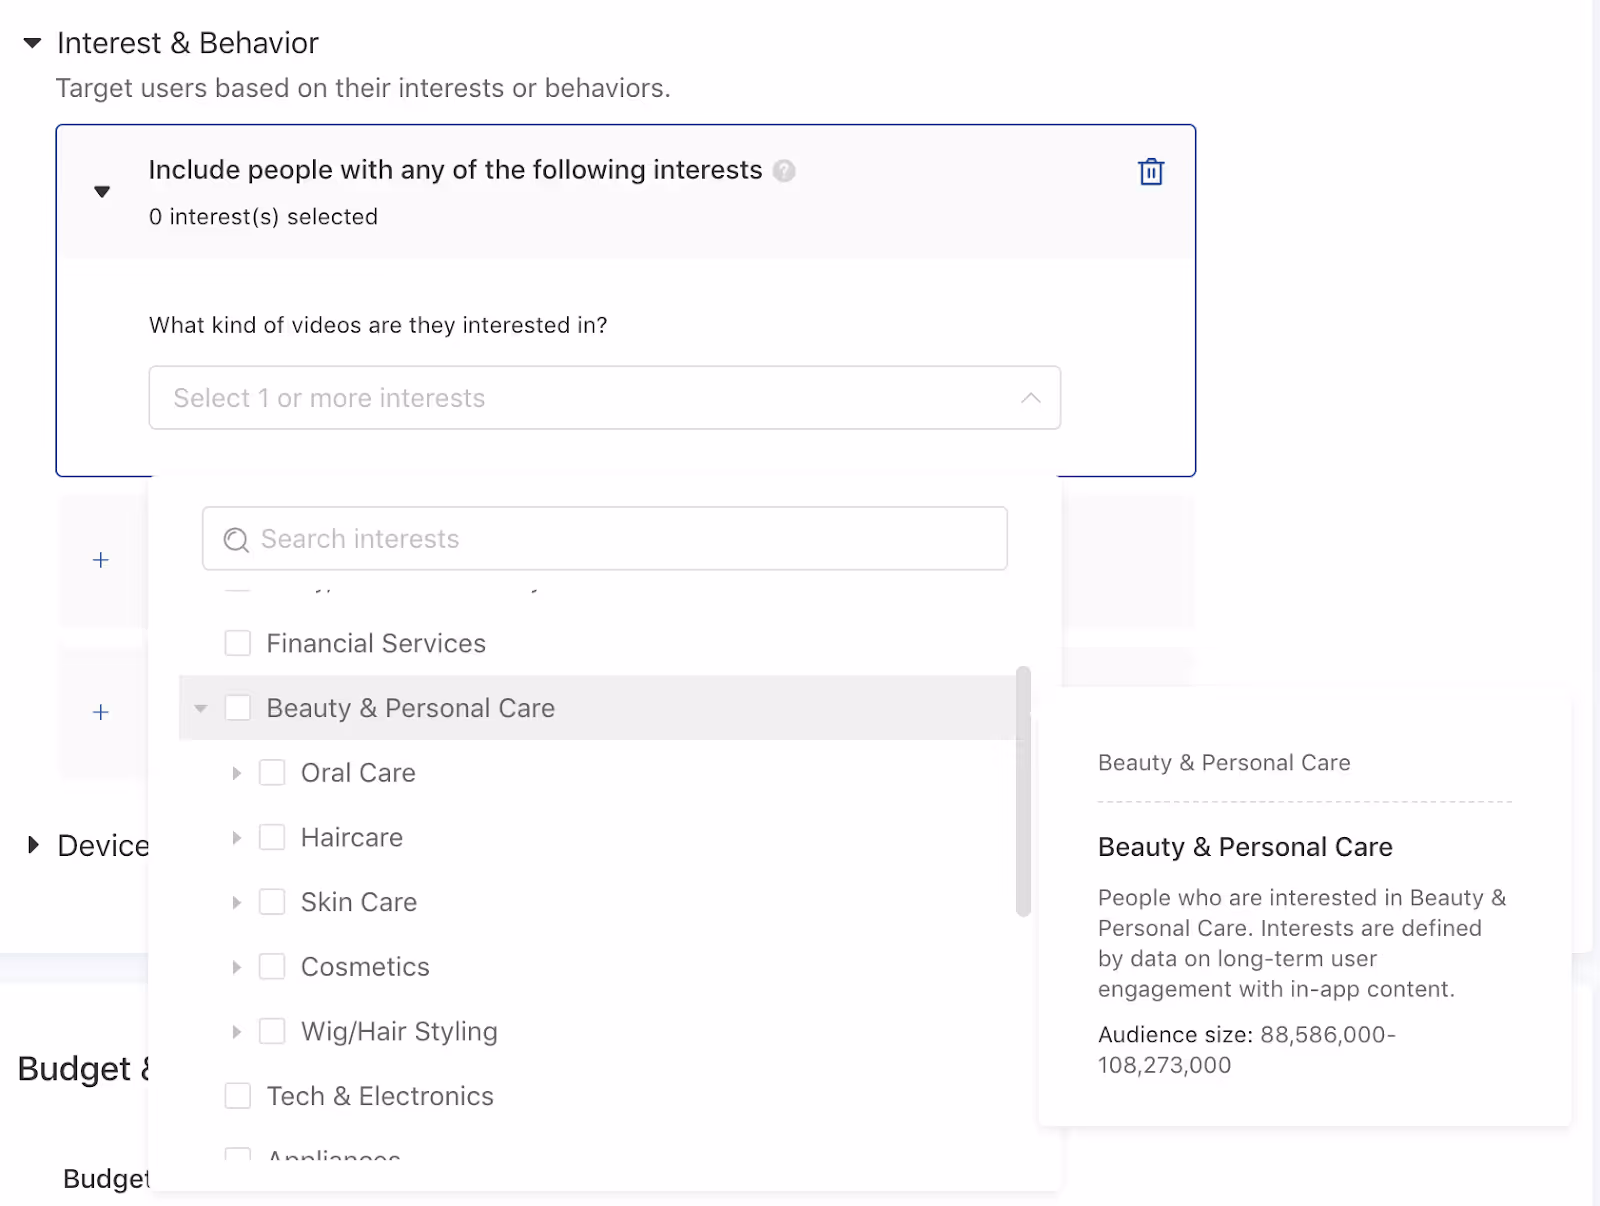
- There are 15 top-level categories to choose from and 100 nested interests.
Behavior targeting is going to be a bit more specific.
These will be more recent actions (within the past 7 or 15 days) that people have taken within specific categories of content on the TikTok app. Think of behaviors as more recent patterns. Target specific actions within particular categories within the past 7 or 15 days. Behaviors are relatively similar to the interests, but a lot fewer options.
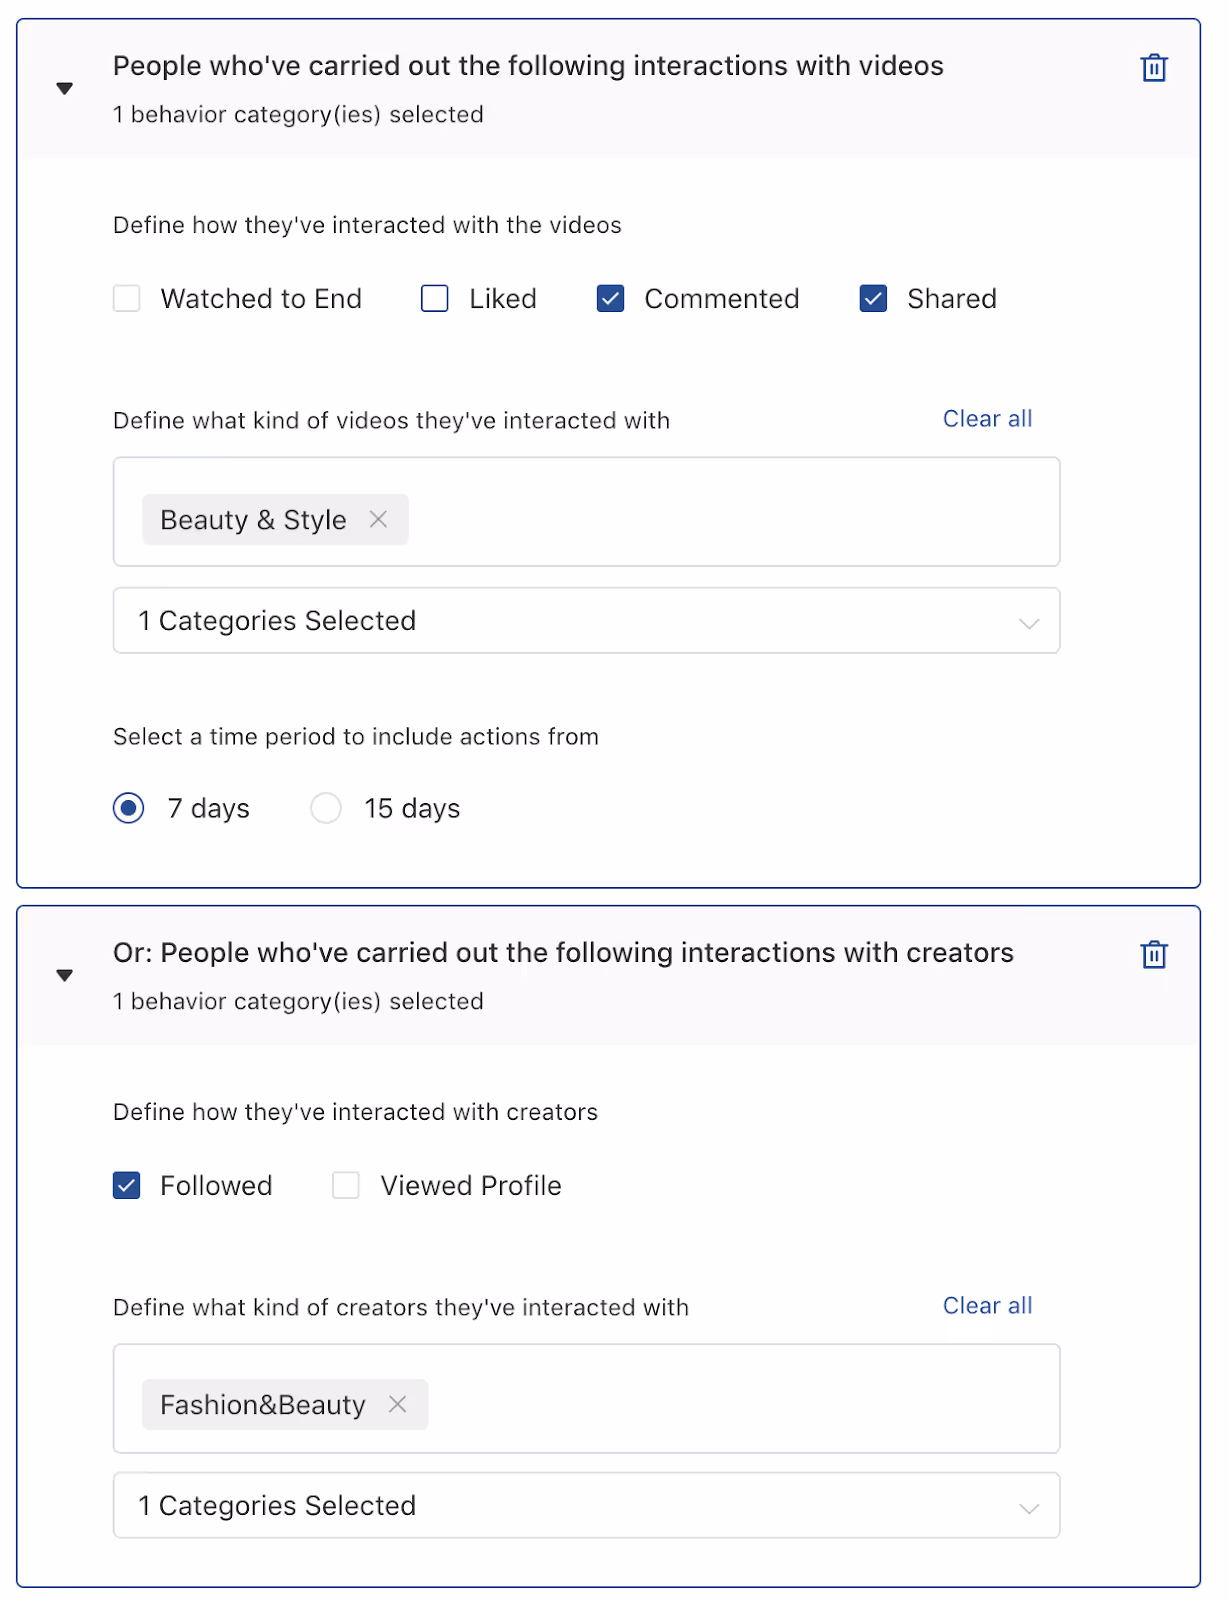
For example, in the screenshot above, we’re targeting anybody who has watched, liked, commented, or shared a video in the Beauty & Style category within the past fifteen days.
These are 'OR' targeting parameters. If you start stacking interest and behavior parameters, you’ll notice your audience sizes increase in size rather than shrink.
TikTok recommends selecting 15 different interests, but leave all interest and behavior fields blank since this is your first campaign.
You might consider testing interest and behavior targeting later on after you've validated the channel and are looking for ways to scale.
But for now, we want to start with broad, open targeting and let TikTok serve your ads to a vast audience to get as much data back as possible.
Step 5f. Budget and schedule
TikTok requires advertisers to spend at least $20 per day but recommends spending 20x your CPA goal. Plan to commit $100 - $200 a day to get through the learning phase.

Step 5h. Bidding and optimization
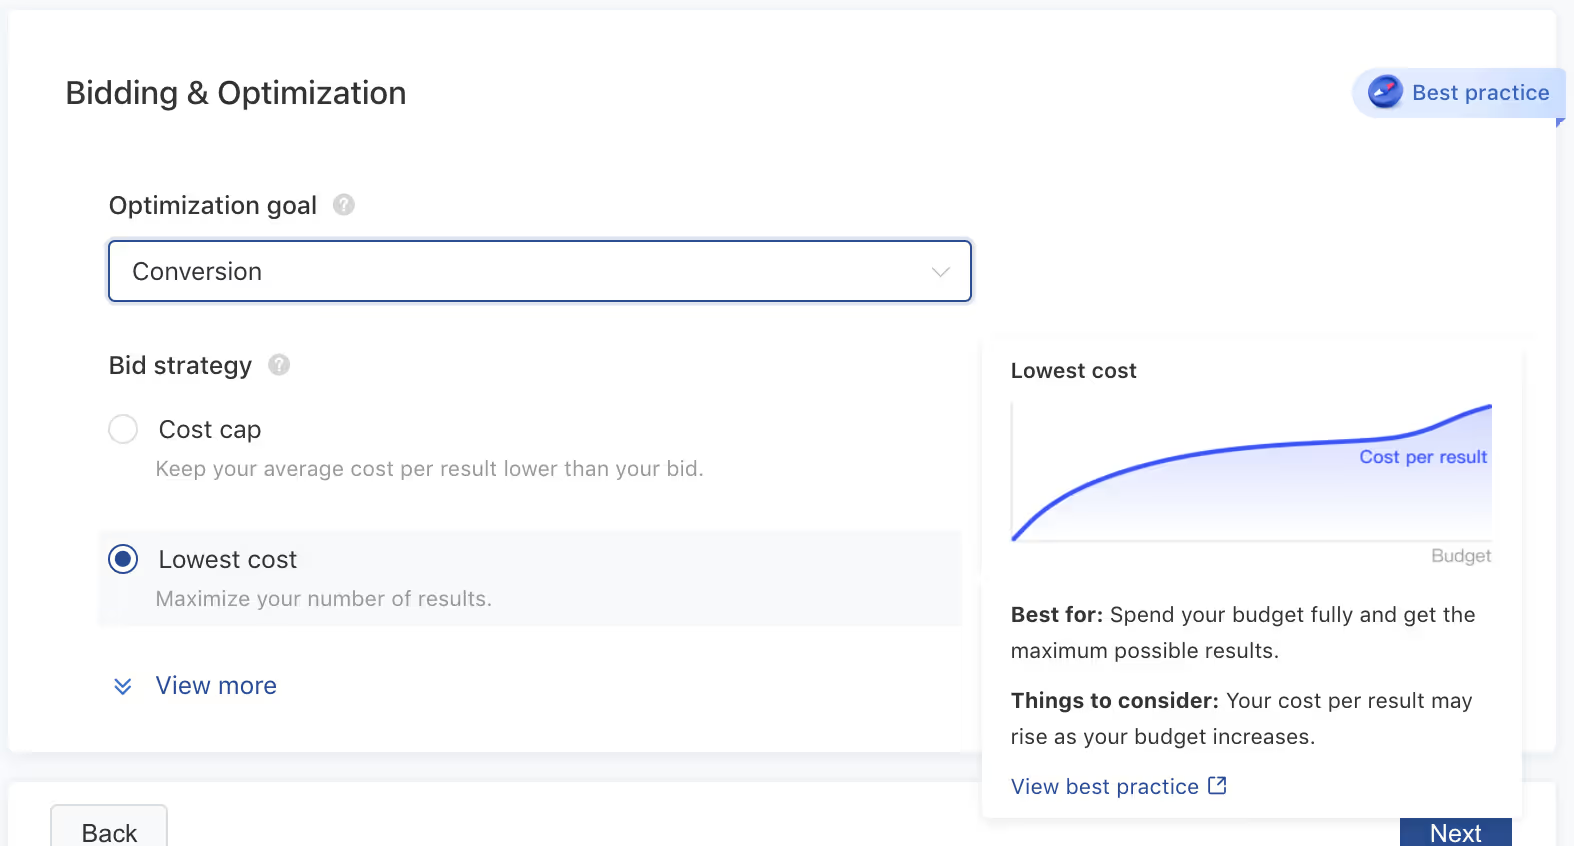
Since we want TikTok to show our ads to people who are most likely to buy, select Conversion from the Optimization goal dropdown
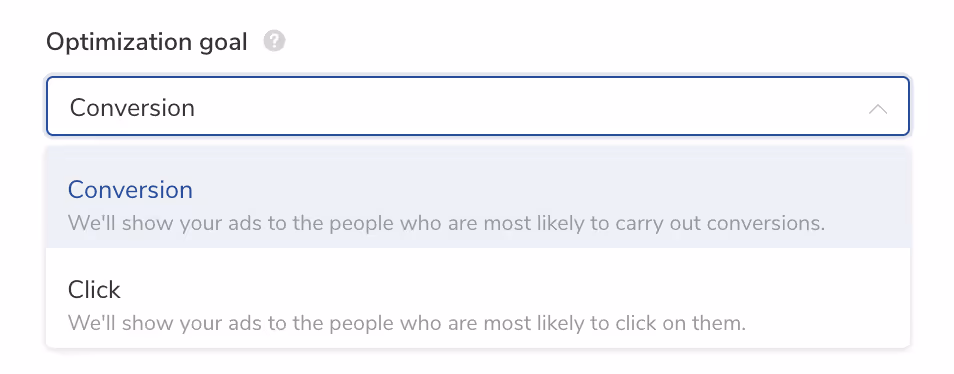
- Tip: If at first you don't see enough volume with a Conversion goal, shift to Click for a few days to let TikTok cast a wider net, then later revert to Conversion once you have more data to go on.
Under Bid strategy, choose the lowest cost option.
This bid strategy is the same as lowest cost bidding on Facebook—you're not giving TikTok a specific bid for an event. You just want TikTok to find the lowest cost conversions while spending through your total daily budget if possible.
Click Next.
Step 6. Create ads
In this step, you'll select the creatives you uploaded to your asset library in Step 2c and add them to your ad set.
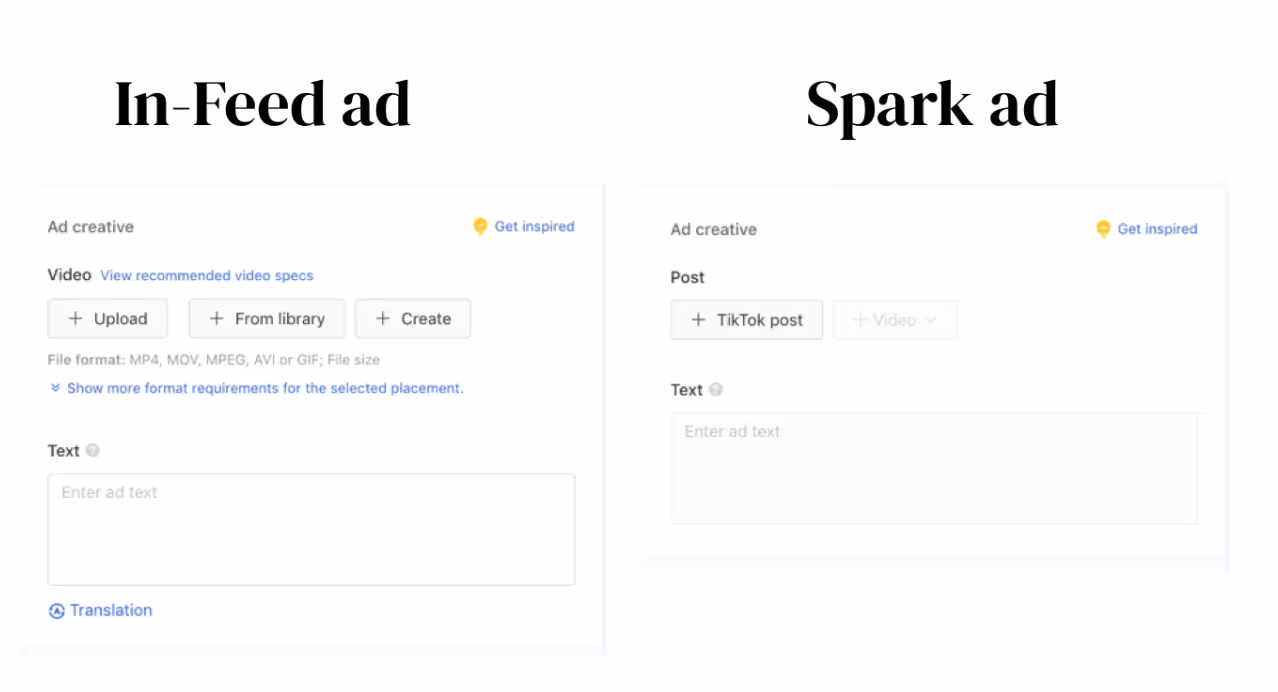
Step 6a. Choose your identity
Here, you'll use the Identity section to select your ad format and decide to launch an In-Feed ad or Spark ad.
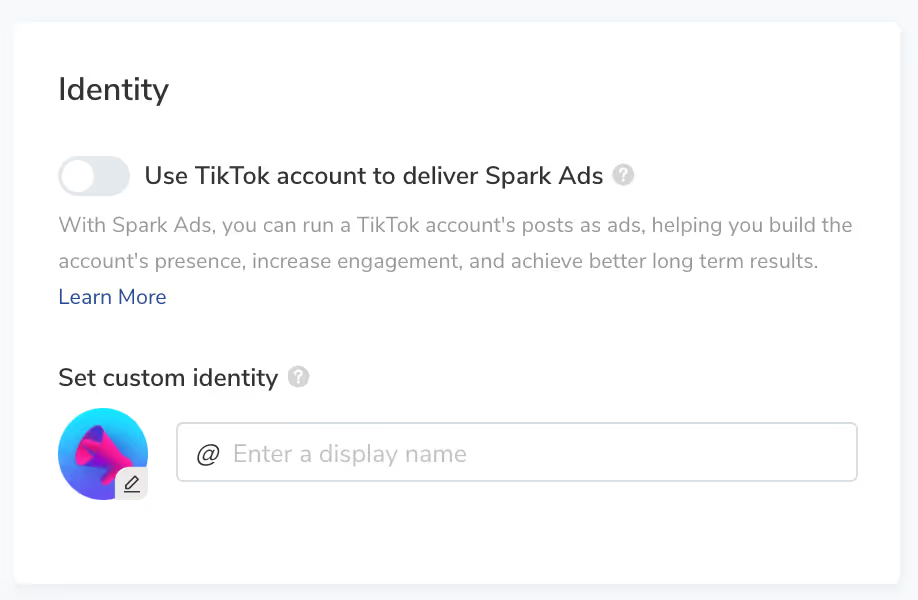
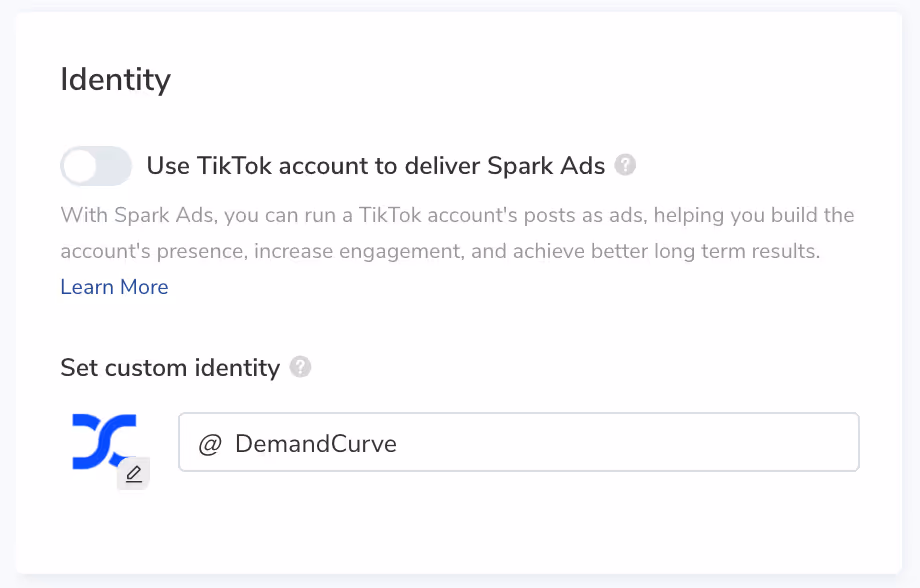
For In-Feed ads, leave the Identity button toggled off (grey), then upload your profile image and enter your display name, like so:
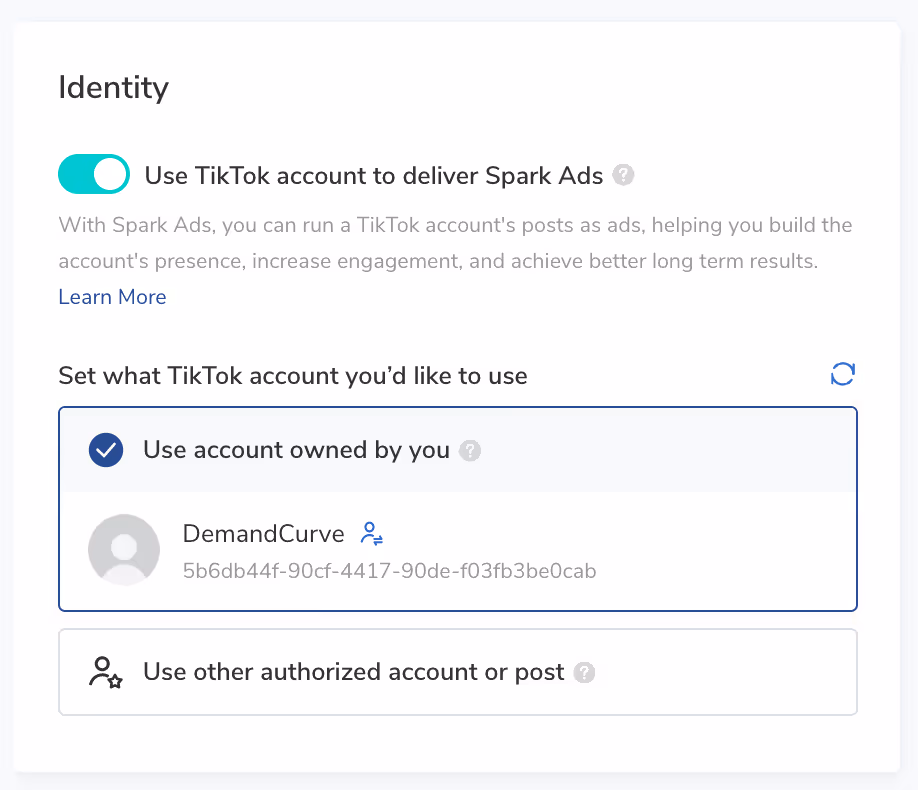
For Spark ads, toggle the Identity button on (turquoise). As you learned in an earlier module, there are two types of Spark ads:
- Deploy Spark ads through your TikTok business profile. These are Spark ads you create using organic posts from your TikTok business profile.
- These are Spark ads you create using organic posts from your TikTok business profile.
2. Deploy Spark ads through an authorized Creator profile
- Create Spark ads using organic posts that TikTok Creators have authorized you to use in your advertising. The Spark ad is promoted from the creator's page and displayed with their handle, with no visible branding.
- Follow these instructions to obtain the authorization code from the Creator you're working with—you'll need it to authorize their account/posts for use in your Spark ads.

Step 6b. Upload ad creatives
Next, upload, create, or select the creative you want to use in the ad group, or choose a post to use in a Spark ad.
Paste the ad copy you drafted in Step 2 into the text field.
Step 6c. Specify CTA and Destination page URL
Once you've uploaded your creative and added the copy, choose the call to action you want people to take, and add your destination page URL.
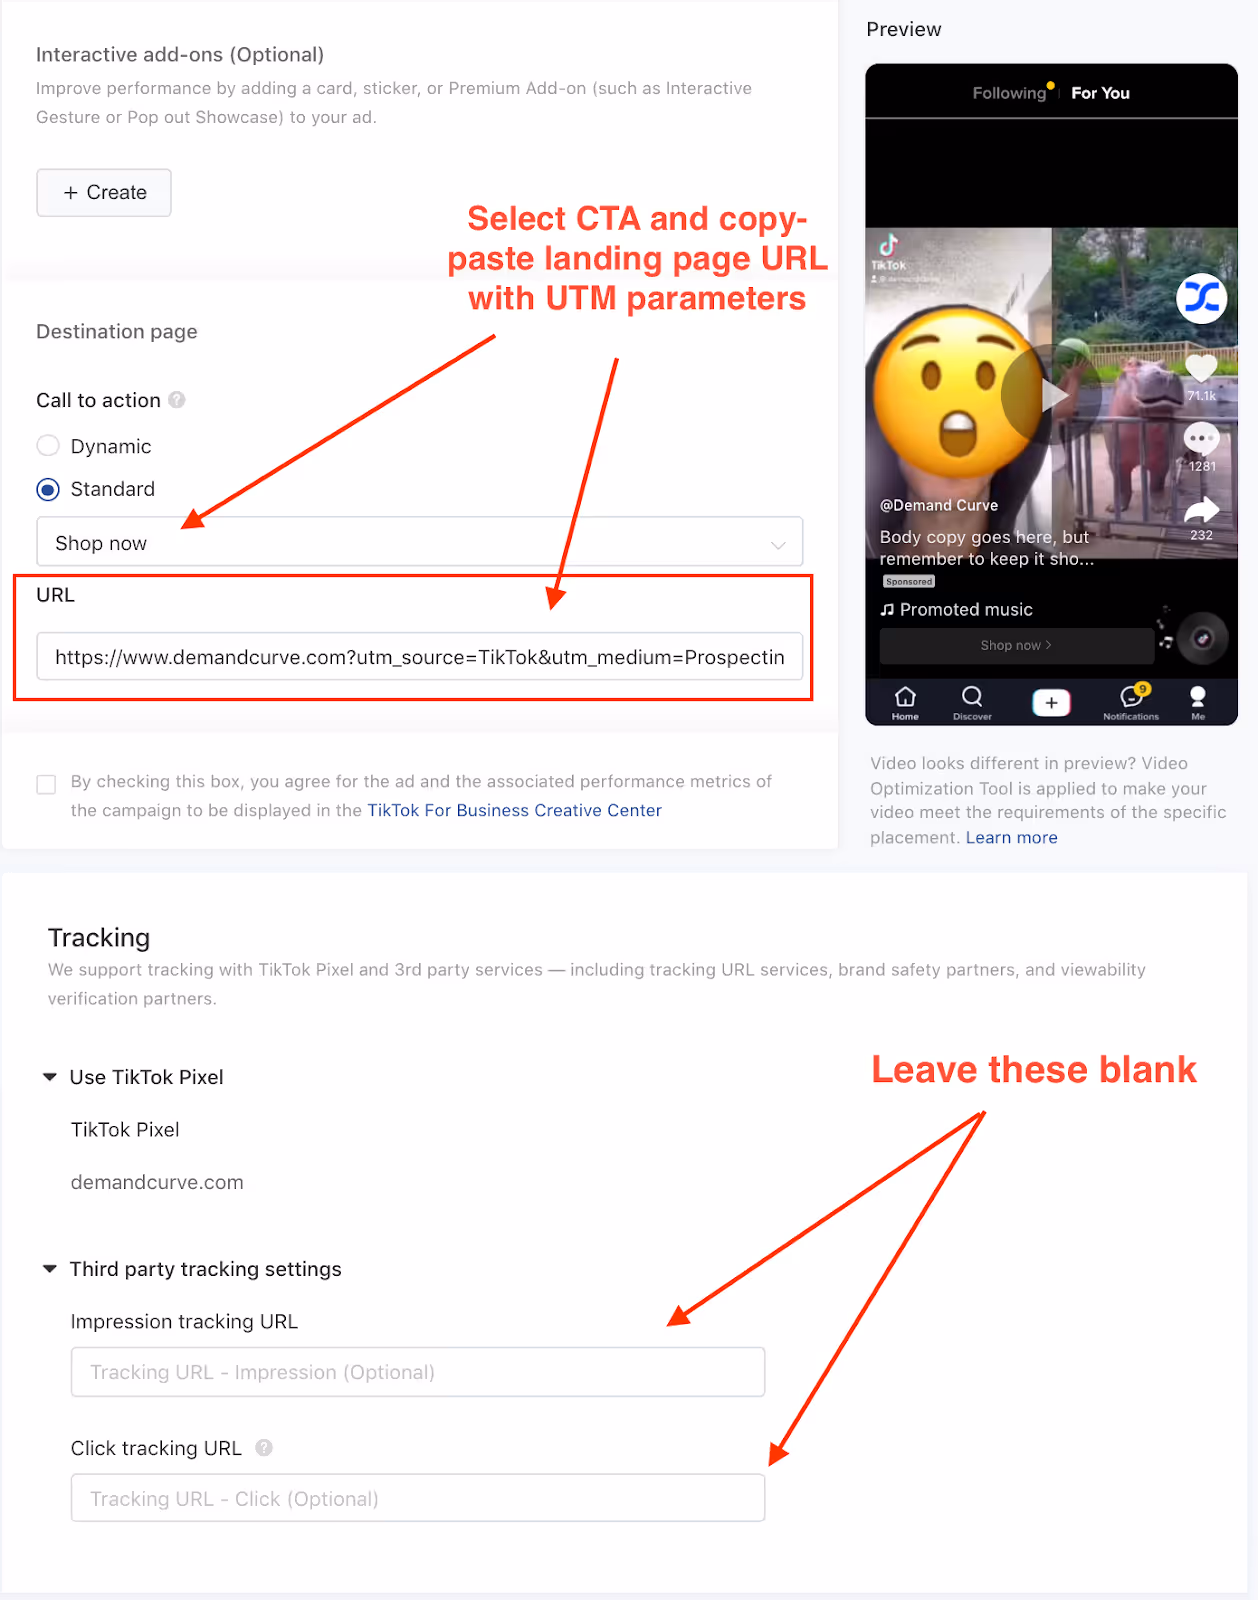
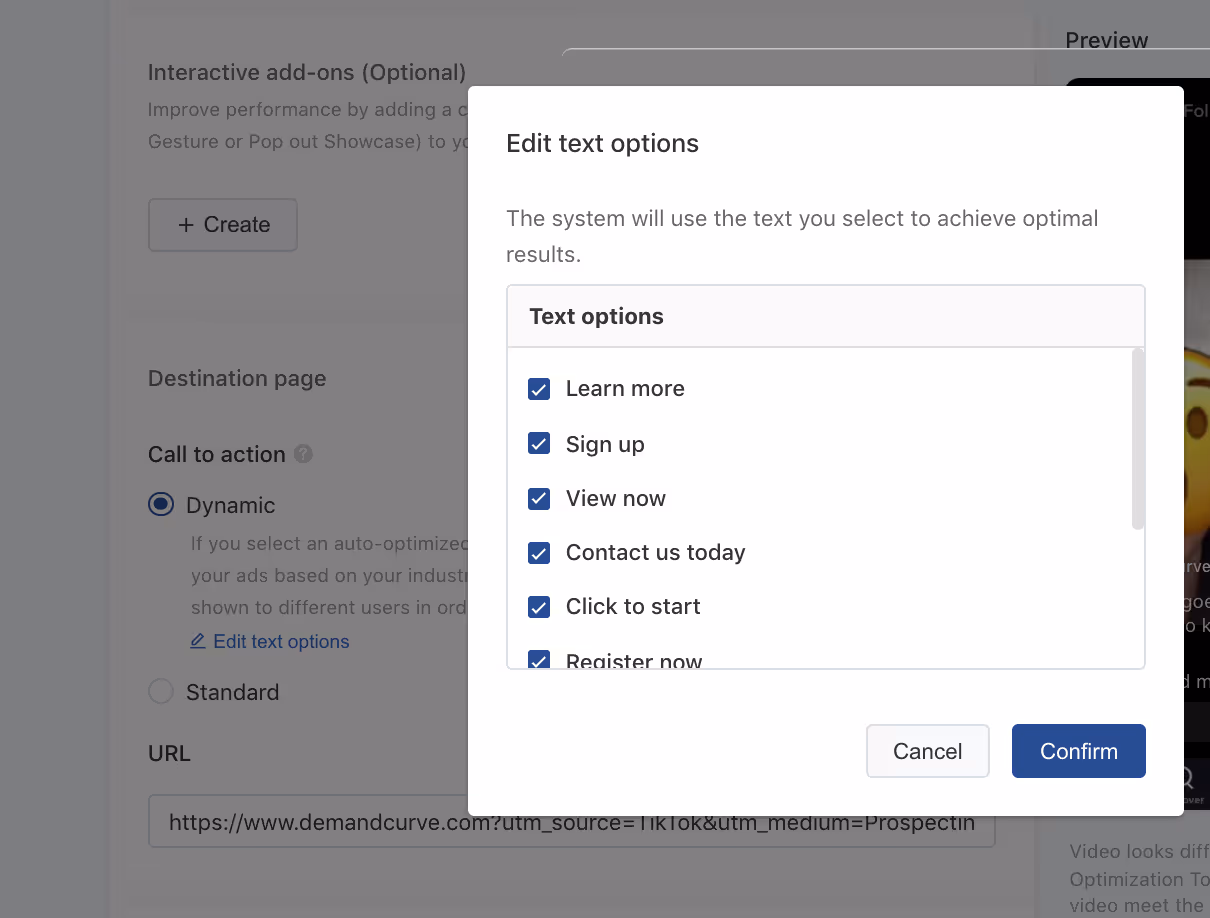
- Call to action: TikTok gives advertisers two CTA options. The Dynamic setting means TikTok will test multiple CTAs and optimize for the one that performs best. Click 'edit text options' and select CTAs with language that matches the action you're asking people to take in your ad.
- Destination URL: TikTok doesn't have a handy UTM creator tool like Facebook and Snapchat do, so you'll have to add your tags manually.
- Grab the UTM tags you jotted down in Step 2b and pair them with our UTM templates to make sure you get these right.
- Since we're including UTMs in the destination page URL, we can go ahead and leave the fields under Tracking blank.
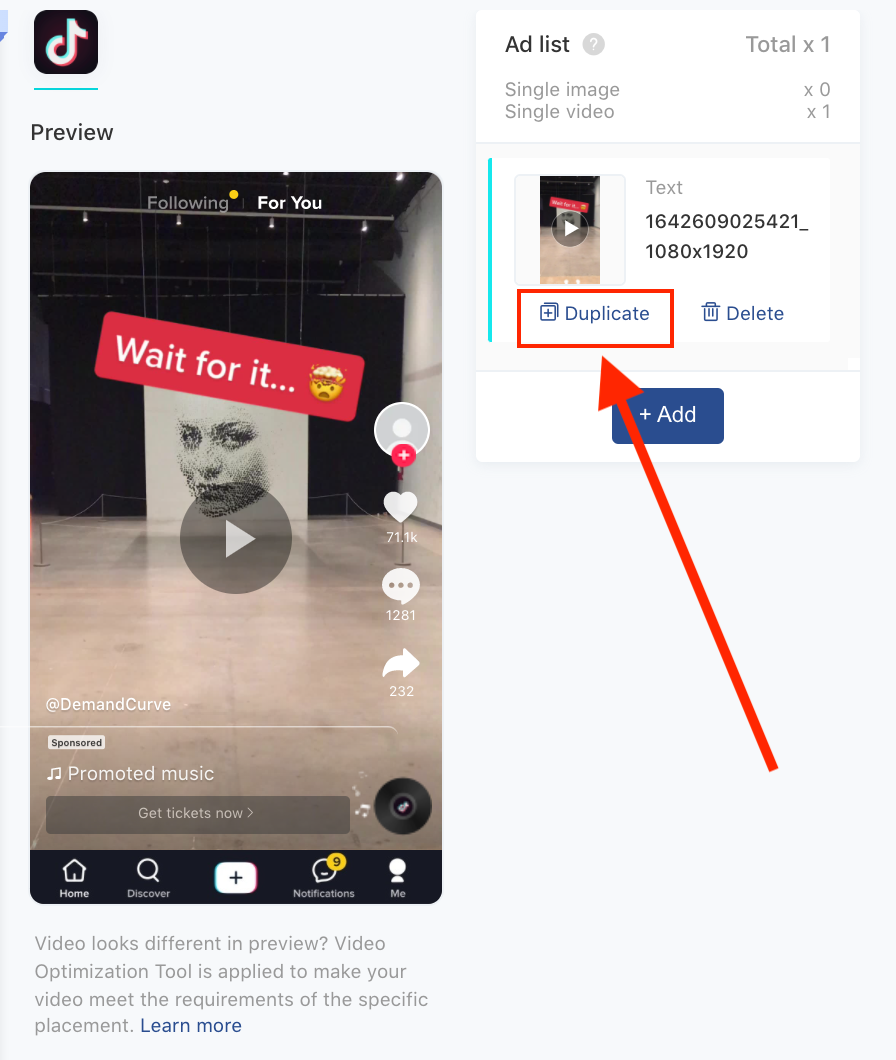
At this point, you've finished setting up the first ad in your ad group.
When you’re ready to add more, click Duplicate to save time rather than starting from scratch.
Step 6d. Final review and submit
If there are any problems with your campaign, ad sets, or ad creatives, TikTok will not publish your campaign. No worries, though — you can navigate back to the step that gives you problems and make changes as needed by clicking on the buttons at the top of your screen.
- TikTok provides a handy ad review checklist you can use in your final check.
- And in the event your ad gets rejected, here's a detailed explainer on the common reasons why ads fail review.
When you're done uploading creatives and building your ads, click Submit.
Step 7. Go live!
Success! You've just launched your first campaign.
Your ads are live.
This unit was co-created with Hawke Media and Slope. If you’d prefer to have professionals execute your TikTok ads strategy, we highly recommend working with Hawke or Slope.