Conversation


🥳 Feedback Received!
Thanks for taking a moment to share your thoughts — it genuinely helps us make each chapter sharper.
What happens next:
- Your feedback goes straight to our product team.
- We’ll use it to refine lessons, clarify examples, and make the program even more useful.
Appreciate you helping make this program better for everyone.
Ready for your next challenge? 👇
Project: Set up Meta Ads
This project assumes that you’ve already:
- Made your initial ad creatives. (See Ad Creatives.)
- Added a Meta payment method. (Here’s how.)
Phase 1: Set up custom audiences
Phase 1a: Website traffic
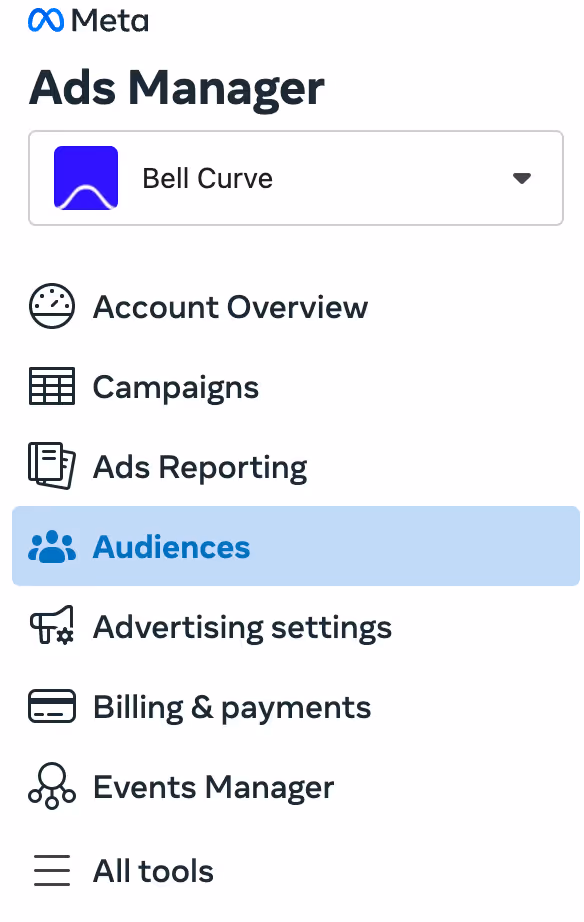
- Head to Meta Ads Manager and click the All Tools hamburger menu.
- Scroll down to Audiences in the sidebar.
Web traffic
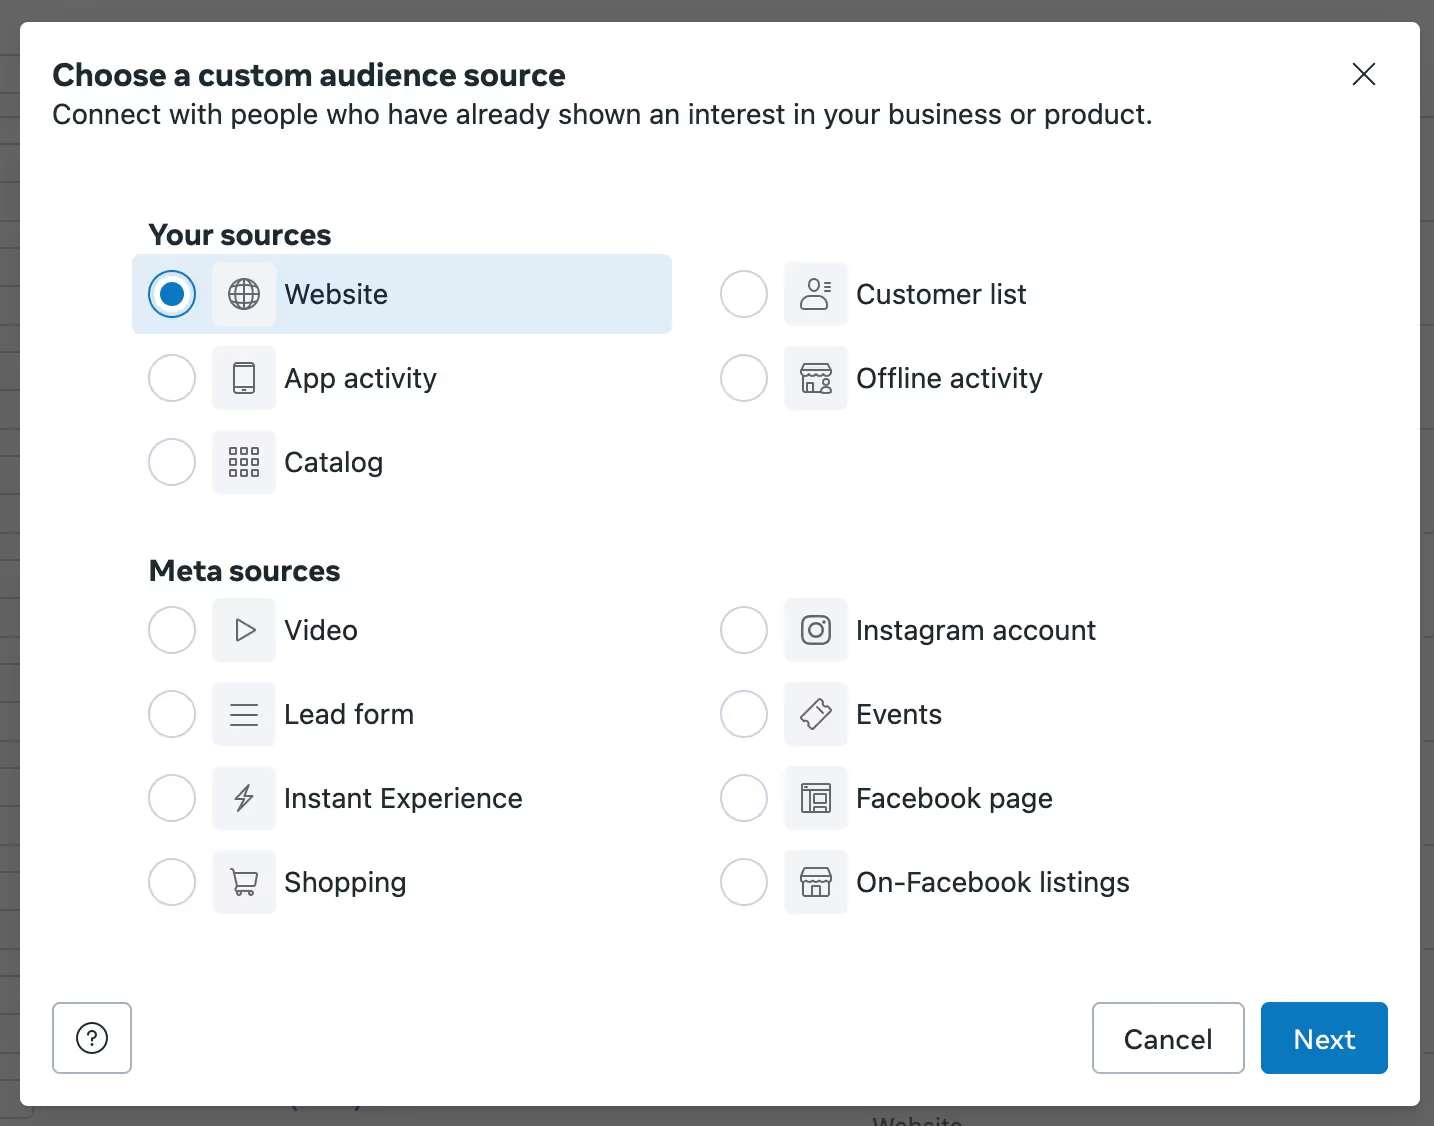
- Click Create audience -> Custom audience
- Then choose Website, under Your Sources.
3. Target everyone who has visited your site in the last 2 days.
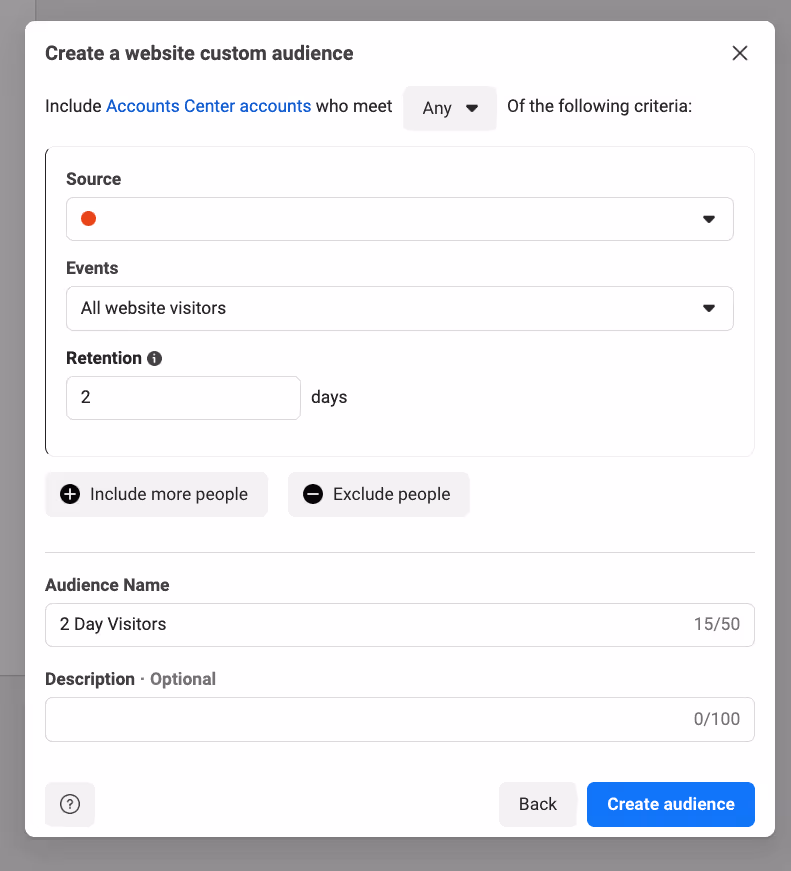
4. Then click Create Audience.
5. Do the same for:
- 4 day visitors: Everyone who has visited your site in the last 4 days.
- 30 day visitors: Everyone who has visited your site in the last 30 days.
- 90 day visitors: Everyone who has visited your site in the last 90 days.
We’ll need these later.
Retargeting traffic
- Head back to that same Audiences menu from the previous step.
- Click Create a Custom Audience. Then choose Website, under Your Sources.
Target everyone who visited a page with the word “retarget” in the URL in the past 60 days.

This is everyone who came to your site through a retargeting ad who you don’t want to target again.
Customer list
If you have email lists with over 1,000 people, you’ll want to upload them. Two reasons:
- You’ll want to exclude them from the ads you run to target new potential customers.
- Meta can generate lookalike audiences off that list.
Export current users’ email addresses. Note that this is a static data set (each new email on the site won’t go on this list), so you’ll also need to upload it monthly.
But if you have Meta conversion tracking set up, you won’t have to do this again. Meta will track every new customer, user, app install, and more on your site. Make an audience that targets everyone who has become your customer.
Or if you have Segment, or some other integration with Facebook/Meta, you can have customer lists dynamically sent into Meta.
Do that first. Click where it says “All website visitors” and search for your event.
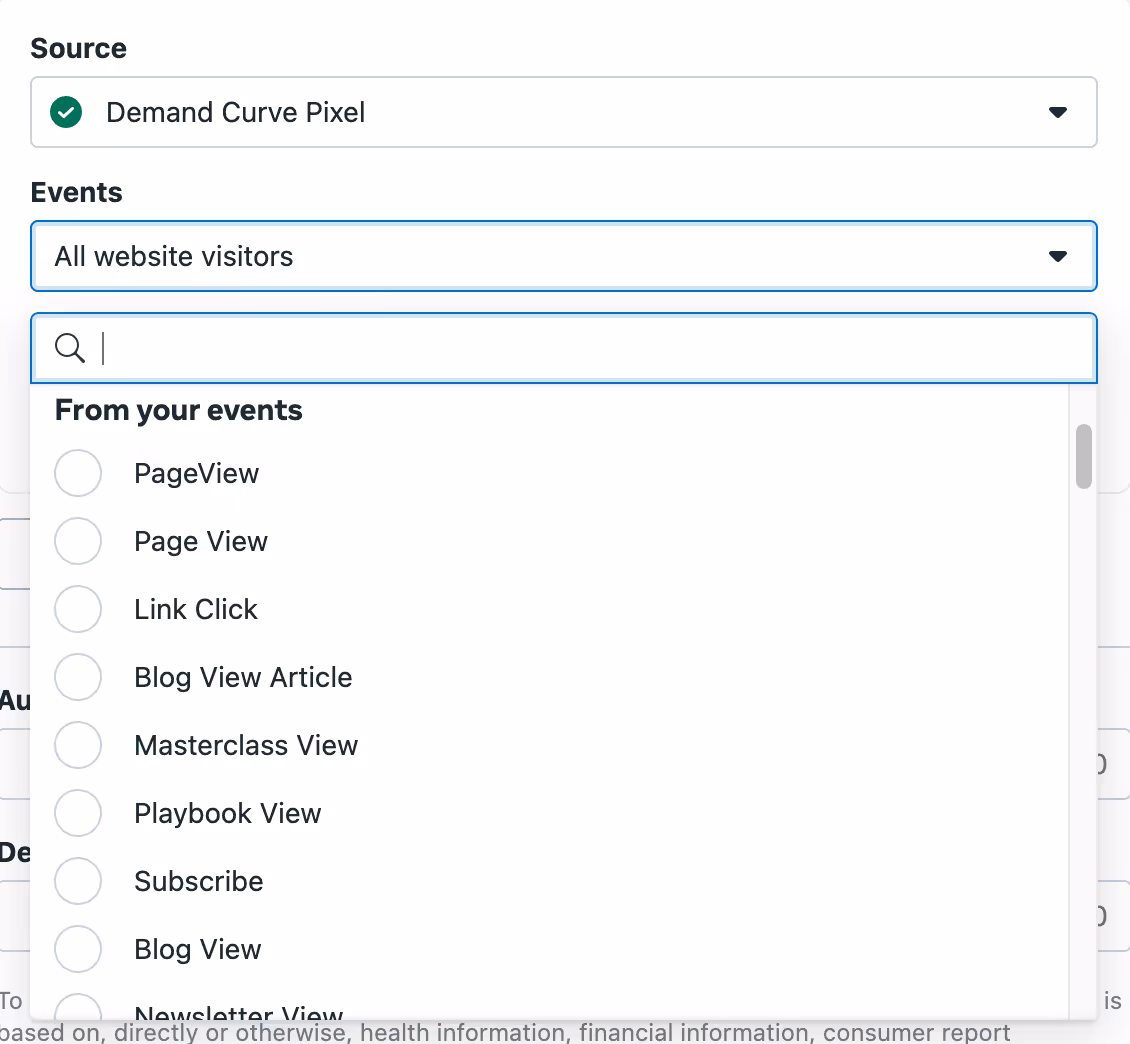
Name it “30 Day Sign Ups” (or “Customers”, if you’re using the Purchase event, etc.). Save it.
Now back to our customer email list.
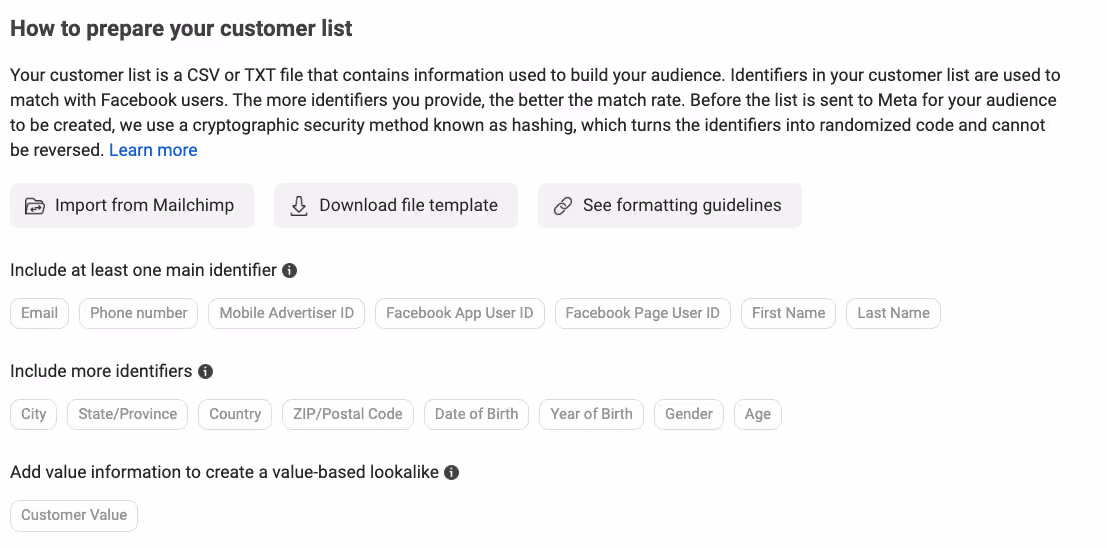
- Click Create a Custom Audience. Then choose Customer list under Your Sources.
- Meta will then show information like how to prepare your customer list. Download its file template and fill it with your list of emails. Upload it. Name your audience. Click Next.
- Map your identifiers. You’ll see how it works on the screen.
- Click Upload & Create. Then click Done.
If you have more than 5,000 customers, make separate lists of customers by their LTV. If there are higher-value customers and lower-value customers, upload separate audiences for those as well.
Other lists
Do the same thing as the Customer list for each list you have—different form submissions, email marketing lists, support tickets, etc. Pick the appropriate type of data source for each list.
Phase 1b: Generate lookalikes
Now we’ll create lookalikes based on your existing traffic. We’ll start with your existing website traffic.
First lookalike
- Click Audiences > Create audience >Lookalike audience. Pick your “90 day visitors” list in the Select Your Lookalike Source field.
- For location, select all countries using the "Select All" checkbox. We'll narrow this down to the specific countries later when we set up the ad sets.

3. Click the Select All checkbox.
4. For audience size, make it 1%.
5. If your product broadly appeals to most consumers (e.g., food and apparel), consider testing audiences of 2% and 7% as well. Otherwise, your lookalike's focus will be diluted.
6. Click Create audience.
Other Lookalikes
Follow the same process for each of the other lists you uploaded (including email lists).
Phase 1c: Instagram followers
To exclude people who already follow your Instagram account, you'll first need to create a custom audience.
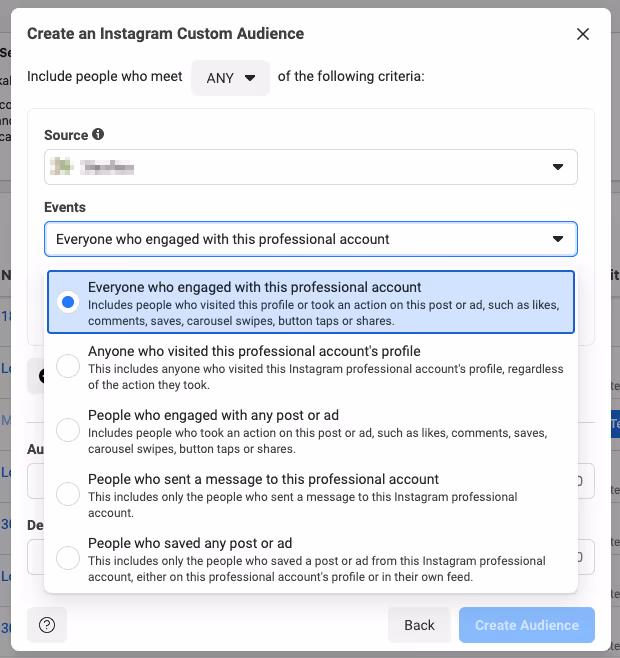
Click Create a Custom Audience>Instagram account (under Meta Sources).
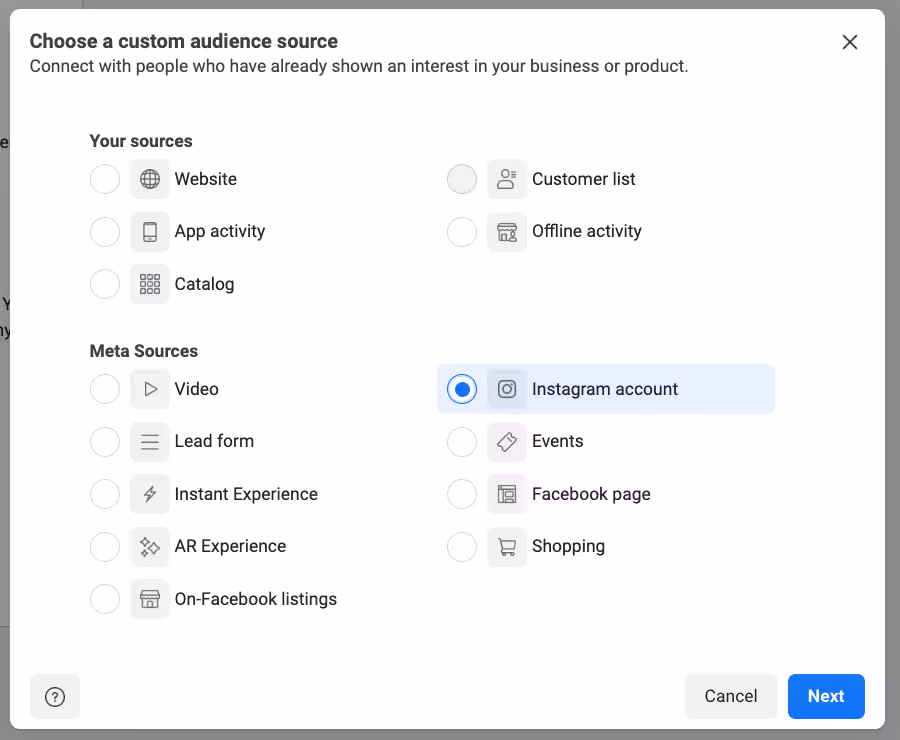
Select "Everyone who engaged with this professional account" in the past 365 days. Note: this should be adapted to the duration of your sales cycle. For example, don't exclude users for 365 days if they need to re-purchase every 3 months.
Phase 2: Campaign creation
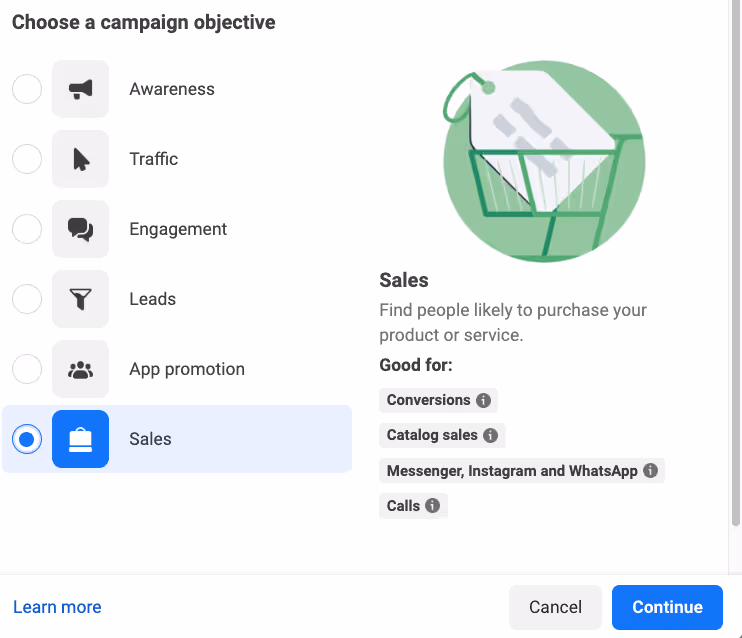
- Head to Ads Manager. Then click the Create button.
- Make the campaign objective Sales. We almost always recommend choosing the Sales objective for your Meta ad campaigns since this objective centers around a traceable action that connects to your revenue.
3. Unless you're setting up a completely automated campaign for your ecommerce company with an integrated product feed, then choose Manual sales campaign instead of Advantage+ shopping campaign.
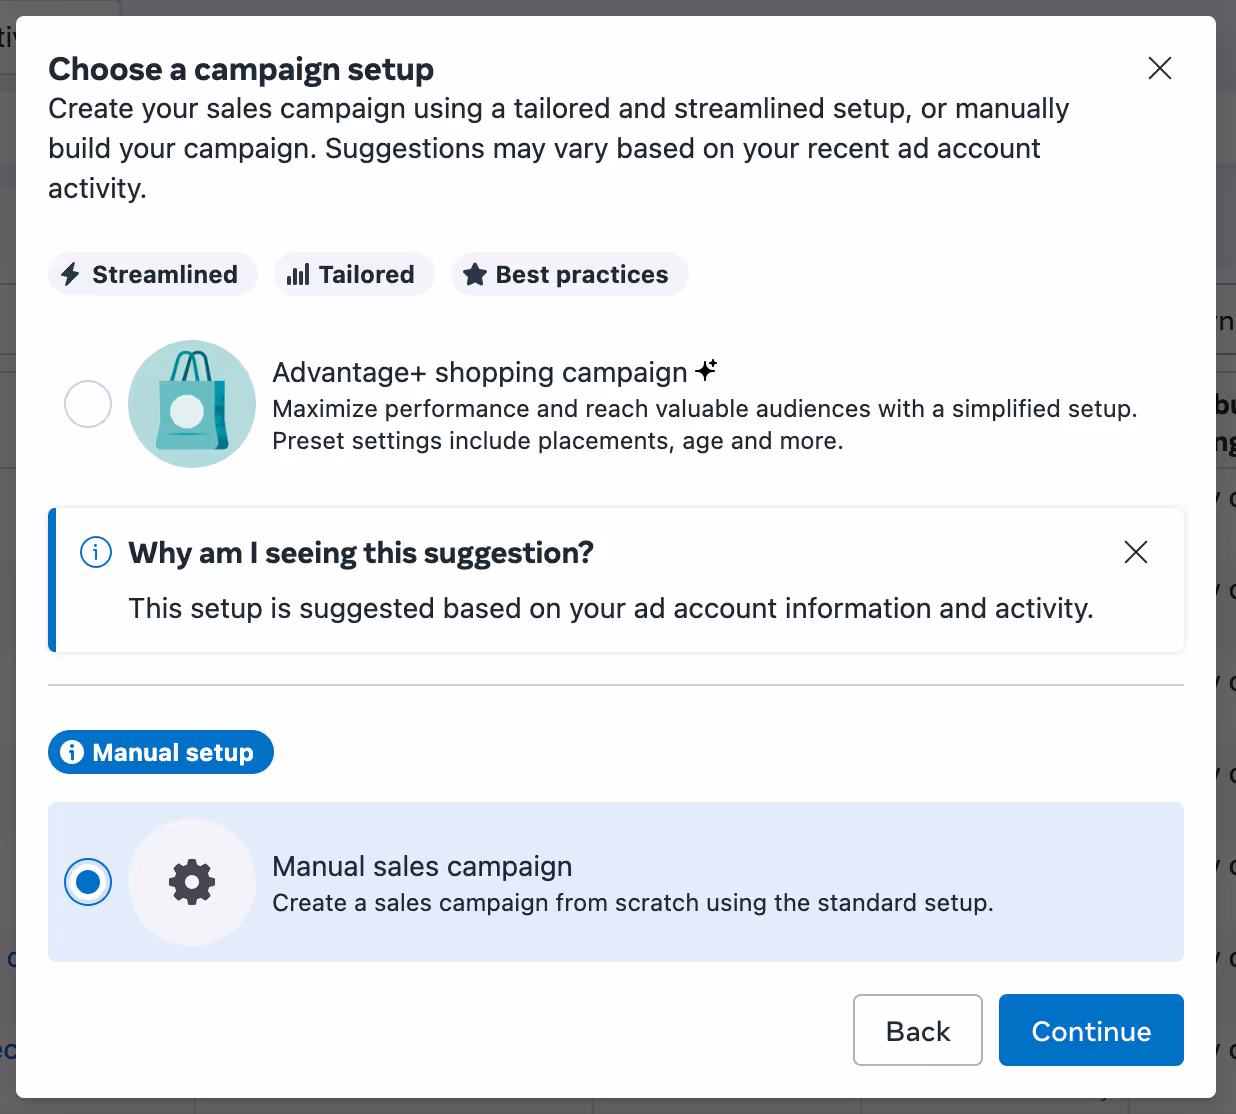
4. Then, name your Campaign
- If you’re making a new campaign for only one product line, name your campaign Primary or Prospecting.
- If you have multiple products or product lines or, make one campaign per product or product line. Most companies only have one product line.
For example, one product line could be “Organic dog food” and within it, there may be multiple flavors of dog food. “Dog brushes” would be a separate product line.
Let's continue setting up the campaign.
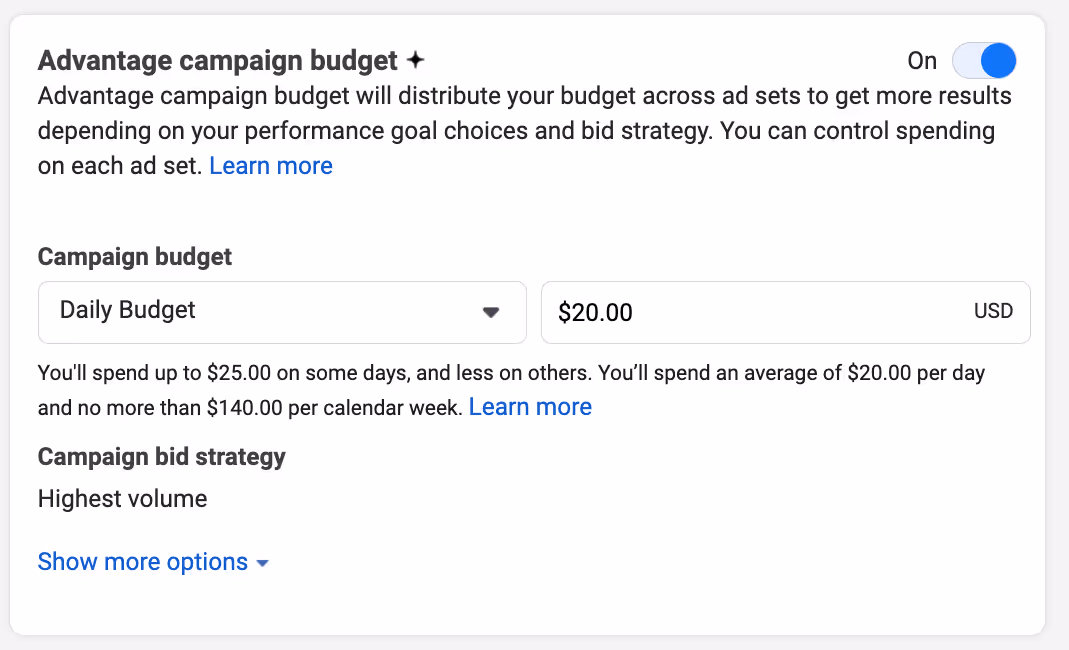
Advantage campaign Budget Optimization (CBO)
Turning on Advantage Campaign Budget Optimization (CBO) gives Meta full control to manage your campaign budget across ad sets to get you the overall best results; it'll spend more money on the ad sets that show promise and less on the ones that don't.
With Advantage campaign budget, you set one central campaign budget. This budget continuously distributes in real time to ad sets with the best opportunities, throughout the course of your campaign.
Key point: We recommend you let Meta manage the spend. If there's specific ad sets you planned that are targeted for entirely different goals (like newsletter subs) and you want to control the budget between sales and subscribers, then I would just recommend creating a different campaign with that different goal.
Let's talk about how you determine your specific budget
Budget - Prospecting
A few steps to figuring this out:
- Take your acceptable CAC (what you calculated on Day 1).
- Multiply it by 3 or 5 (minimum test buffer)
- Multiply it by the number ad sets you intend to run (let's say 3)
- Then divide by 7 or 14 (because we'll run the ads for 1-2 weeks)
- Multiply it by 2 (to get data faster)
- Set that as your minimum daily ad spend (daily budget).
- No matter what, don’t spend more than $300 per day to start, unless you have a ridiculously high LTV product (over $3,000).
Why multiply by 3 or 5?
We need a buffer in case there’s some variation in our audience that means highly profitable or highly unprofitable people happen to see our ad first. This happens frequently. If we can get CAC within an order of magnitude (3-5 times, maximum) of what we want, it also leaves us room to optimize ads and the rest of the funnel to get down to what we want.
So, if your target CAC is $50, we’ll need to spend at least $150 before we rule out an ad set as being unprofitable. We can sometimes rule it out earlier, but $150 is the minimum you’ll want to spend.
Why multiply by number of ad sets?
Because your campaign budget will theoretically be split over them. It may concentrate it quickly to the winners, but this buffer also allows more budget to be spread over the ads within the ad sets.
Why divide by 7 or 14?
We usually run ads for at least a week, and we don’t want to blow our budget too early. People behave differently when they’re heading out for the weekend than when they’re commuting to work on a Tuesday. We want to reduce the chance that the day of the week affects ad performance.
If there’s a major holiday coming up, consider running a test a different week. Not to say you shouldn’t run ads for Black Friday. But don’t expect those results to generalize to a normal workweek.
Why multiply by 2: Now, take your budget and multiply it by 2. Set it as your daily budget. But set a reminder to lower your budget back to 3/7 CAC after three days.
Why? Students have overwhelmingly told us it's worth the tradeoff to get data sooner and see results even if the data is affected by the day of the week.
So, if your target CAC is $50 and you intend to run ads for at least a week over 3 ad sets, your usual budget would be $64.29 (50*3*3/7*2). Set your budget to $130 for three days instead, then revert to $65—SET A REMINDER!
We know this is convoluted, but you'll get important data faster.
Budget - Retargeting - 4 day Ad Set
Spend aggressively to retarget 4 day visitors. They've just seen your ad and they're higher intent.
The rule of thumb is: divide your total reach by 500. But don’t spend less than $5 per day. You can see this when you plug in your retargeting audience.
So if your audience is 6,000, your daily budget would be $12.
Budget - Retargeting - 180 day Ad Set
Divide your total reach by 1,000. Example: If your reach is 6,000, your budget would be $6.
Budget scheduling
Run as ongoing unless there’s a special case. Meta will generally outperform you here.
Campaign bid strategy
You have a few options for how you want Meta to optimize:
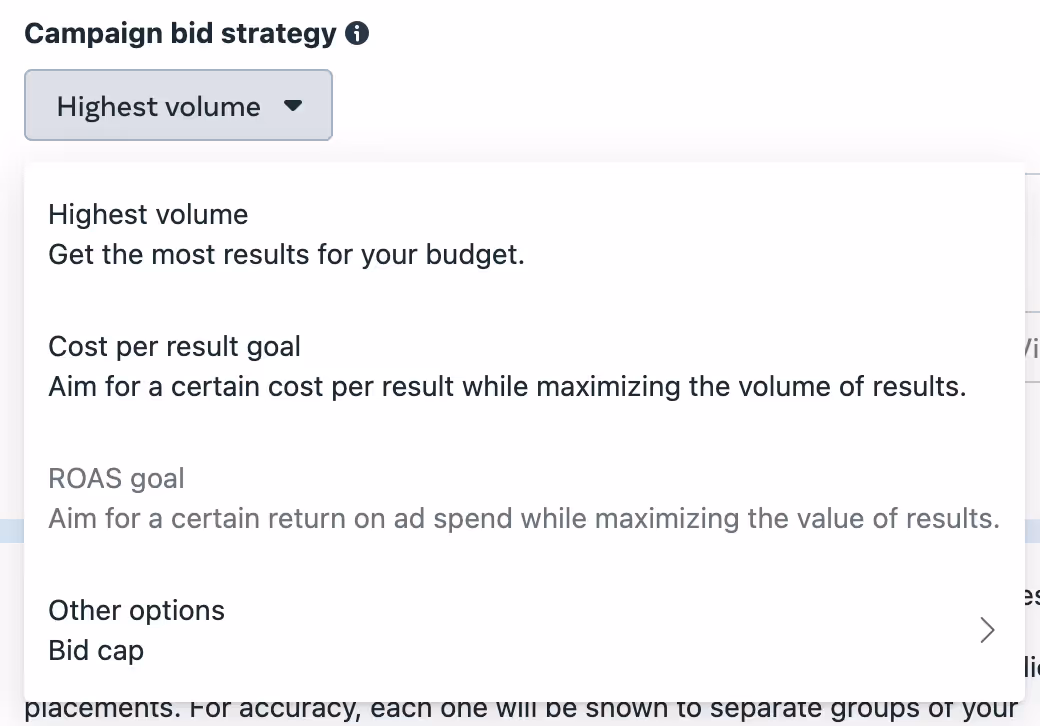
If you already know exactly how much you're willing to spend per acquisition (like $50), then choose Cost per result goal.
If your goal is a purchase event with revenue assigned, you can choose ROAS.
Otherwise, you can just use Highest volume.
Advantage+ catalog ads
If you are an ecommerce company with a lot of products, then it might be worth testing Advantage+ catalog ads. To do that you'd need to create a product catalog (which might be pulled in via a feed from your Shopify site).
But, we'd probably recommend that for the future. For now let's try targeting our top products.
Phase 3: Ad set creation
We’re going to make separate ad sets for each group of ads you've created.
A reminder that an ad set is primarily two things:
- A collection of ads
- Specific targeting options
For your purposes, break up and name Ad Sets based on the different segments of people you're targeting—and not the specific value props being targeted in the ads.
You'll want to name your ad sets clearly based on WHO it's targeting so it's crystal clear for you and everyone else on the team what it's for.
Creating your ad sets
After configuring the campaign you'll start creating your first Ad Set.
Name your ad set after the audience you want to test.
For example, you could structure your prospecting campaign to have separate ad sets targeting different audiences: 1% Top Customers (Lookalikes), Marketers (Interest), and Developers (Interest).
Phase 3a: Conversion event
Next, choose the conversion event you want. We want this event to be as far down the funnel as possible—ideally, a purchase event.
Here's an example where I used Cost per result goal on the Campaign level, and then chose the Purchase event with a target cost per result of $50.
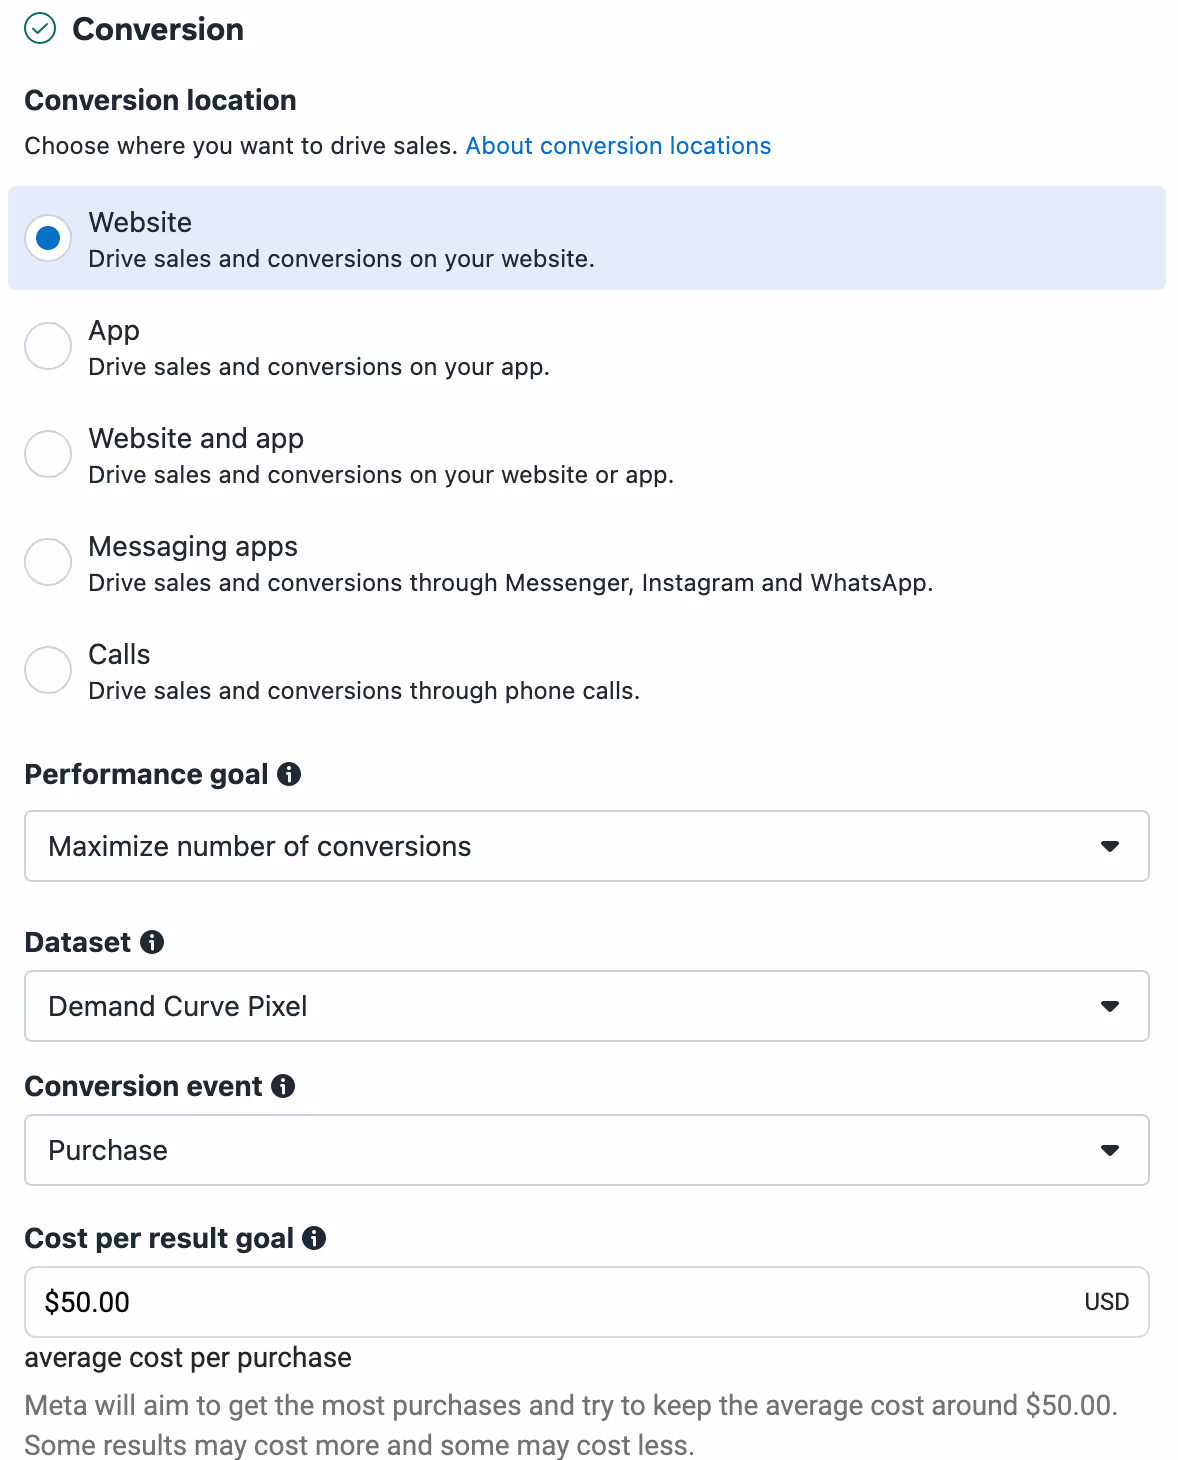
In almost all cases you'll want the Performance goal to be "Maximize number of conversions."
Why might you not choose a Purchase goal?
It’s often hard to get enough data on purchases because so many people can drop out of the funnel before buying, especially if you don’t have much traffic on your site. Particularly if you have an expensive product, a long sales cycle, or a lot of steps that someone needs to take in order to purchase.
So you can use an earlier conversion event that happens more often—for example, registrations or email signups, or clicking on the Landing Page CTA—until you have enough volume to use the purchase event. You’ll want your event to happen at least 50 times in about a week.
Use the Meta pixel for websites, or your Meta SDK installation if you’re sending users to a mobile app. Over time, Meta will show more of the ads that convert better, and less of the ads that don’t.
For both prospecting and retargeting ads, you can leave optimization and delivery options on their default settings with Cost per result goal empty.
It should look like this:
Why? If we optimized for something other than conversions, we might get people who like the ad or our landing page, but who don’t actually buy. At the end of the day, we want to focus on customers who actually pay.
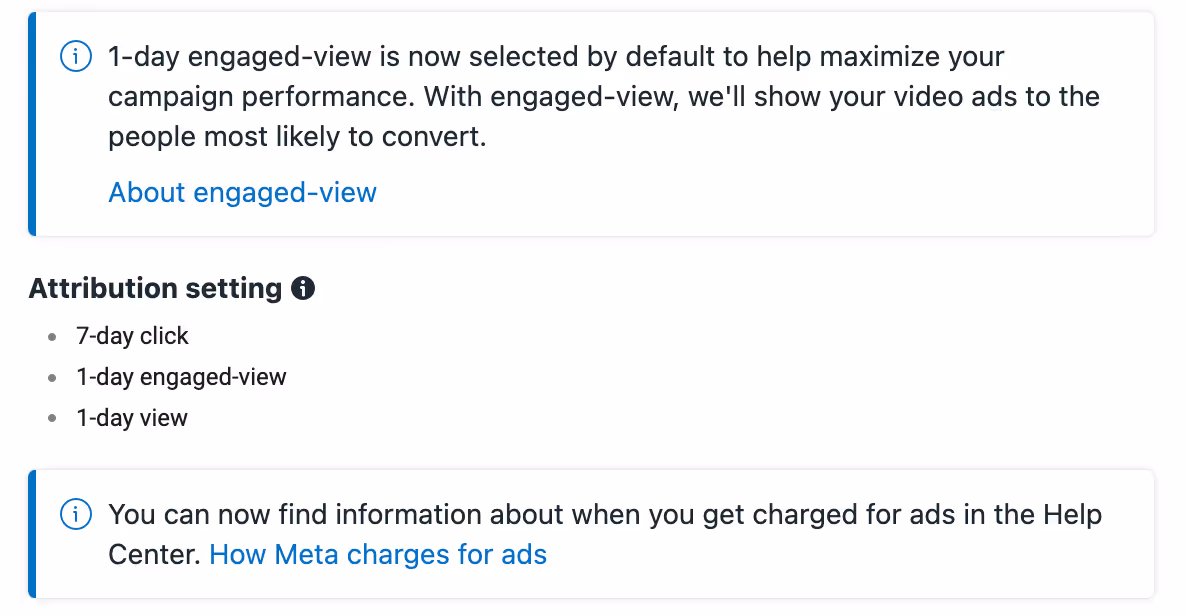
“1 day view” means they could have seen your ad and then Googled the product. We want to make sure we give the ad credit.
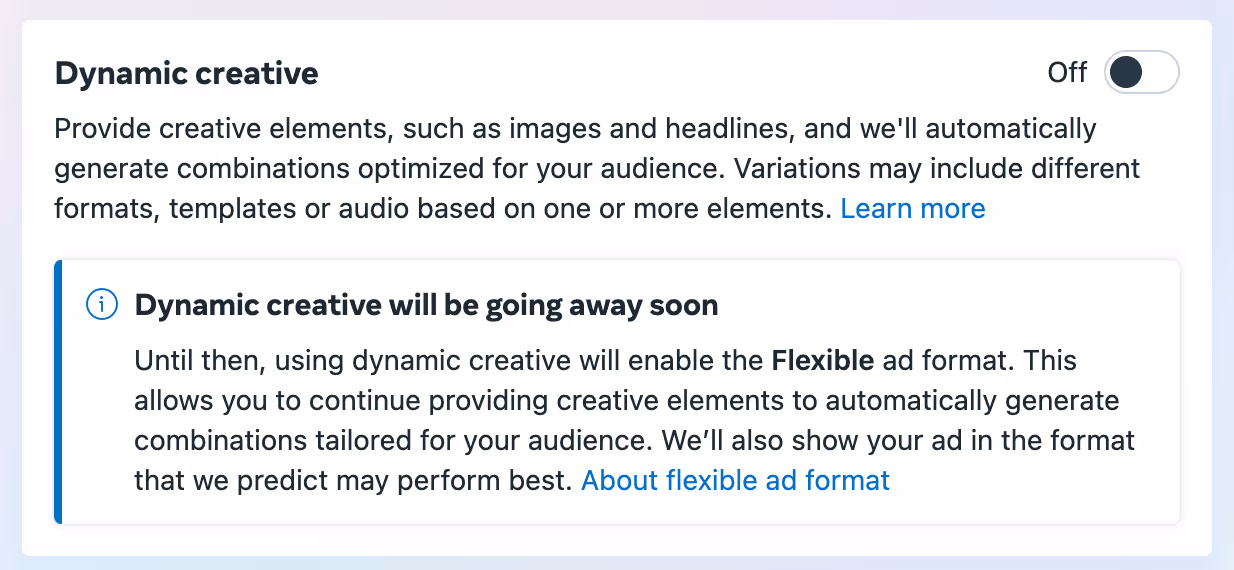
Phase 3b: Dynamic creatives
These are being or have been phased out (depending on when you're reading this)
3c: Targeting
In our Meta targeting lesson and the Generate Audience and Ad Sets project, we discussed the benefits of various targeting strategies, including:
- Custom audiences
- Lookalike audiences
- Interest and behavior targeting
This point of the campaign creation process—the ad set level—is where you actually set your targeting parameters.
You should have separate ad sets for each group you plan to target.
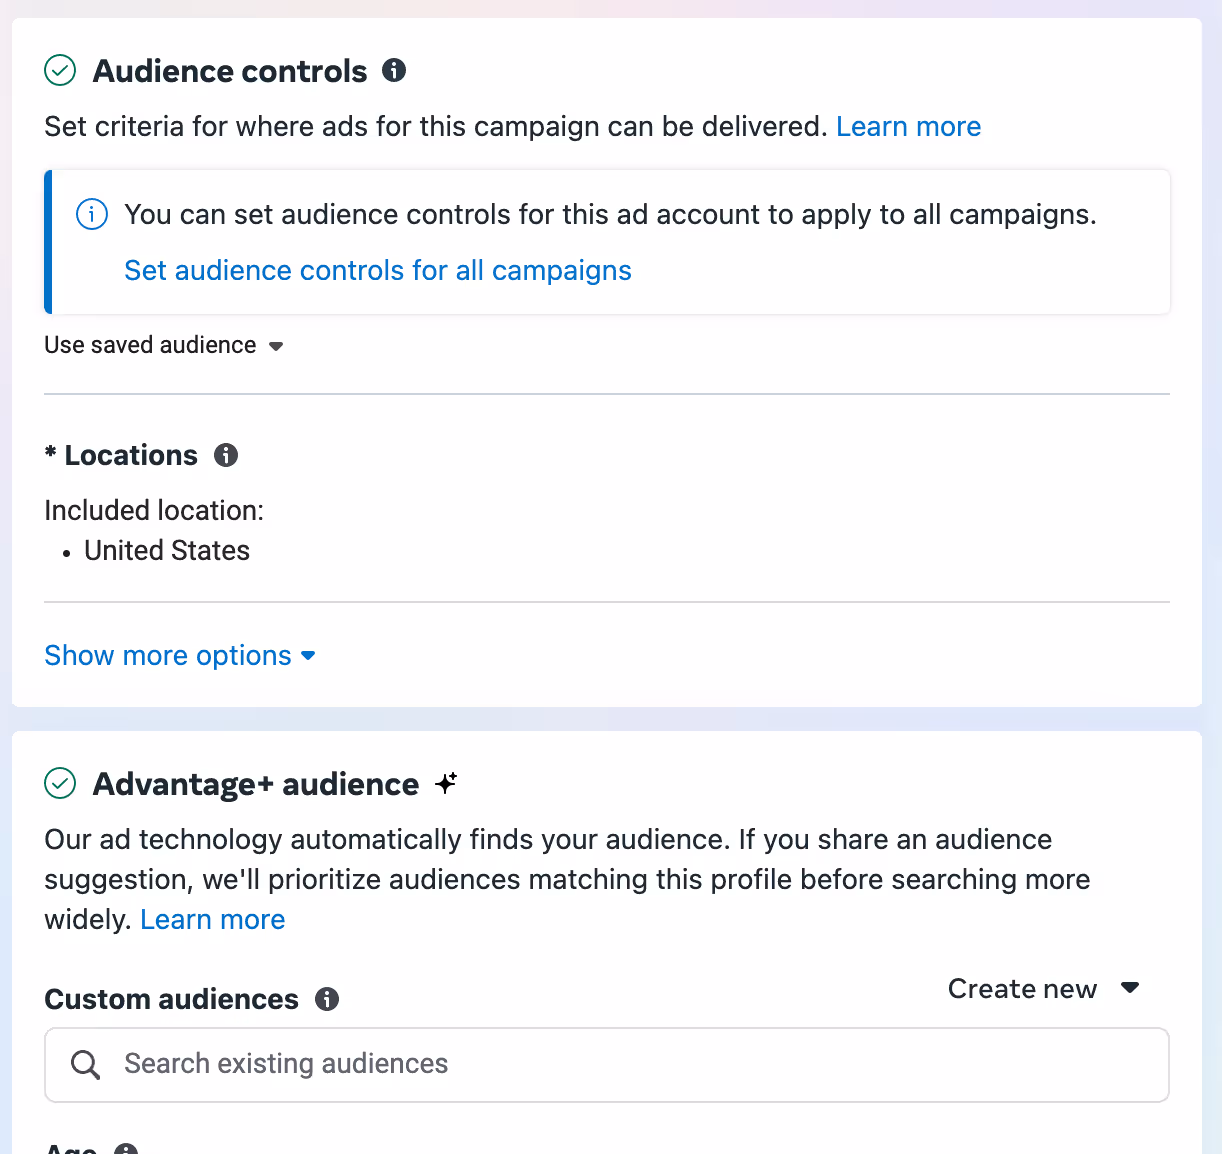
And we'll default to using Advantage+ audiences for prospecting campaigns to let the AI help.
Do not mix audiences, e.g., setting a lookalike audience with targeting parameters for location and age group. Multiple ad sets may have identical creatives but use different targeting filters; this setup aims to test which audience or targeting filters work best.
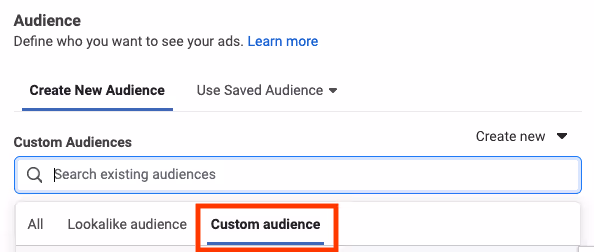
Custom audiences
Use the custom audiences you created in Phase 1a for retargeting ads (targeting people who have already been to your site). You can find the names of these audiences in the Custom Audiences field, e.g., 30 day visitors, 90 day visitors.
Do Retargeting campaigns using regular Audience targeting, not Advantage+
If you’re running lead gen ads, it’s almost always worth setting up a retargeting ad set for people who have filled out a lead form. You can do this by making a custom audience in the “Audiences” section from Phase 1.
Lookalike audiences
Select the lookalike audience you created in Phase 1b in the Custom Audiences field.
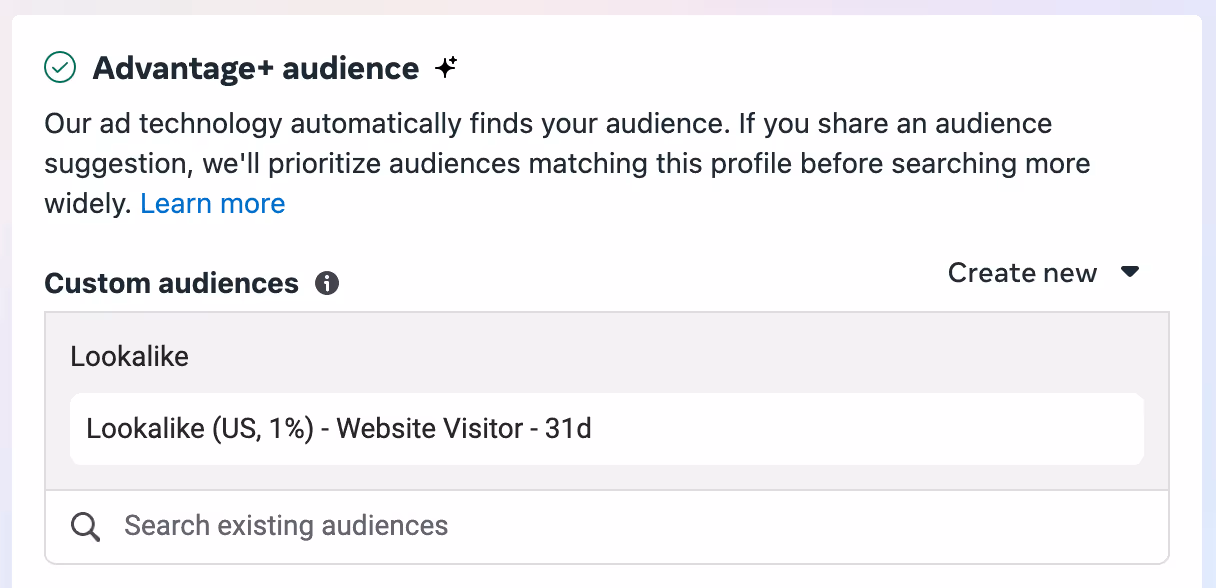
Do lookalikes using Advantage+ audiences.
When you’re making lookalike ad sets, you can also make multiple ad sets based on demographic data. For example, depending on your product, you might make a lookalike off of your existing customers and then split it to make separate ad sets for men and women, or for people over or under 35.
Again, avoid layering interests and lookalikes. Meta'a interest data is iffy, and you’re not reaching enough people to miss out on the folks Meta mistakenly can’t capture. (Assuming your audience is less than about 5 million people—which it generally is for the 1% lookalikes we recommend.)
Interest targeting
Whether you're using a broad or narrow interest targeting strategy, remember to avoid hyper-targeting. Use targeting filters only to avoid showing your ads to people outside of your market.
Use Advantage+ audiences for interest targeting.
For basic demographic targeting, follow the instructions in our Location, Age, Gender, and Language Targeting reading.
Audience exclusions
For each of your ad sets, set audiences to exclude based on what group of people you're targeting.
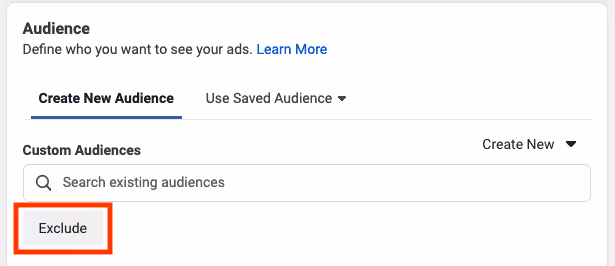
Some guidelines:
- For your prospecting ads (designed to reach brand new users), exclude people who have already interacted with your company. It makes sense to exclude these audiences if you have a more specific campaign already targeting them, e.g., retargeting ads.
- Examples: People who already like your Facebook page, Instagram followers, people who have visited key web pages and/or performed actions like added to cart, people who have installed your app in the last 180 days, your 90 day visitors list.
- Should your prospecting ads exclude current customers or past purchasers? Some nuances here:
- If you’re selling a service that can only be purchased once (e.g., SaaS subscription), exclude people who like your page.
- If you can have repeat purchases (e.g, an ecommerce company), it’s okay to keep advertising to the same audience.
- For your retargeting ads, exclude the following audiences:
- 2 day visitors (we don’t want to spam them right after they’ve failed to convert)
- Note: You can test excluding recent visitors anywhere from 2 days to 180 days. 2 is the standard we use at Demand Curve, but this is not a rigid rule. Some purchasing decisions take longer.
- Converted Users
- 60 day retargeted Users
- 2 day visitors (we don’t want to spam them right after they’ve failed to convert)
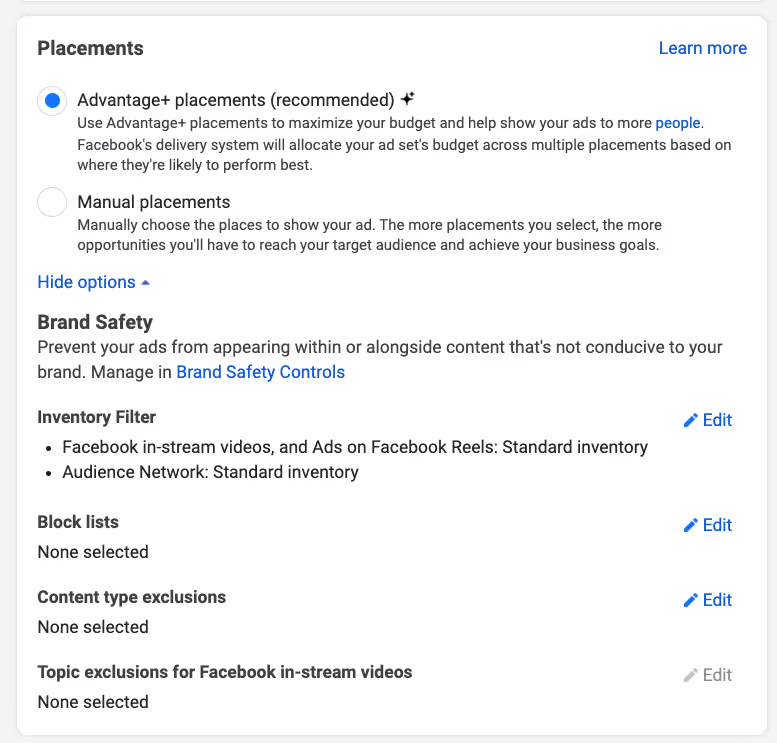
3e: Placements
Select Advantage+ placements (recommended) rather than Manual Placements. This option gives Meta's algorithm more control—it'll optimize placement delivery of your ads for better results.
3f: Confirm and turn off
Review your changes and confirm! Close the creator window. Then turn the ad set off in the Ads Manager dashboard. The toggle should be gray, not blue, to show that it's not currently active.
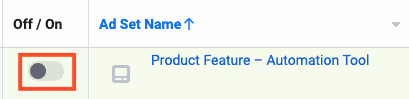
Why? You still need to make ads and we want to finish doing all the ad sets first.
Repeat this phase (Phase 3) to create the other ad sets in your campaign. Pay special attention to targeting options (Phase 3c) for each ad set.
You should have ad sets for each separate audience you want to target, or for each group of creatives you want to test. Once these ad sets are set up, move on to the next phase (ad creation).
Phase 4: Ad creation
We’re now going to add ads to each ad set. Click the name of an ad set to do this. Then click the green “Create” button to create an ad.
To start off, we’ll make one of your image ads.
4a: Name
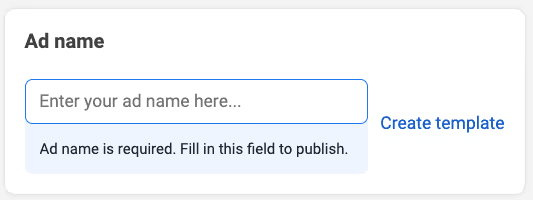
Name your ad using a differentiated piece of copy across ads. Typically, this is the copy from its creative or from its text if its creative is light on copy. If your ad is a video, it can be a catchy line from the video.
We name ads this way to make it easier to compare how different copy is doing once ads are live. If we used generic or short names for ads, it would be extra work to see what’s performing well.
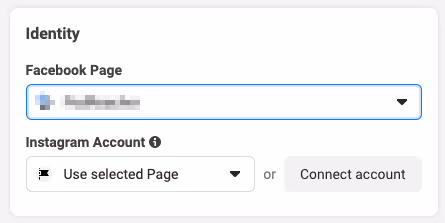
4b: Identity
Choose the business' Facebook page. Connect the business’ Instagram account if you haven’t yet.
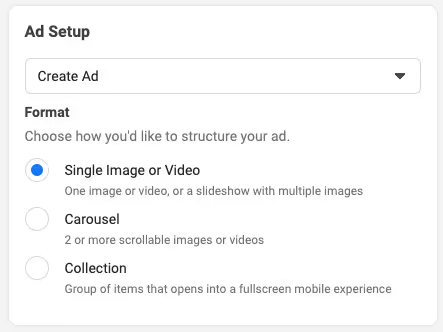
4c: Ad setup and creative
Select the ad type (e.g., flexible, single image or video, carousel, or collection) and upload your ad creative.
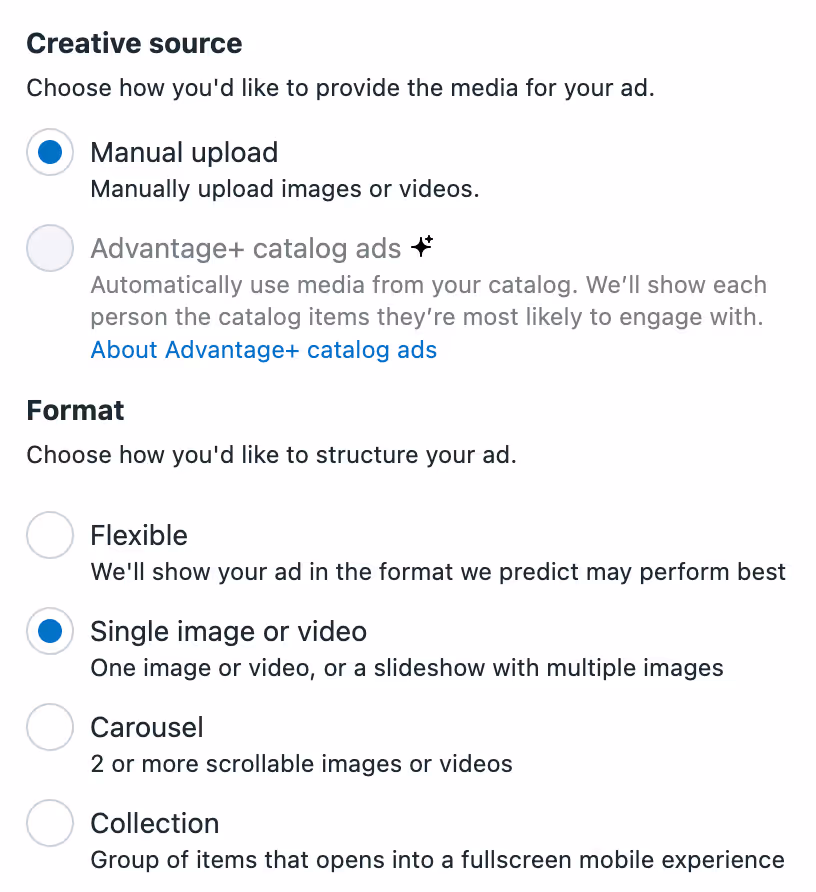
Flexible ads let you upload up to 10 creatives, 5 Primary Texts, 5 Headlines, and 5 Descriptions and Meta will mix and match which they think will perform best.
The rest you specifically upload creatives and give it one Primary Text, Headline, and Description.
In general, I think giving Meta the option to experiment is a great idea so I recommend using Flexible, but if you'd like tighter control, then use Single Image or Video, or Carousel.
Remember to follow Meta's recommendations for different formats and placements' aspect ratios.
A few guidelines for video ads:
- Make sure it has captions. Have Meta review the captions unless you’re in a pinch.
- Create an enticing thumbnail.Users should want to know what happens next; the right thumbnail gets many more people to click and actually watch the video.
- For example, if your product is high-quality pork snacks, your thumbnail might be an image of the snacks being cooked in the oven—the viewer will want to see what the finished food looks like.
Ad copy
Primary Text is the text that appears at the top of a newsfeed ad, above the creative. Headline is the copy that appears below the creative, followed by Description.
We recommend keeping all of your copy in a master doc or spreadsheet for testing purposes.

If you have slight variations of the same copy, Meta also allows you test to running alternate options. When you click into the text fields, an Add Options button will appear. Add 1-2 more variations if you'd like (this is optional).
Some copywriting guidelines:
- Primary Text: Whenever you're targeting a specific interest (i.e. MyFitnessPal, FitBit, Healthy eaters, etc.), call it out in the first sentence of the copy.
- Headline: If the headline is multiple sentences, use periods. If the headline is a single sentence, leave off the period.
- Description: This should be the "social proof" copy in your ad copy doc.
Call to action
For prospecting ads, default to "Learn more" or "Shop Now" (for ecommerce companies). They tend to perform the best.
For retargeting ads, default to "Sign Up" or "Book Now"—or whatever is most appropriate given the product/service. In essence, move further down funnel with your CTA text.
4d: Destination
Add the URL of your ad landing page—where users will go after clicking on your ad. Do not include tracking parameters yet; this will be done in the Tracking section. Do not include a ? at the end.
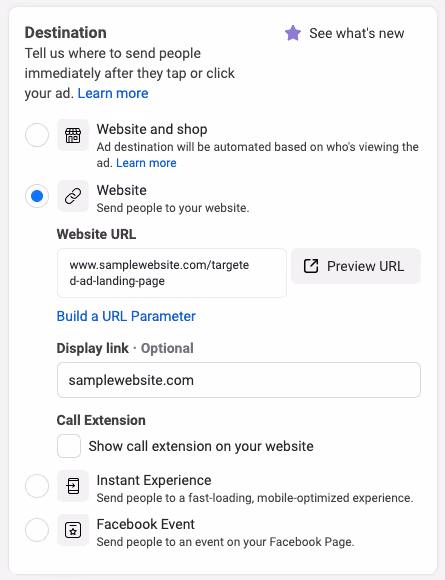
Then set a "clean" display link for your site. Skip the "www." here.
For example, your display link should show fictitiousdogfood.com, even if the ad really takes them to a landing page like fictitiousdogfood.com/fall-promo or a subdomain like stores.fictitiousdogfood.com.
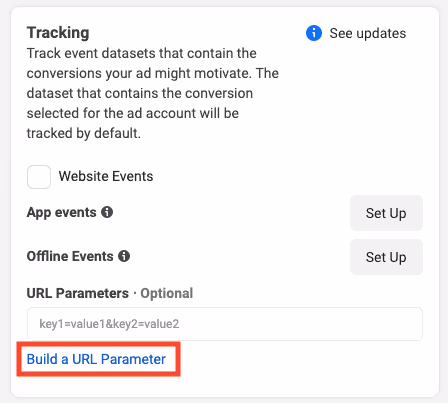
4e: Tracking
To track which ads are getting users to your site, take advantage of Meta's dynamic UTM parameters. These tags automatically populate details from your ads so you can quickly understand the exact source of your traffic in Google Analytics.
You can set up these parameters under the Tracking section at the ad level. Click Build a URL Parameter.
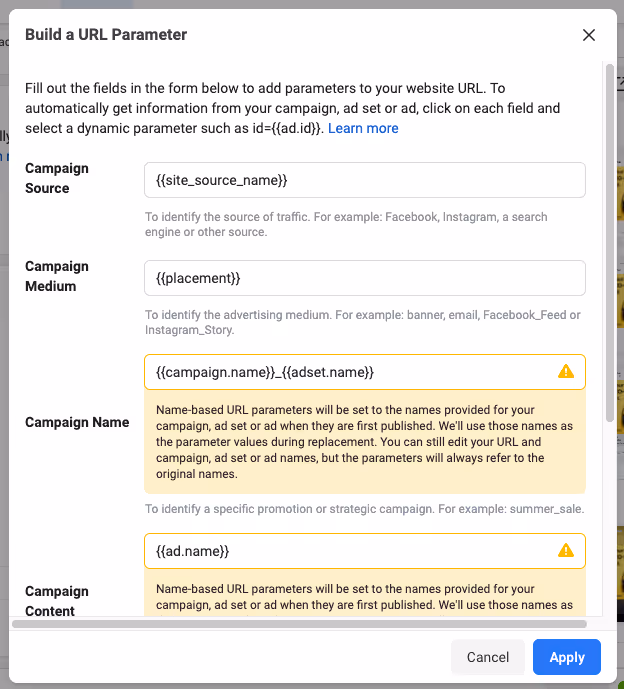
Here's how we recommend setting up your URL parameters:
- Campaign Source:{{site_source_name}}
- There are four possible values: fb (Facebook); ig (Instagram); msg (Messenger); an (Audience Network).
- Campaign Medium: {{placement}}
- There are six possible self-explanatory values: Facebook_Desktop_Feed; Facebook_Mobile_Feed; Facebook_Right_Column; Messenger_Home; Instagram_Feed; Instagram_Stories.
- Campaign Name:{{campaign.name}}_((adset.name}}
- We use two dynamic tags here so you can see which campaign and ad set the ad belongs to.
- Campaign Content:{{ad.name}}
- Find out which specific ad drove users to your site.
Your setup should look like this:
Phase 5: Create other ads in the same ad set
Repeat phase 4 to create other ads in the same ad set. You can play around with duplicating ads to save yourself time.
We recommend creating 3-6 ads per ad set.
If you have a smaller budget, aim for the lower end of this spectrum. This way, you can collect more data per ad. With too many ads in a single ad set and a limited budget, you won't get enough data to determine which creatives are actually effective. Aim for around 10,000 impressions per creative for more accurate data.
When it comes to ad creative experimentation, focus on variety. Try different visual elements, copy, and formats. Approach your product from many different angles. The idea is to test drastically different ads to see which drive more results; then tweak and adjust based on your observations.
Publish each ad set after you duplicate ads to it; this “saves” your changes (make sure your campaign and ad sets are off). Meta starts to act weird and confusing if you duplicate too many ad sets at once.
Meta's algorithm skews your ad spend toward the top-performing creatives in an ad set. Sometimes it jumps to conclusions very early, showing what it perceives to be the most successful ads more frequently than others. So even if one ad appears to be more successful than others in the same ad set, take this with a grain of salt. You should relaunch ads at different times to see if anything changes—don't rule out ad creatives based on a single session of being live.
Phase 6: Review and publish
Review both your ad sets and ads.
Set the reminders from our Meta Ad Optimization reading.
Then click that big blue button to turn on your Meta ads.