Conversation


🥳 Feedback Received!
Thanks for taking a moment to share your thoughts — it genuinely helps us make each chapter sharper.
What happens next:
- Your feedback goes straight to our product team.
- We’ll use it to refine lessons, clarify examples, and make the program even more useful.
Appreciate you helping make this program better for everyone.
Ready for your next challenge? 👇
Project: Search Ads
The Growth Program is about doing, not just learning.
So, instead of trying to teach you every little thing about Search Ads before we start doing anything, we're going to do this in stages.
So, let's get started with the basic structure of your account.
What you’ll do
- Set up your account
- Create your first campaigns and ad groups
- Add your initial keywords
Prerequisites
- Google Ads conversion tracking should have been set up
- A product and website to create campaigns for
Introduction
In this project, we’ll set up your first campaign(s), ad groups, and keywords. They will be rough, unoptimized, and potentially entirely wrong.
But that’s okay!
In future lessons, you’ll learn how to choose the right keywords, write ad copy, add ad assets, change landing pages, improve targeting, change campaign structure, and optimize.
We won’t even create ads for now since we haven’t talked about ad copy yet.
This project aims to get you comfortable with the interface and apply your first lesson. Again, we didn't want you to read for 10 hours before doing anything!
After additional lessons to improve the individual pieces, we'll return to these campaigns later.
We’ll use the Growth Program as an example, but apply the steps to your own business.
Phase 1: Setup
Make a copy of the Google Doc template.
Then, skim this completed doc to see what we’re working towards.
Phase 2a: Campaigns
Since we're just getting started and we're realistically going to have a modest testing budget, we'll keep this relatively simple with these parameters:
- Optimize for those most likely to purchase
- No branded campaigns (i.e. terms without your brand name)
- Keep it simple, only one campaign
So we'll just do one campaign called:
Campaign: Search – High-Intent Leads
- Objective: Capture users actively looking for the product/service
- Bidding: Maximize Conversions (switch to Target CPA after 30+ conversions)
- Budget: ~$50-100 per day
- Location: United States, Canada, United Kingdom (or wherever you ship/sell)
Phase 2b: Decide on ad groups
After you make your campaigns (it will happen, we promise), we’ll need to add some ad groups to your campaign. As a reminder, ad groups are grouped together based on user intent. For example:
- Direct purchase intent
- Problem-solution searches
- Note: if you solve numerous problems, you could break this into several related ad groups
- Competitor alternatives
Replace the ad groups in your doc with the relevant ad groups.
You will decide the keywords in the next step.
Phase 3: Decide on keywords
Google recommends 5-12 related keywords per ad group, but in the name of simplicity, you can do ~3 keywords per ad group for now.
Use any words you think people would Google in that category. We’ll have a more systematic way of developing these in a bit.
Or, frankly, just give ChatGPT your product page and ask it to give you keywords for your ad groups.
For example, for the Growth Program, we might do something like this:
Ad Group 1: Direct Purchase Intent
- Keywords:
- growth marketing course
- best growth marketing training
- learn growth marketing online
- Landing Page: Direct to product/service page
Ad Group 2: Problem-Solution Searches
- Keywords:
- how to scale a startup
- best customer acquisition strategies
- how to get more users
- Landing Page: Content-driven page explaining benefits, with CTA
Ad Group 3: Competitor Alternatives
- Keywords:
- CXL alternatives
- alternative to Reforge growth course
- Landing Page: Competitor comparison page
Add these to your doc.
Phase 4: Add your first campaign to Google Ads
Now that you’ve specced out your initial campaigns, ad groups, and keywords, it’s time to add them to Google Ads.
Here’s how to do the first one.
Note: If the screen you end up at doesn't seem to follow these steps, look for a link that says something like "I'm an expert. Skip this." and click it.
4a. Start a new campaign
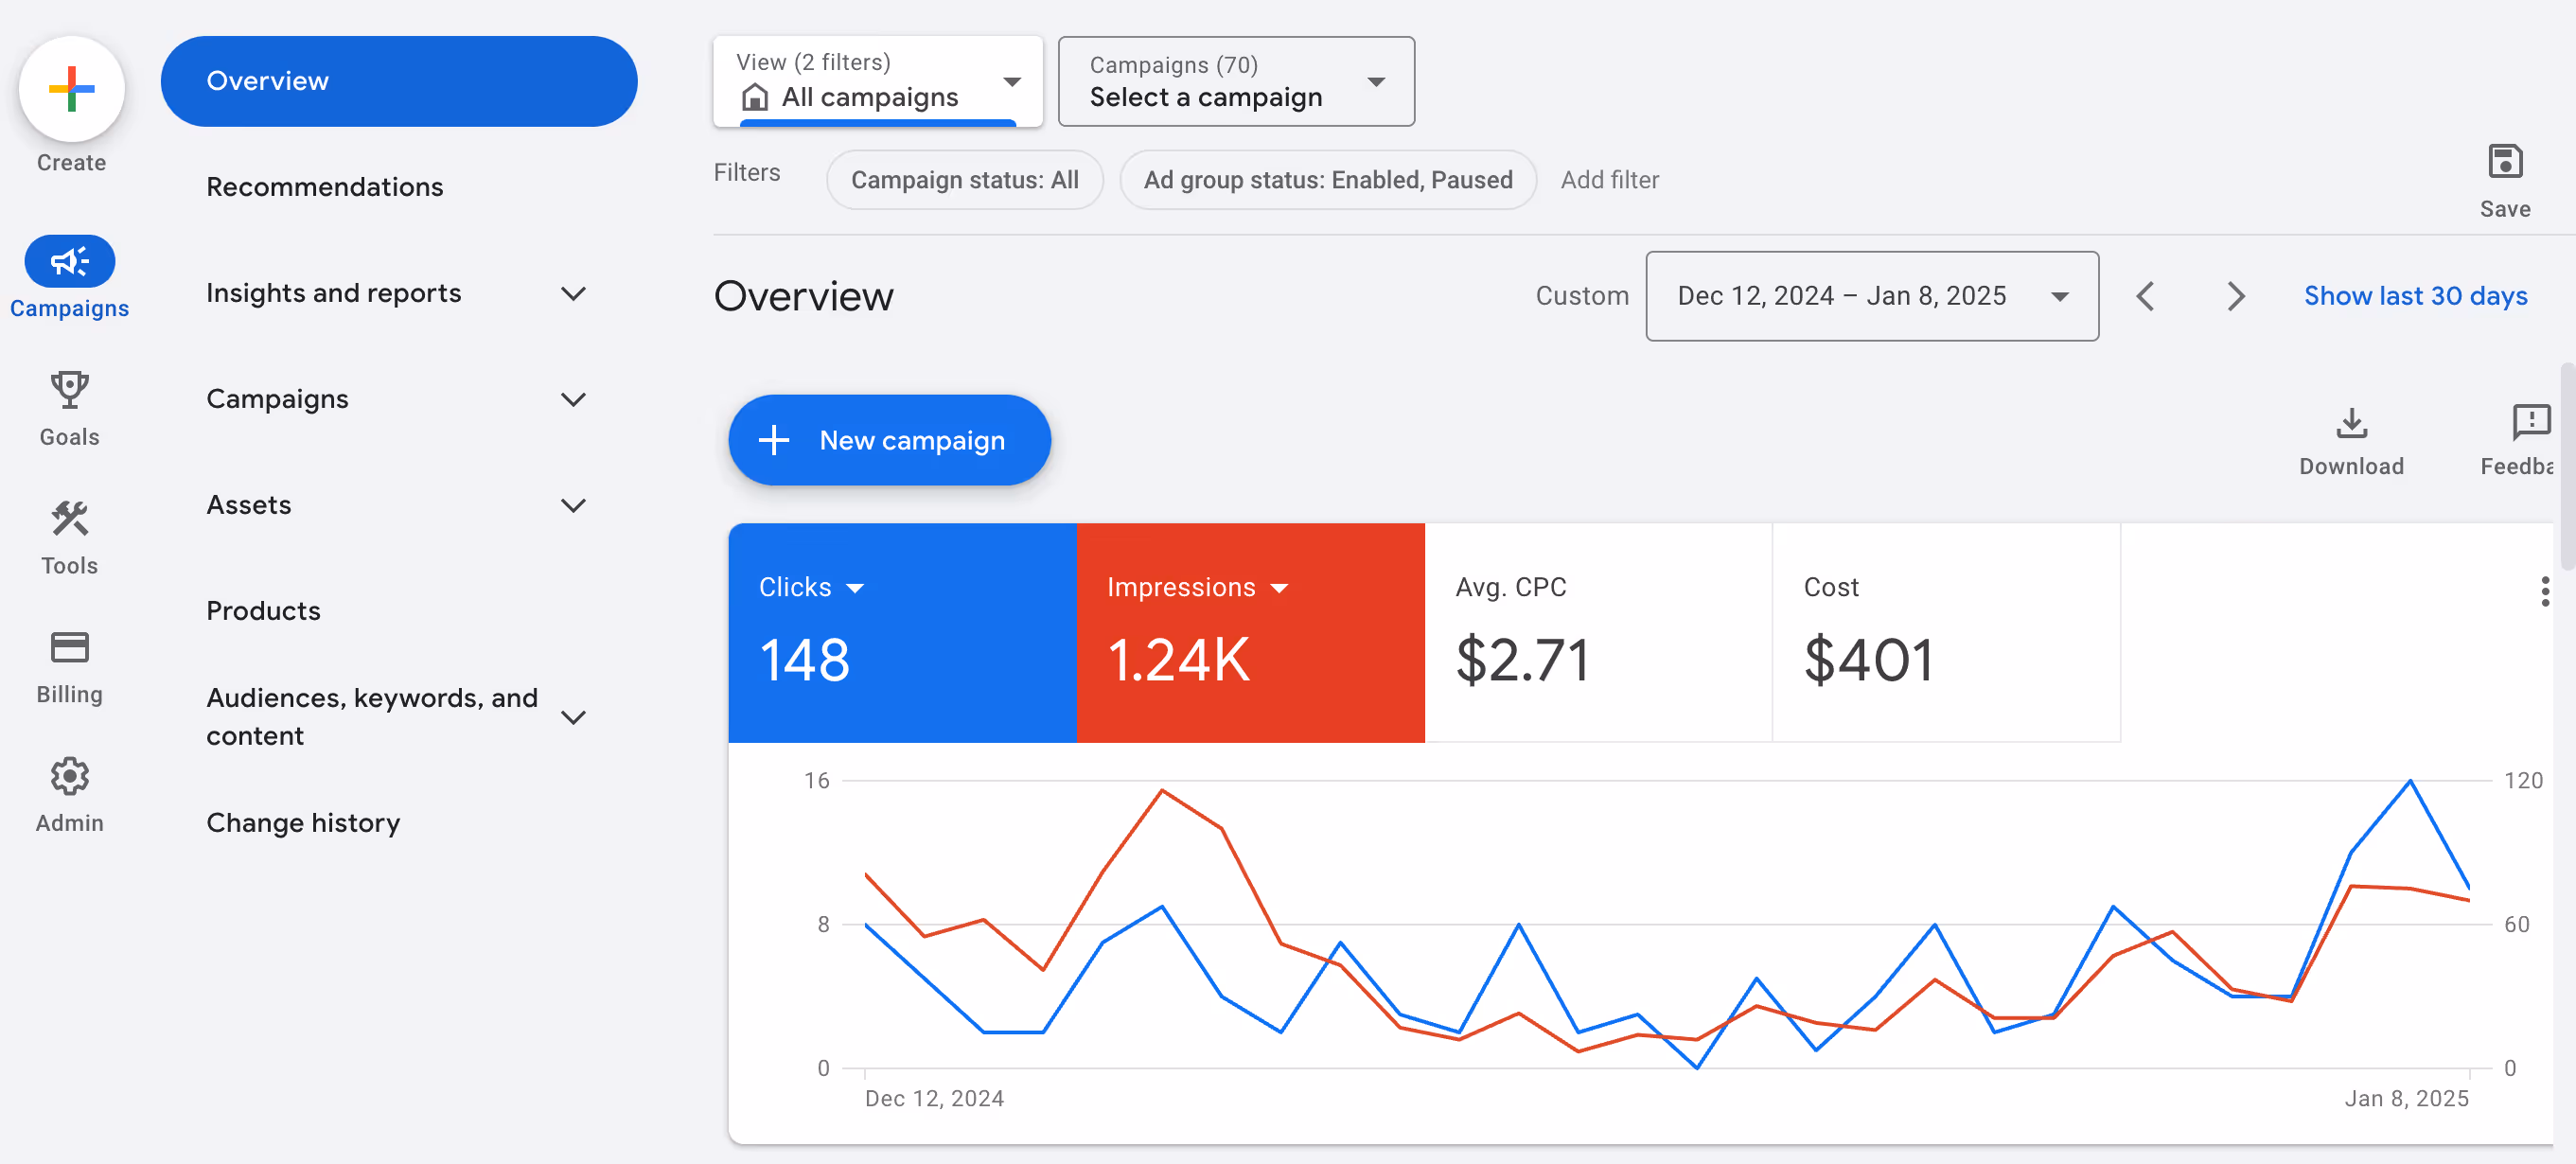
First, go to your Google Ads dashboard
You can either:
- Click the big blue + New Campaign button then click + New Campaign again or
- Click Create in the top left and then Campaign
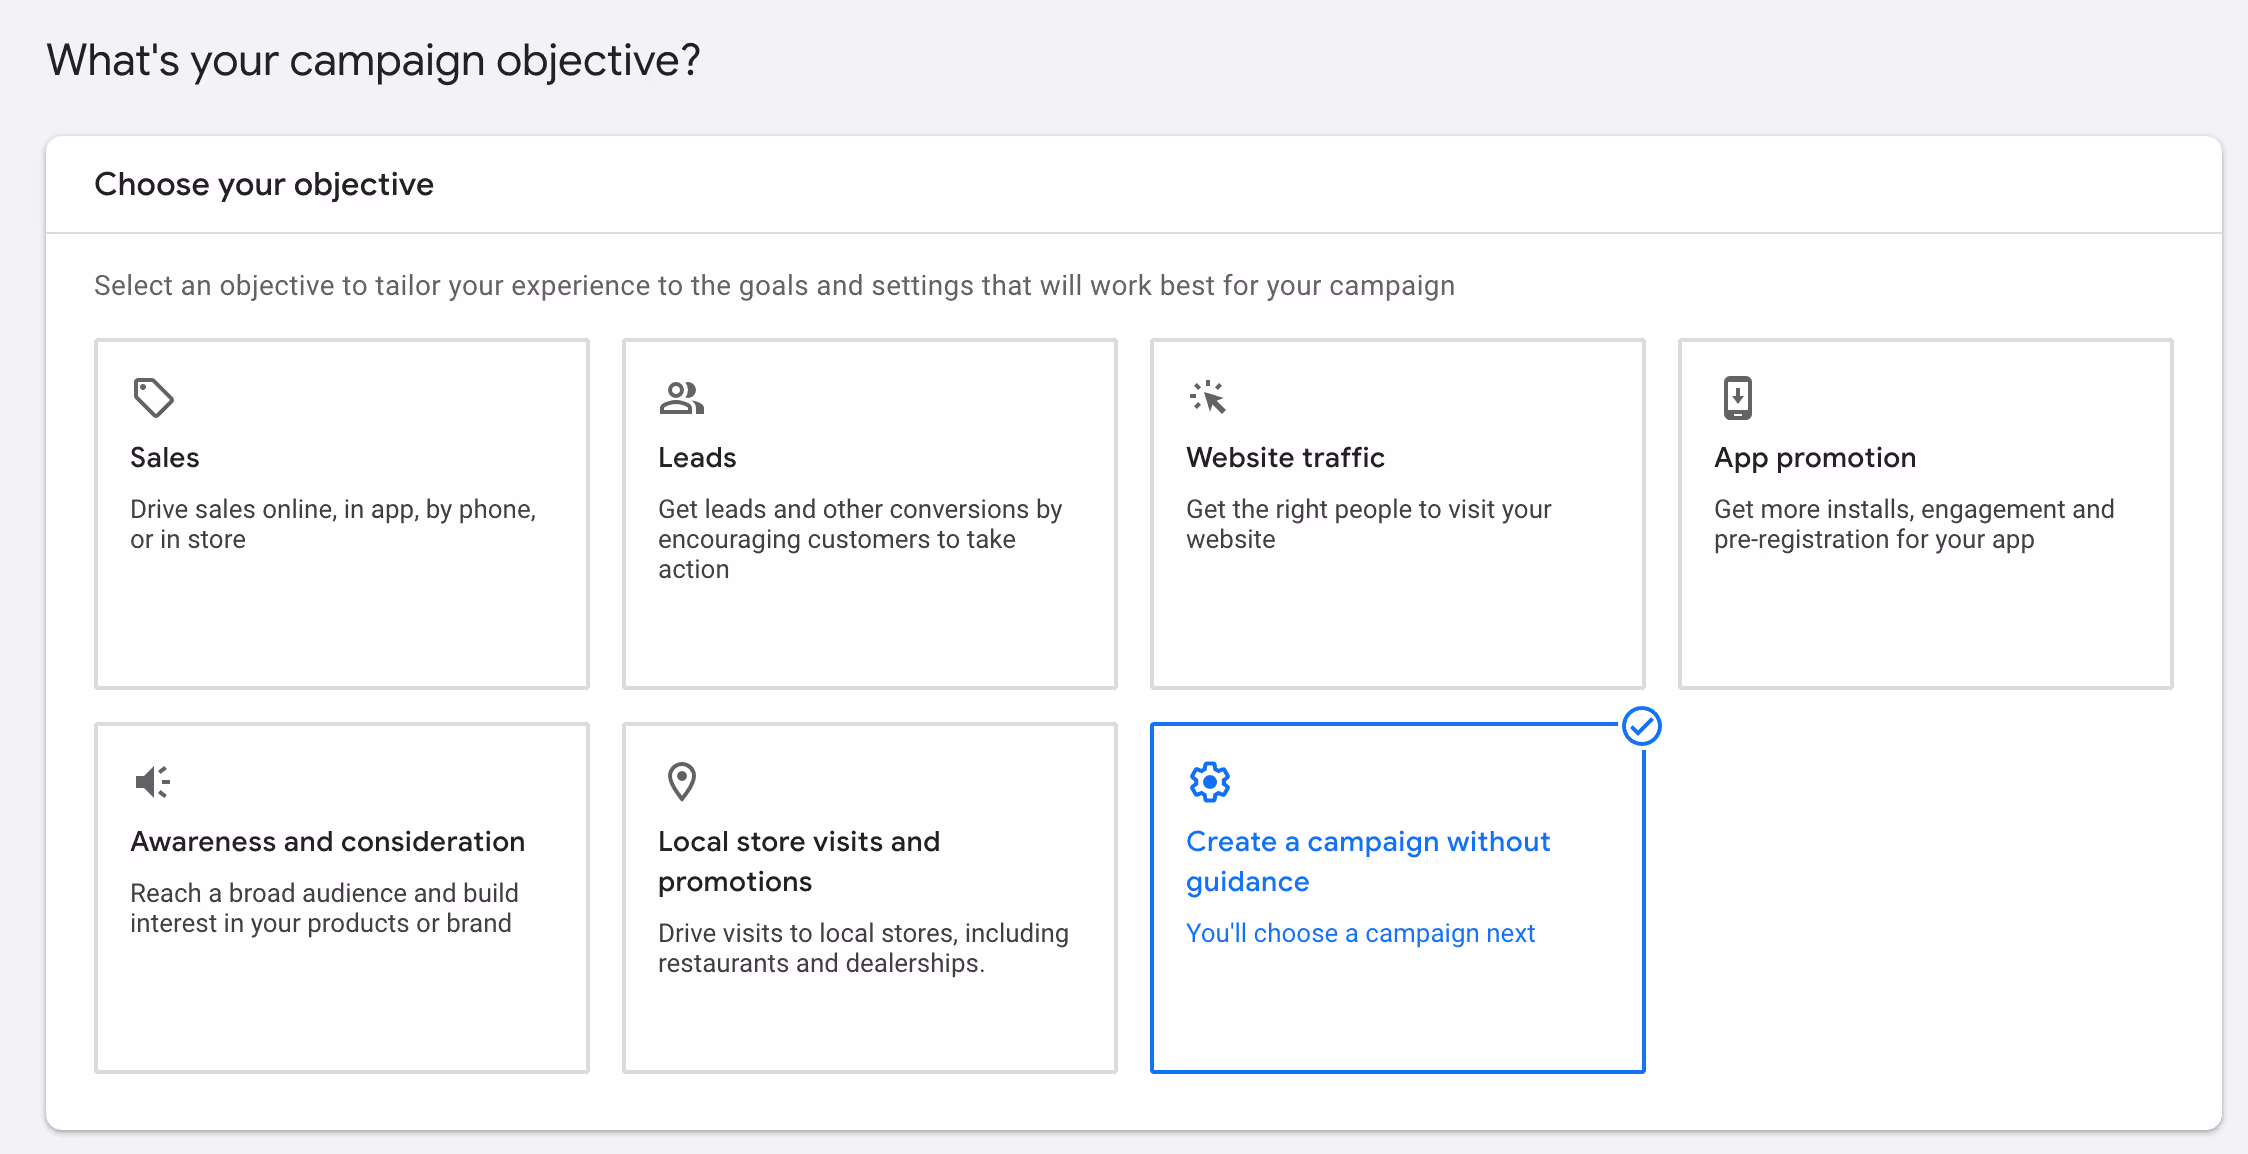
Then let's just do Create a campaign without a goal's guidance. Google will make recommendations for you depending on the other choices, but we’re here for that 🙂
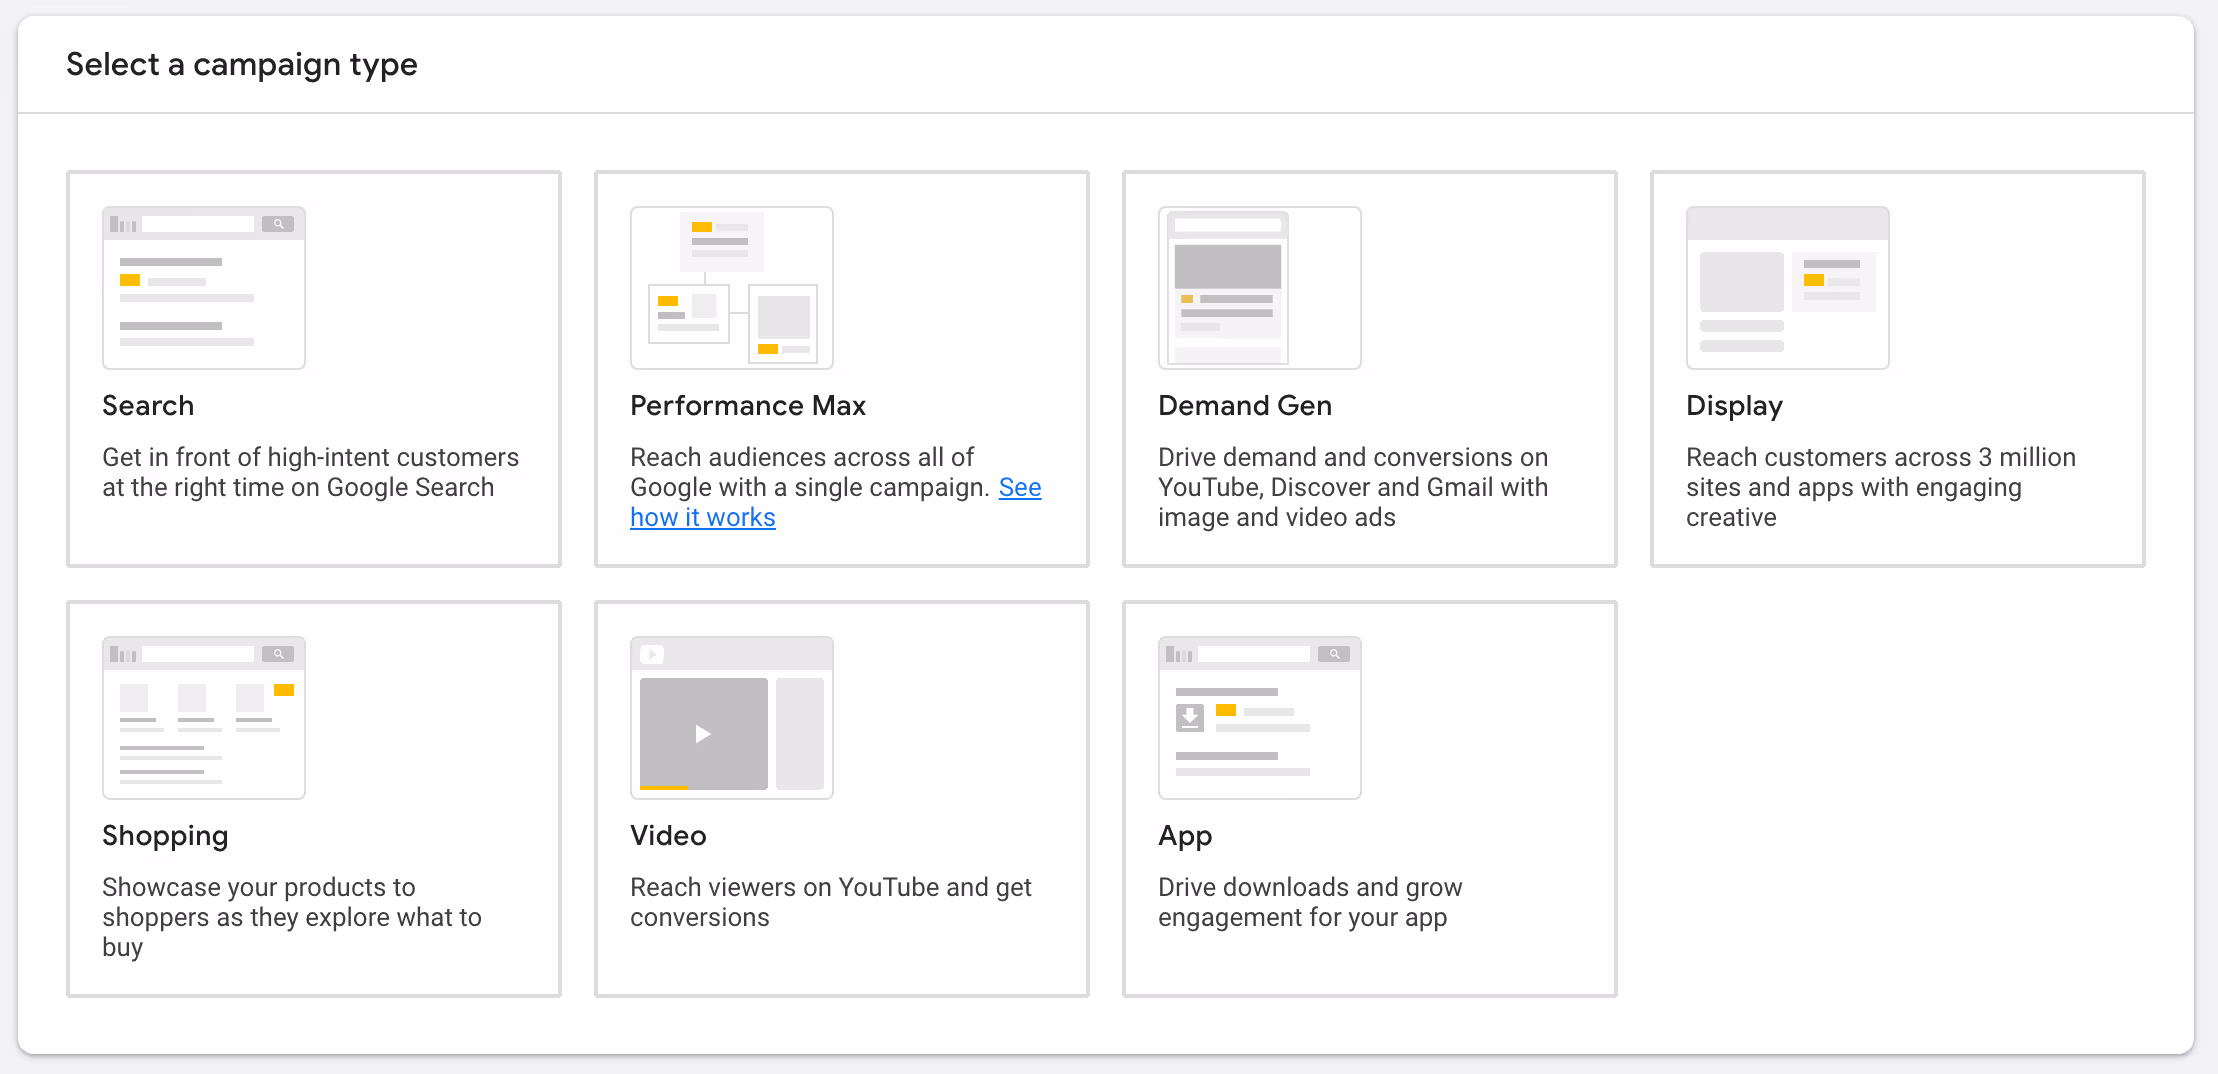
Choose Search
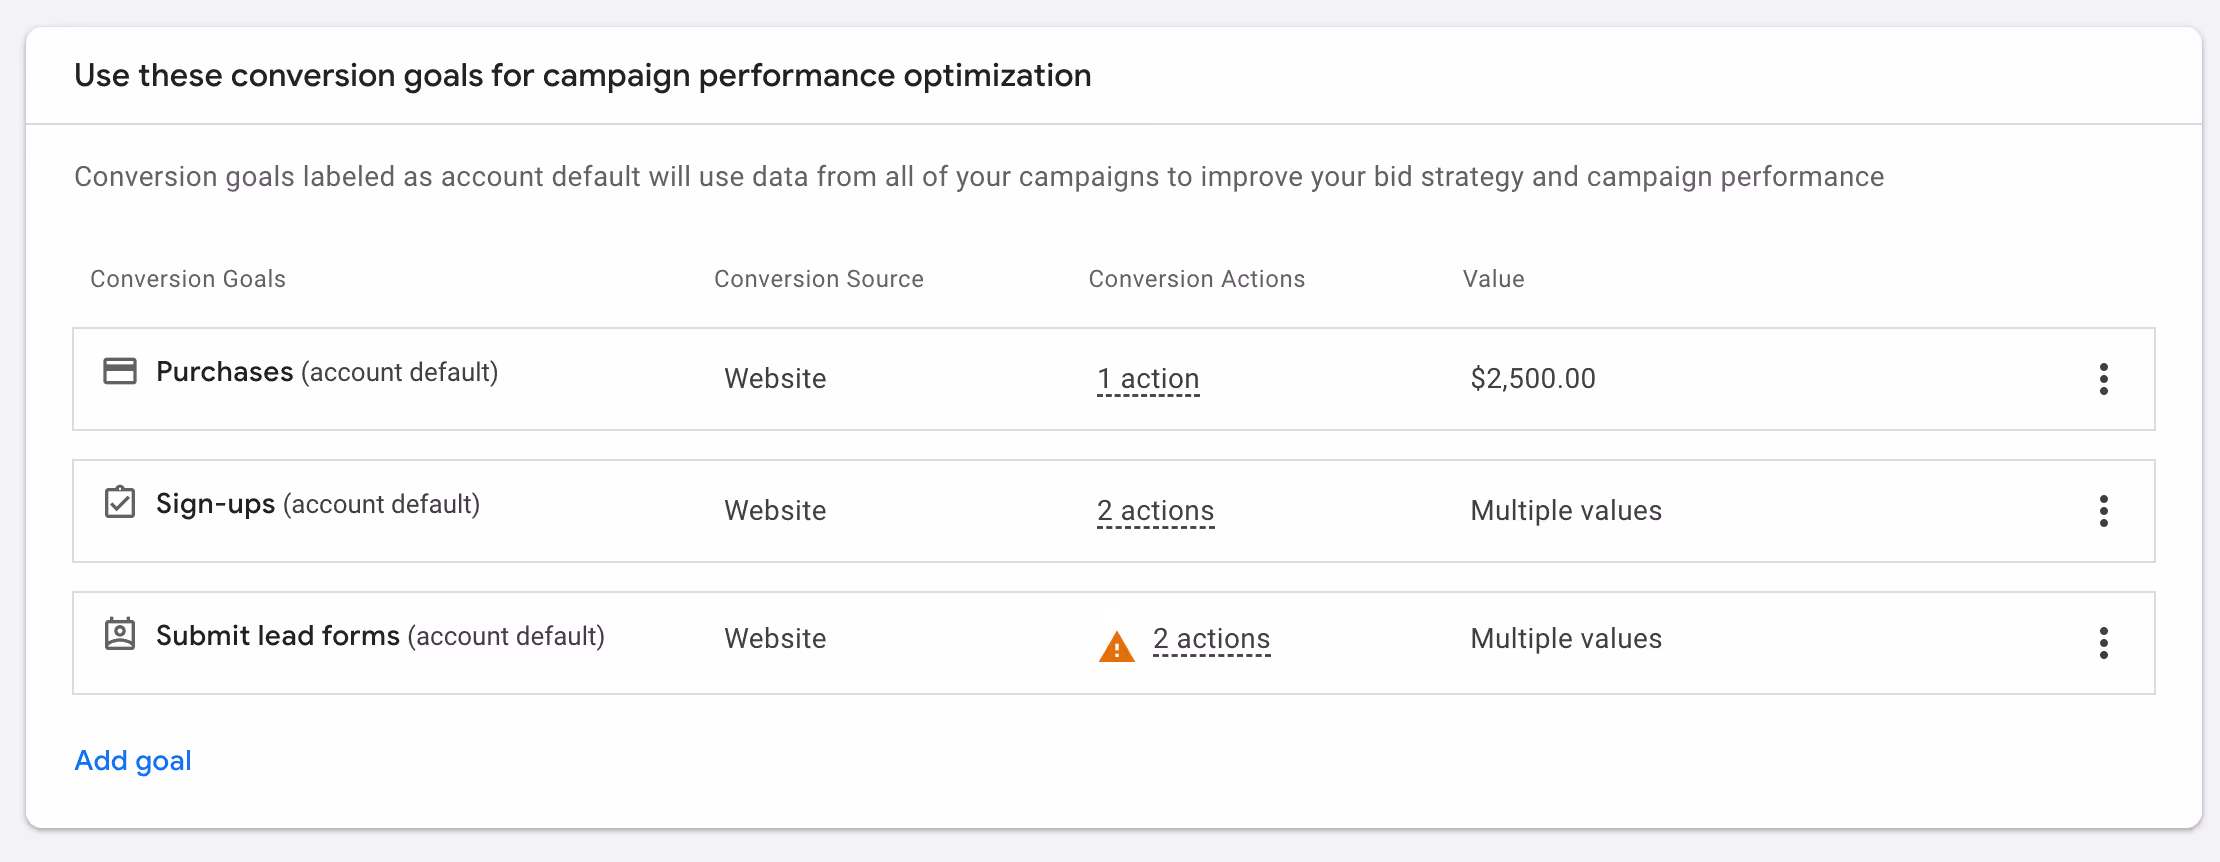
Next, you'll see three conversion goal options to choose from. Leave these blank for now. We'll circle back and define campaign goals in a later step.
Then choose Website visits and enter your site:
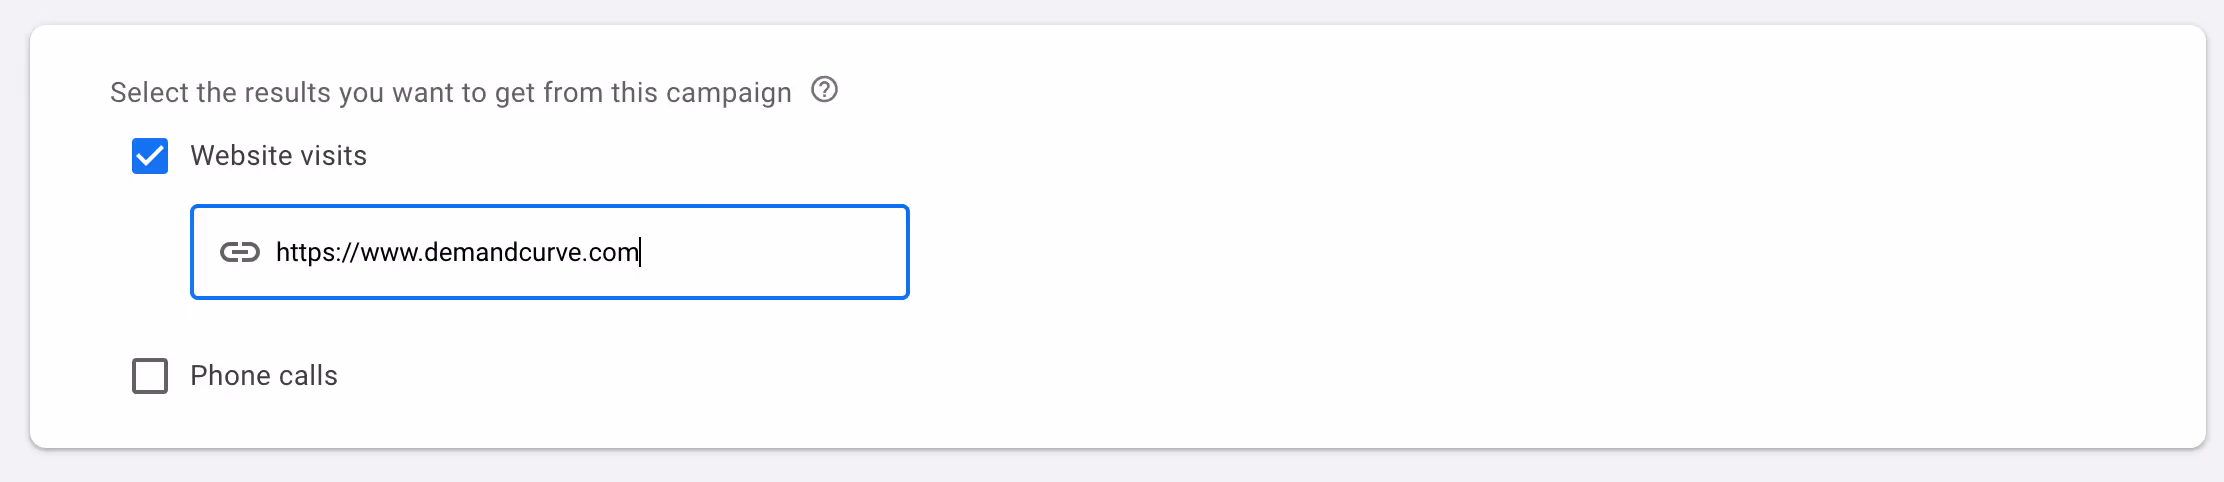
Campaign name: Give your campaign a name. For now, do Search – High-Intent Leads

Click Continue. Next we move onto all the various campaign settings that looks like this:
4b. Configure campaign settings
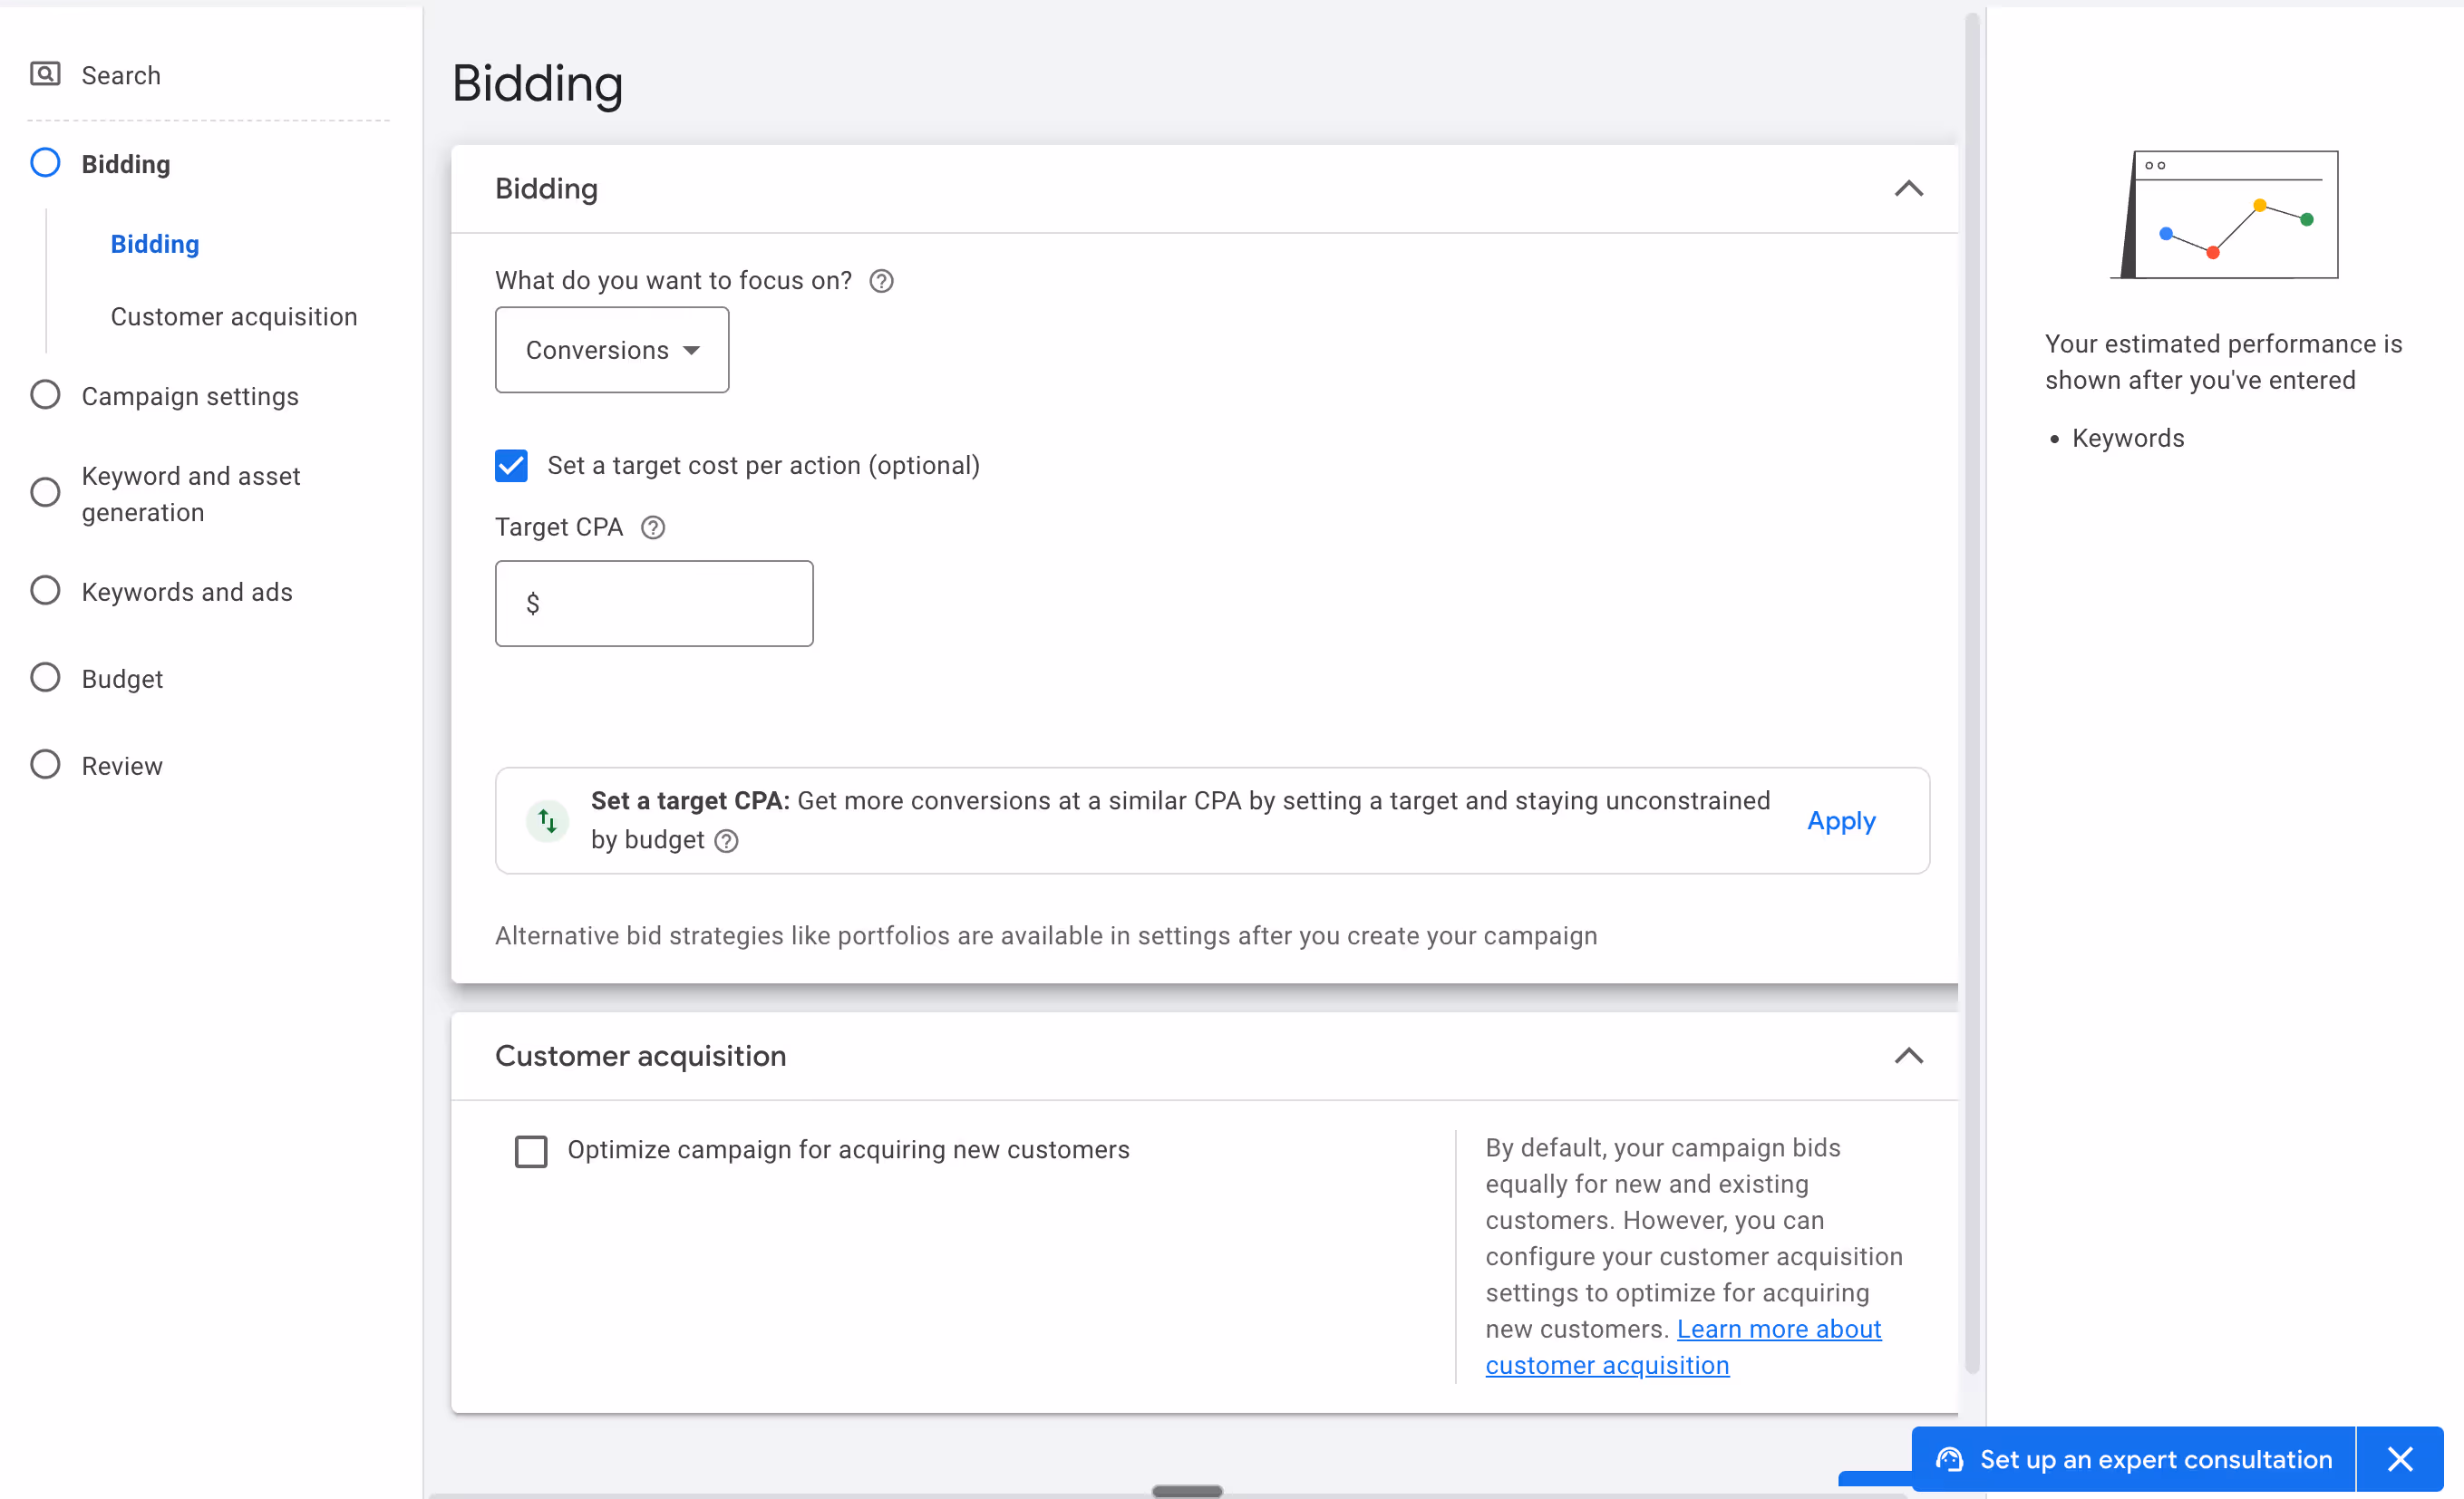
Bidding
- Bid strategy: Select 'Conversions' from the 'What do you want to focus on?' dropdown. It will likely be the default.
- The algorithm has gotten so good that it's generally advisable to let Google decide how much you're willing to pay per click (because it will automatically charge a lot for a hot lead, and not much for a cold lead).
- Target CPA: This is optional, but it lets you set how much you're willing to pay per conversion on each keyword.
- Remember there's a trade off between CPA and volume. If you sell a thing for $100 that costs you $40 to service, you can afford max $60 per conversion. If you set it to $30, you'll get fewer conversions but each conversion will be more profitable. If you set it to $60, you'll get more conversions but you'll be breaking even. Balance this accordingly.
- Usually at the initial stages you'll want to see if Search Ads can work AT ALL. So I'd recommend putting a higher than ideal Target CPA.
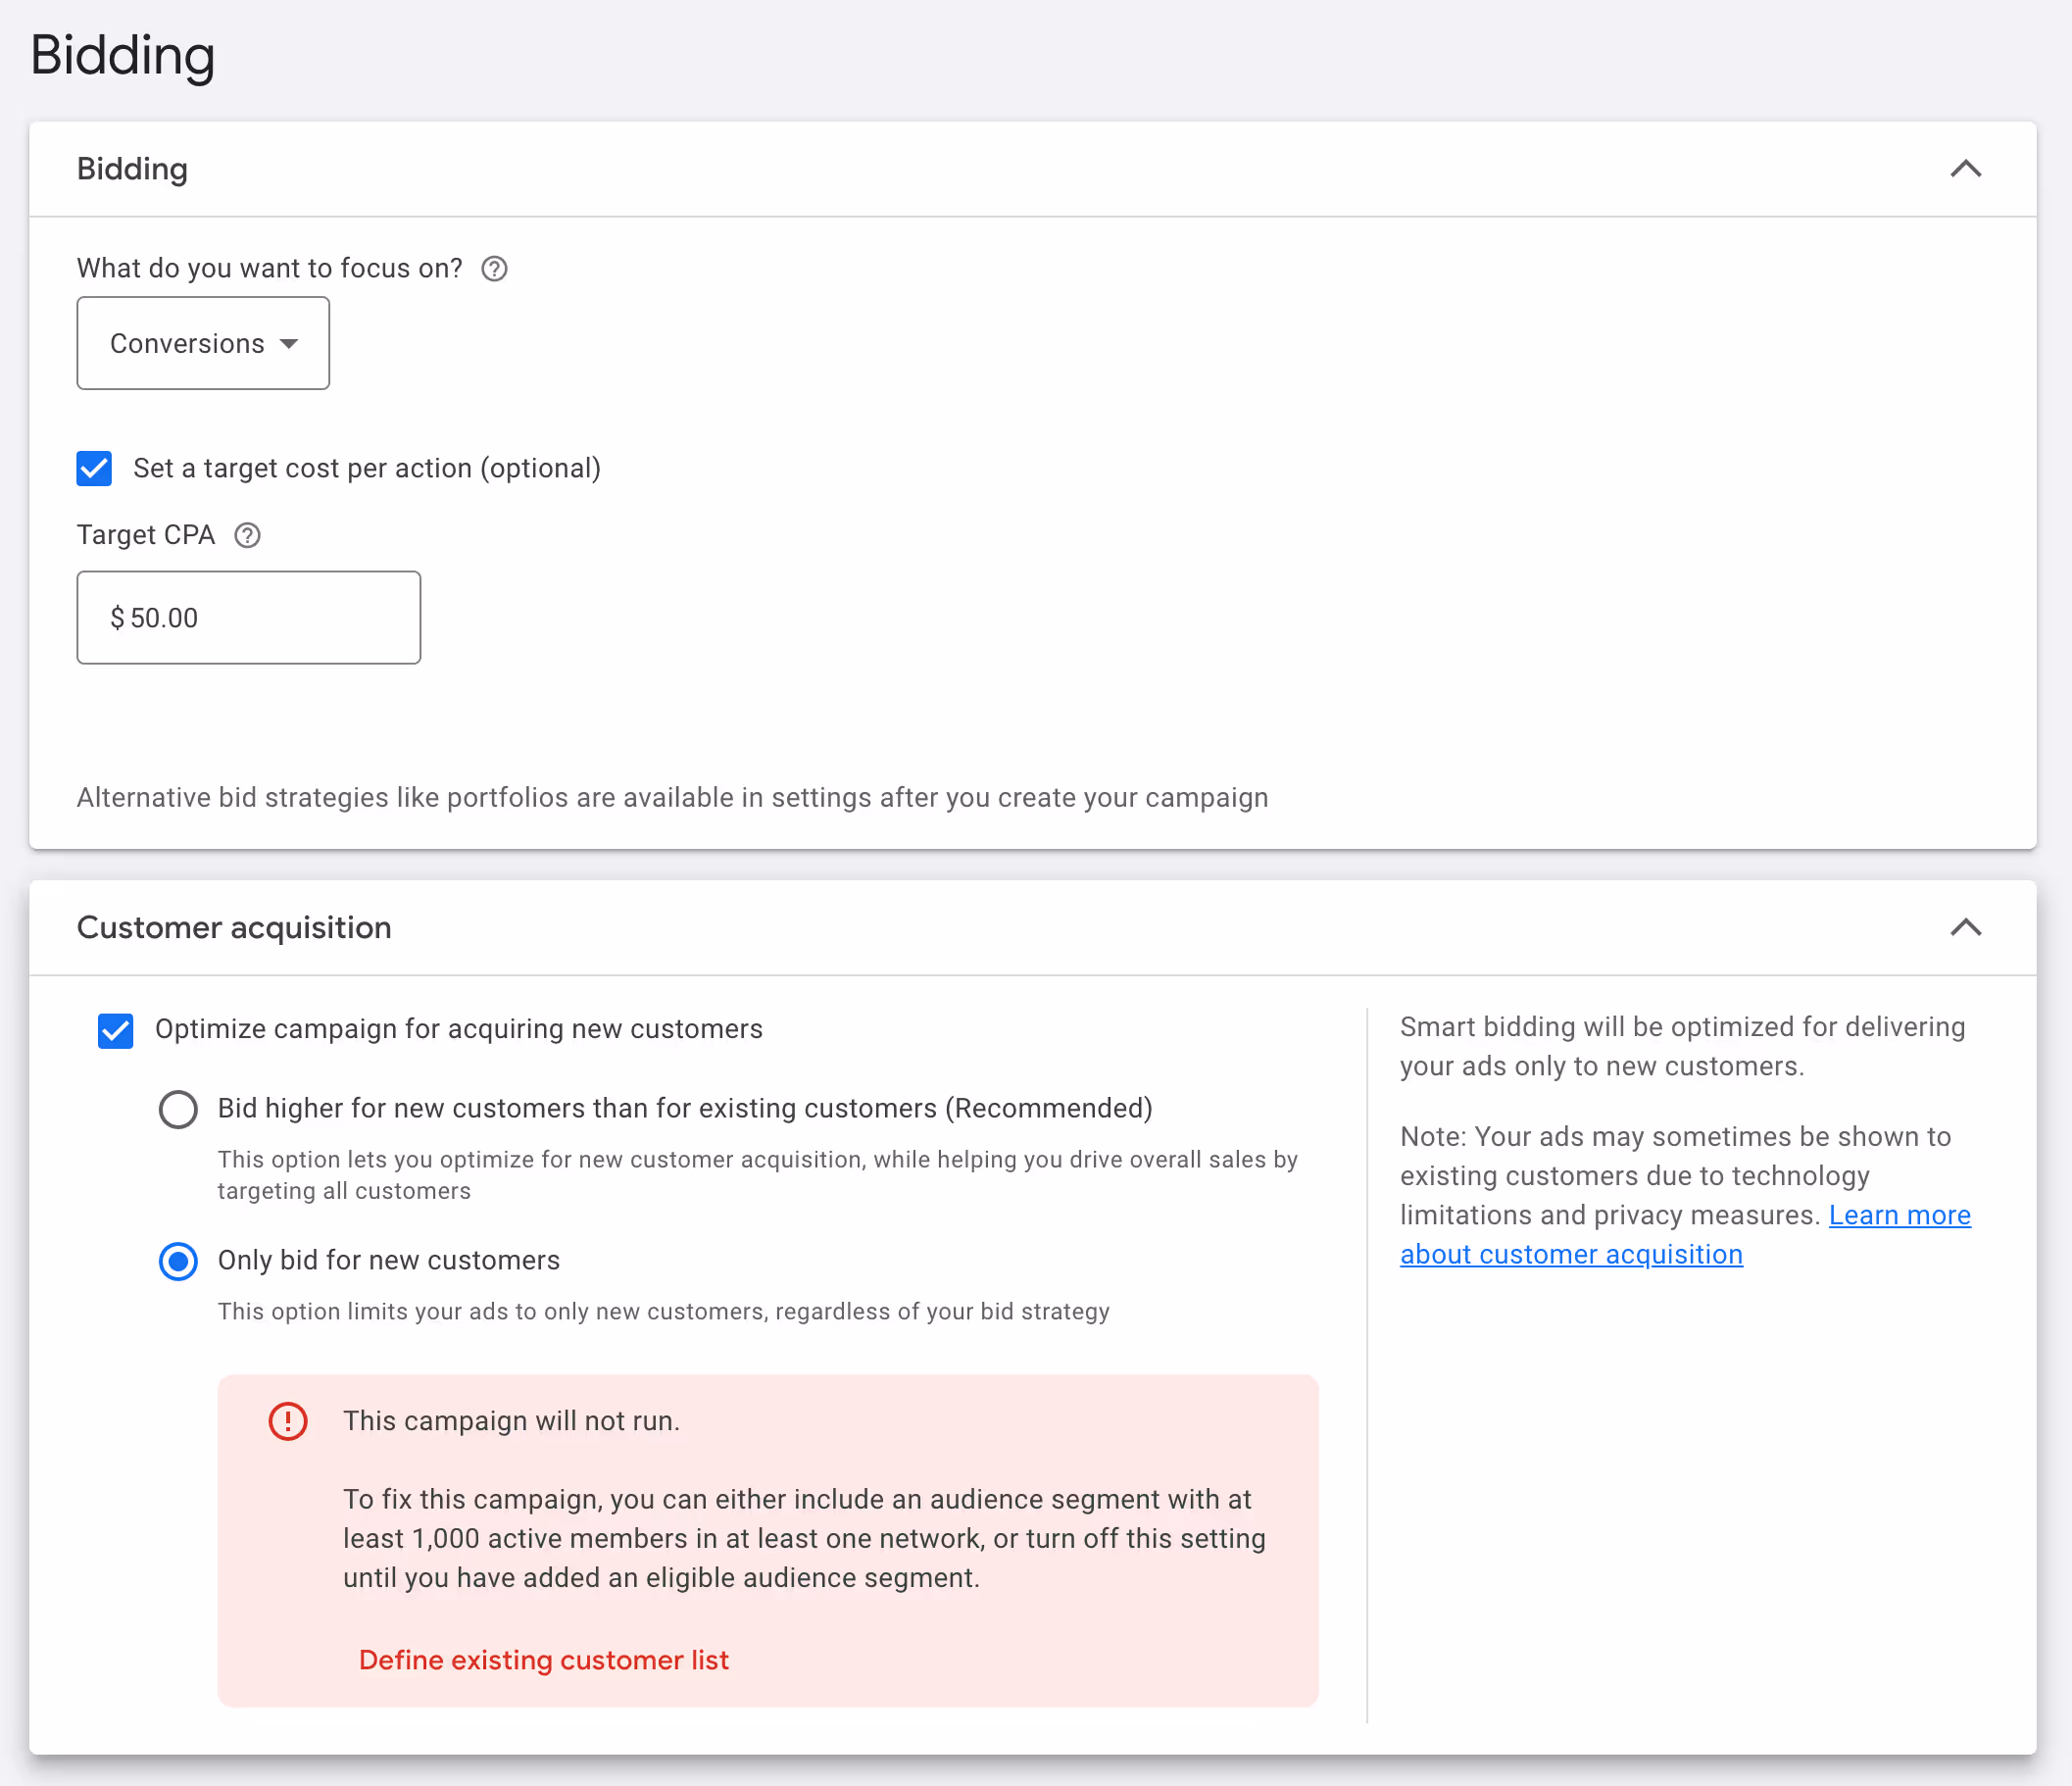
- Customer Acquisition: Here you can get Google to treat existing customers differently—which is a good idea since you are looking to GROW your customer base, not just squeeze more from your existing one (which you can also do with email marketing).
- If you have a list of > 1,000 existing customers then you can check the box for "Optimize campaign for acquiring new customers" and upload that list. It can either be static (a CSV upload) or dynamic (defined from past conversions).
- If you don't have that list, just leave this blank for now
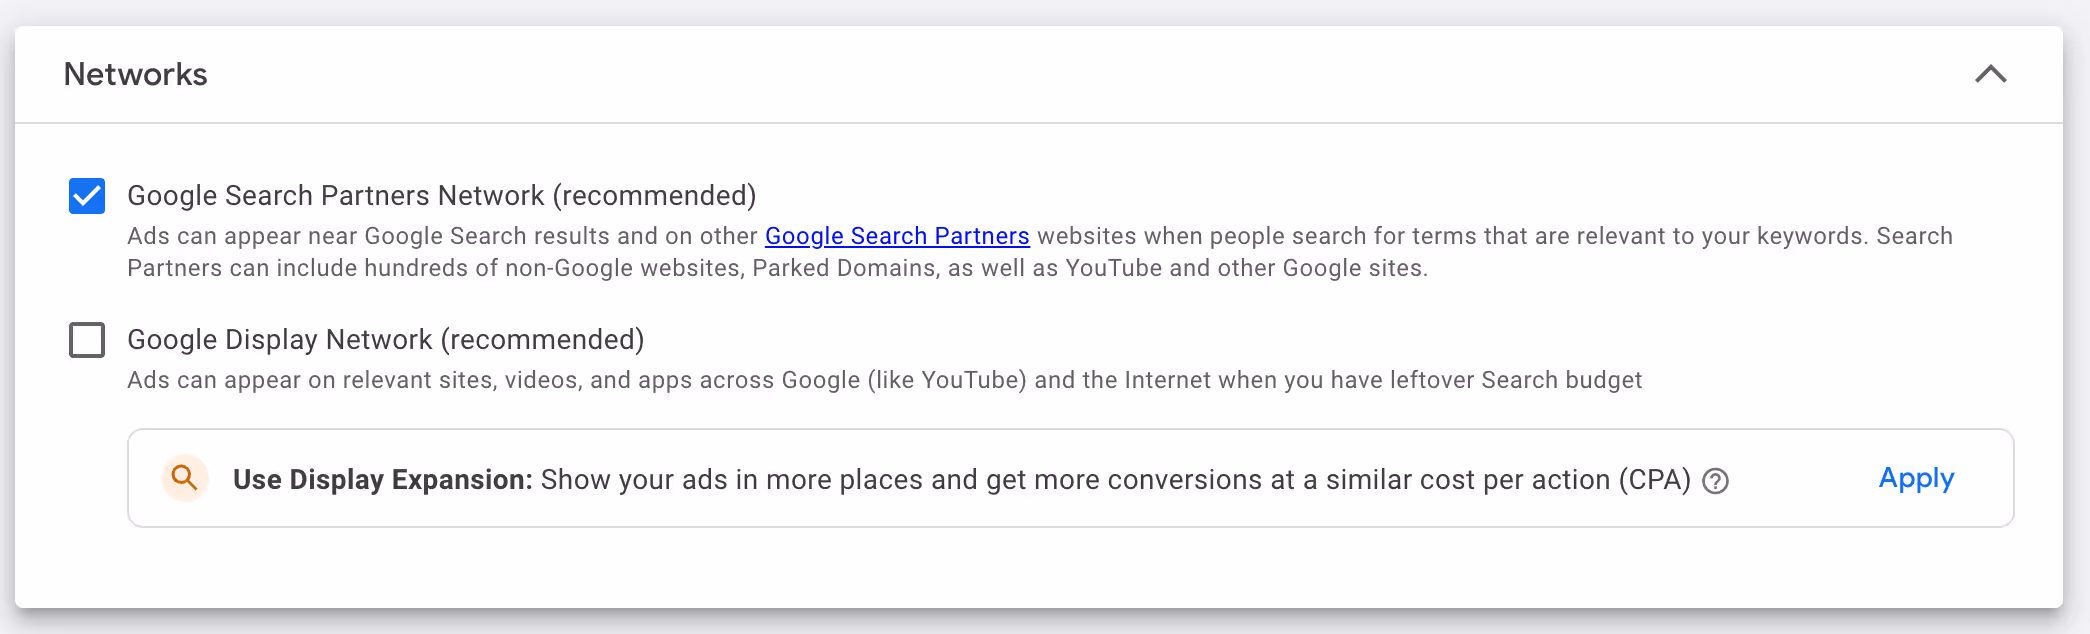
Networks
- Search: Keep Google Search Partners Network enabled
- Display: We recommend disabling Google Display Network for now so you can focus on just testing Search out for now. You can test Display later.
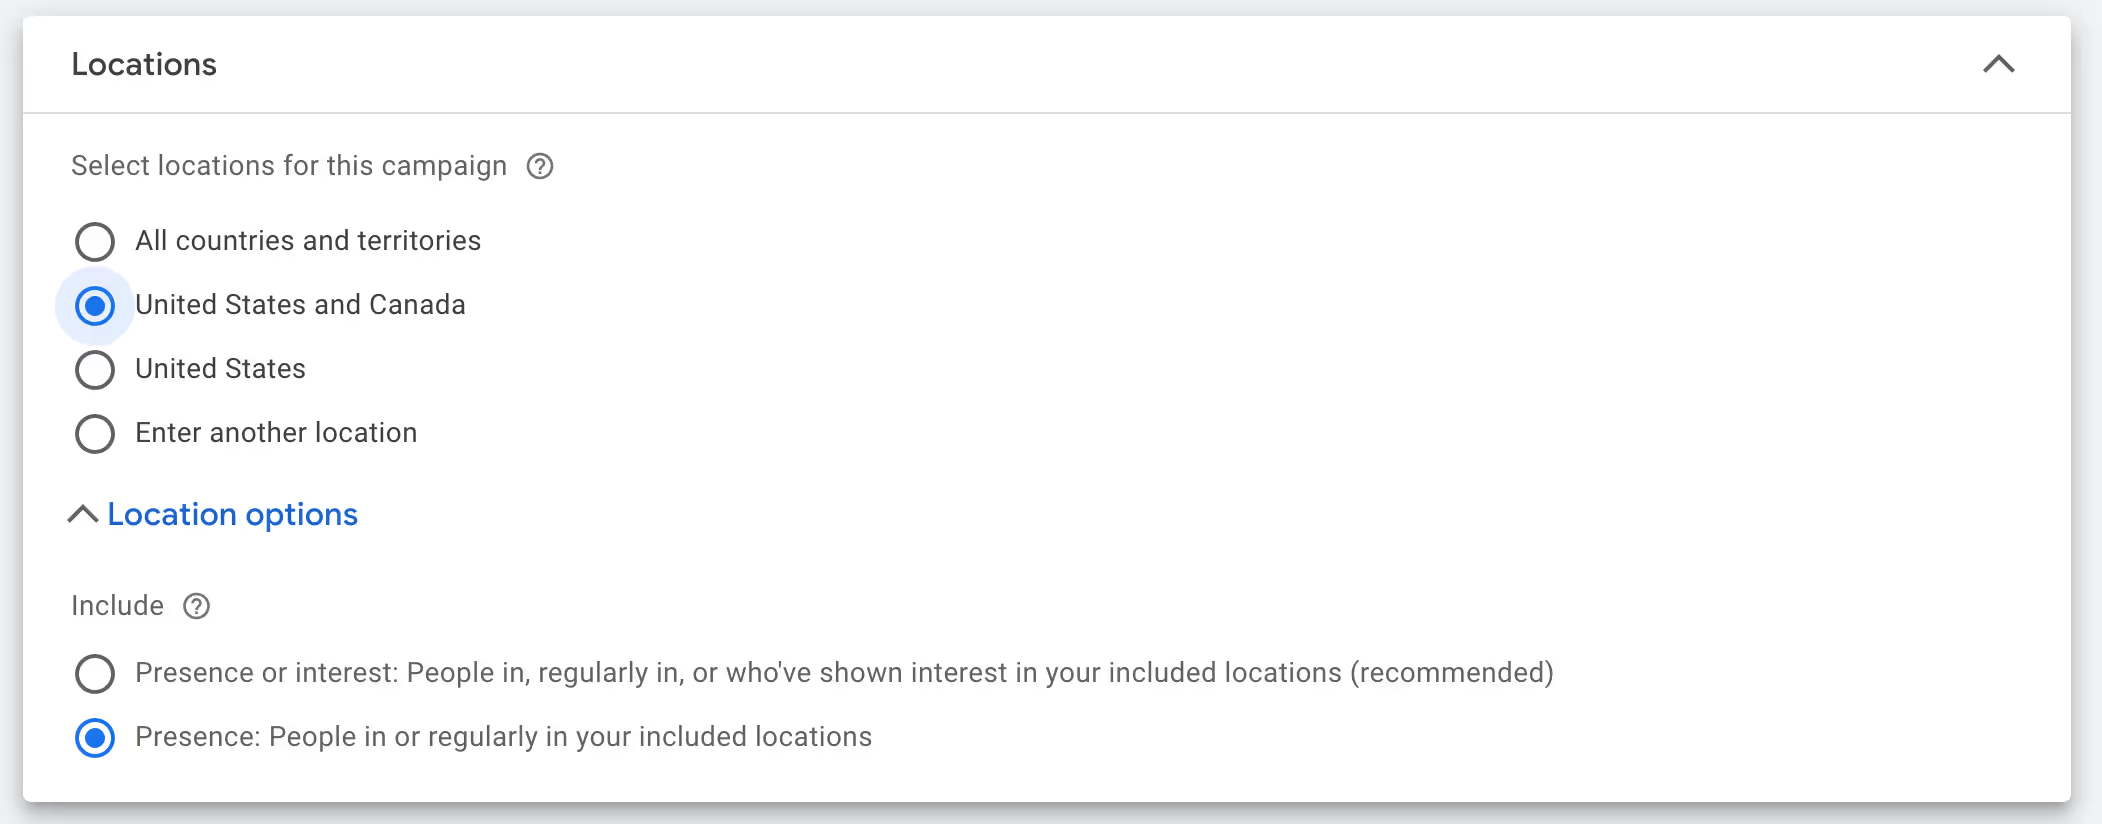
Locations
Add your main target market, such as the United States and Canada
We'll dive deeper into Location targeting later but for now expand Location options and select Presence. This ensures it only targets people who LIVE in those places.
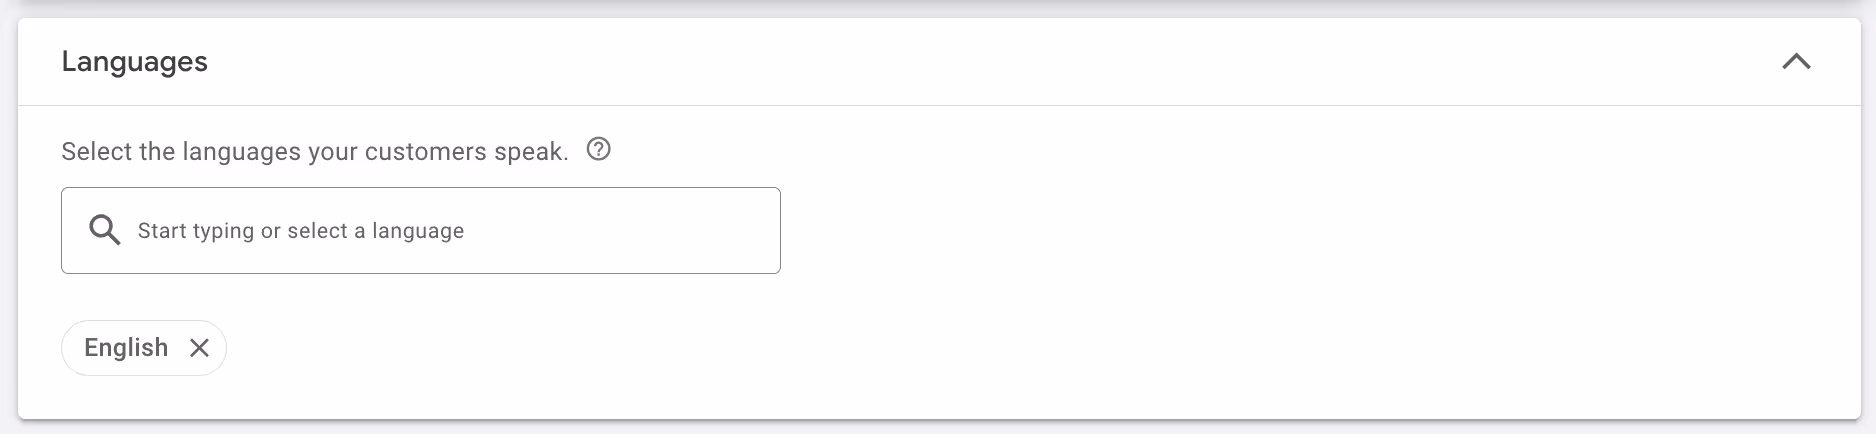
Languages
Use your main target language, such as English
Audience Segment
Just leave this the way it is for now!
Broad match keywords
Keep this on.
As we've said, Google's algorithms are really good and are increasingly getting better. We definitely recommend keeping this enabled so you leave it more up to the algorithm. Doing it manually by turning this off will more than likely end up backfiring.
Automatically created assets
This is default off. If you want to test it, you can try turning it on as it may give you great results—or at least be a good starting point.
Otherwise, I'll walk you through creating stuff yourself.
Click Next
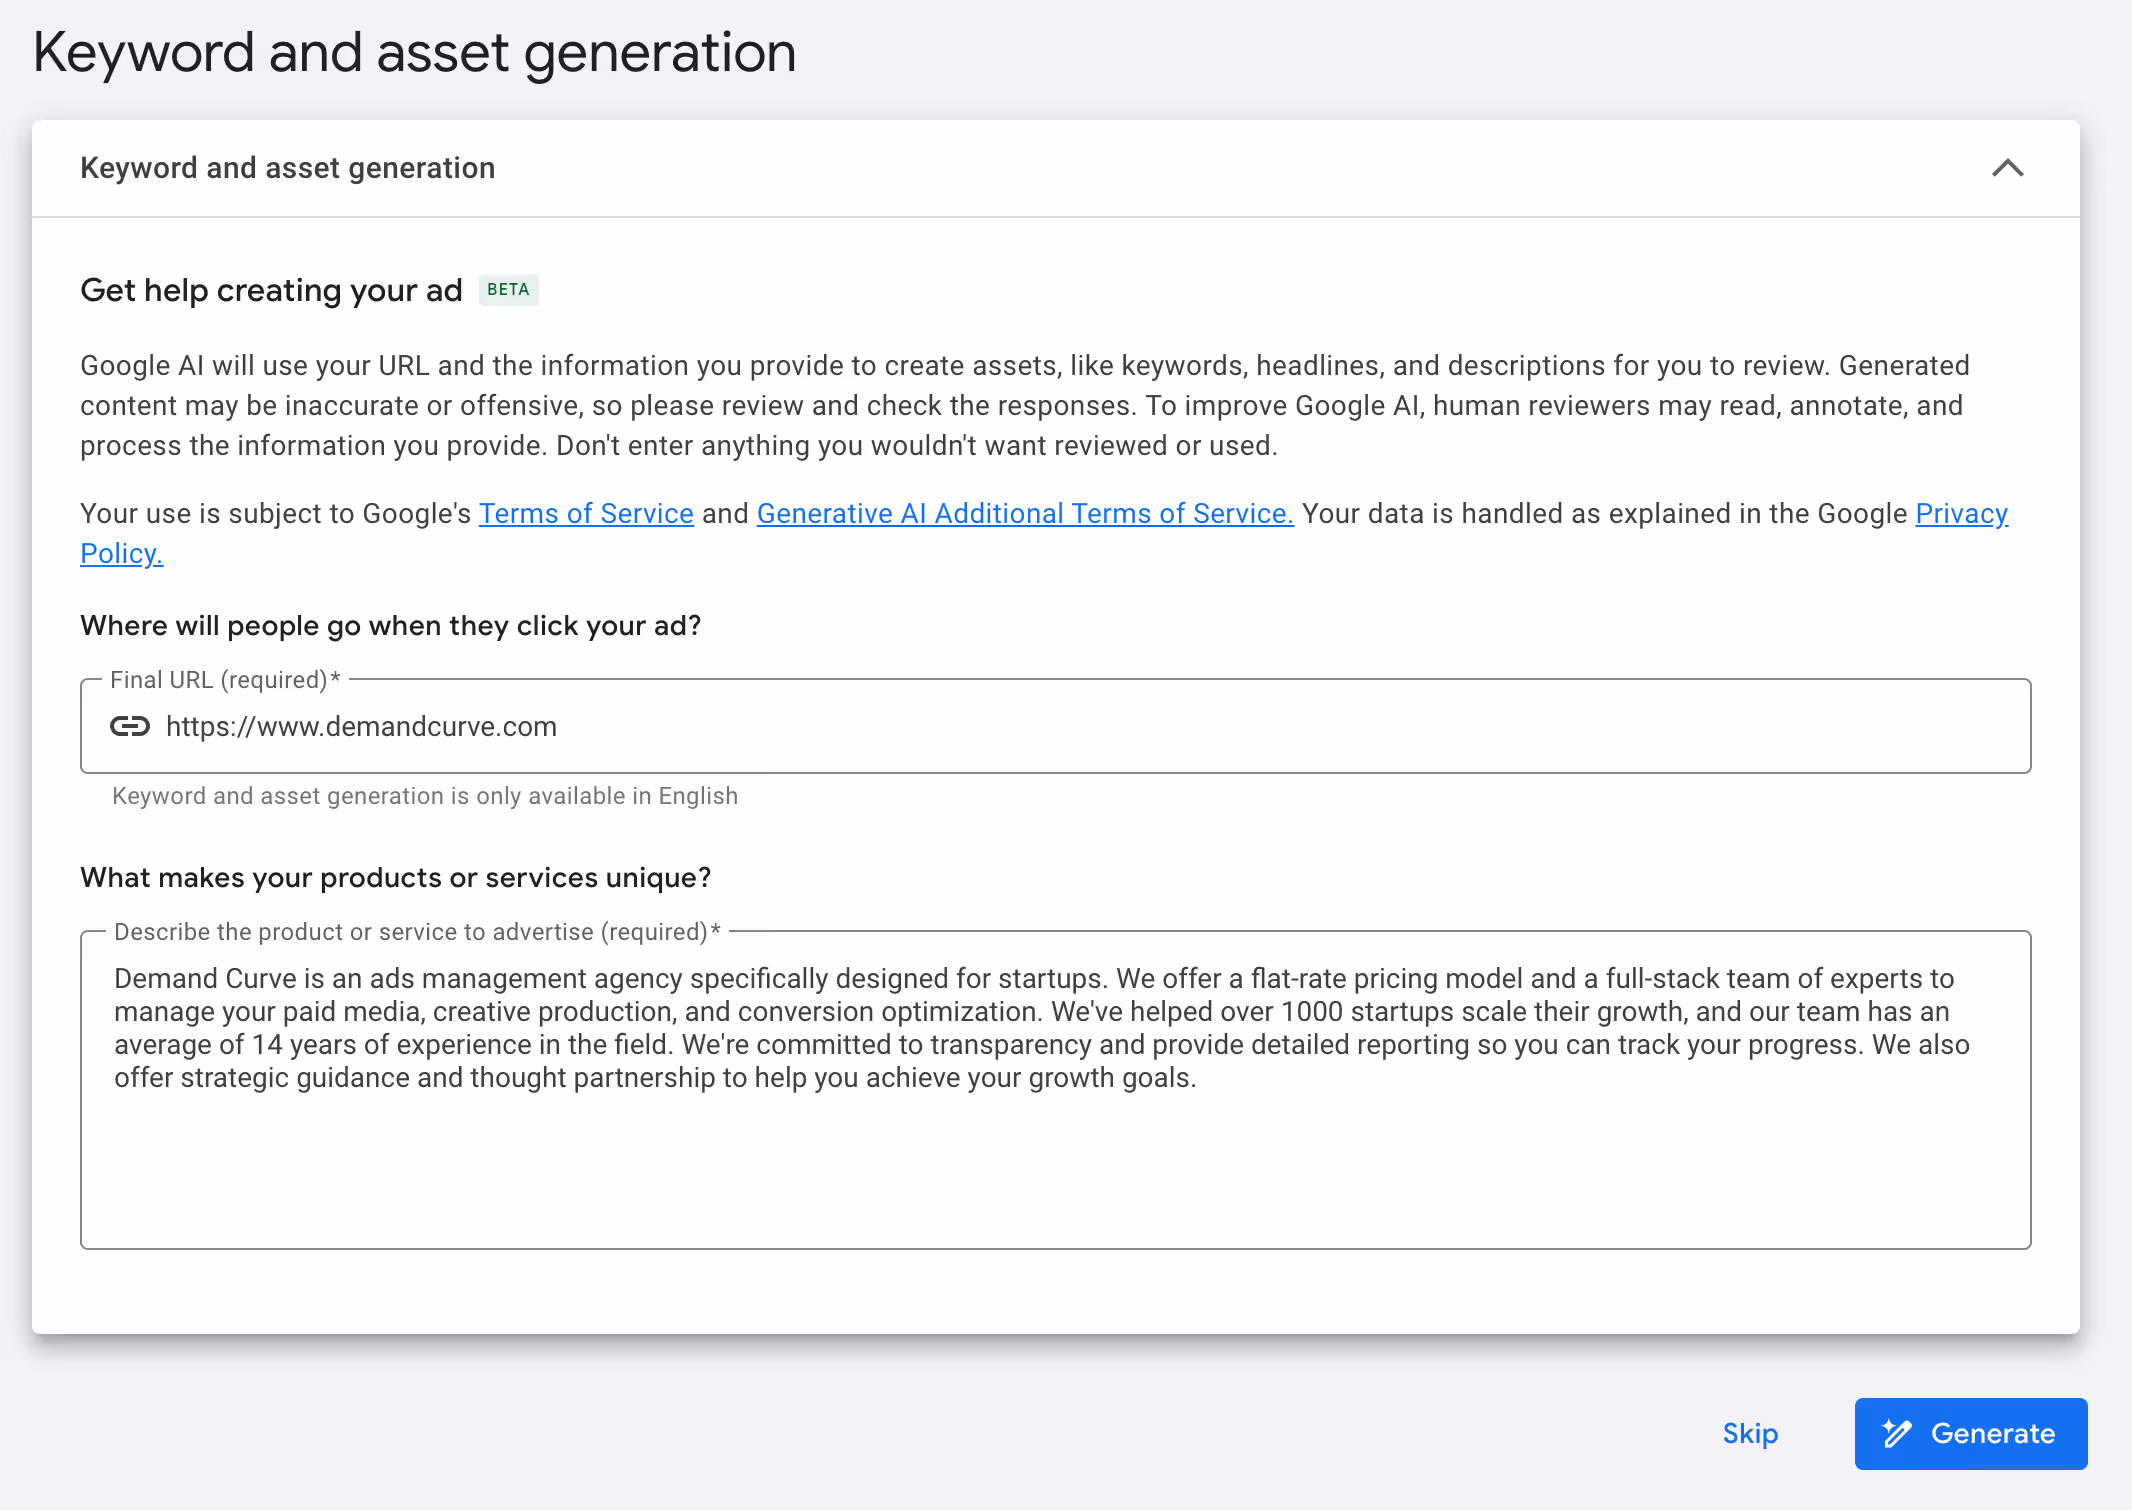
4c. Configure keyword and asset generation
You can get Google to scan your site and generate an ad group, keywords, and ads based on what it finds.
This is a great starting point for the first ad group.
Check to make sure the URL and description are accurate, then click Generate
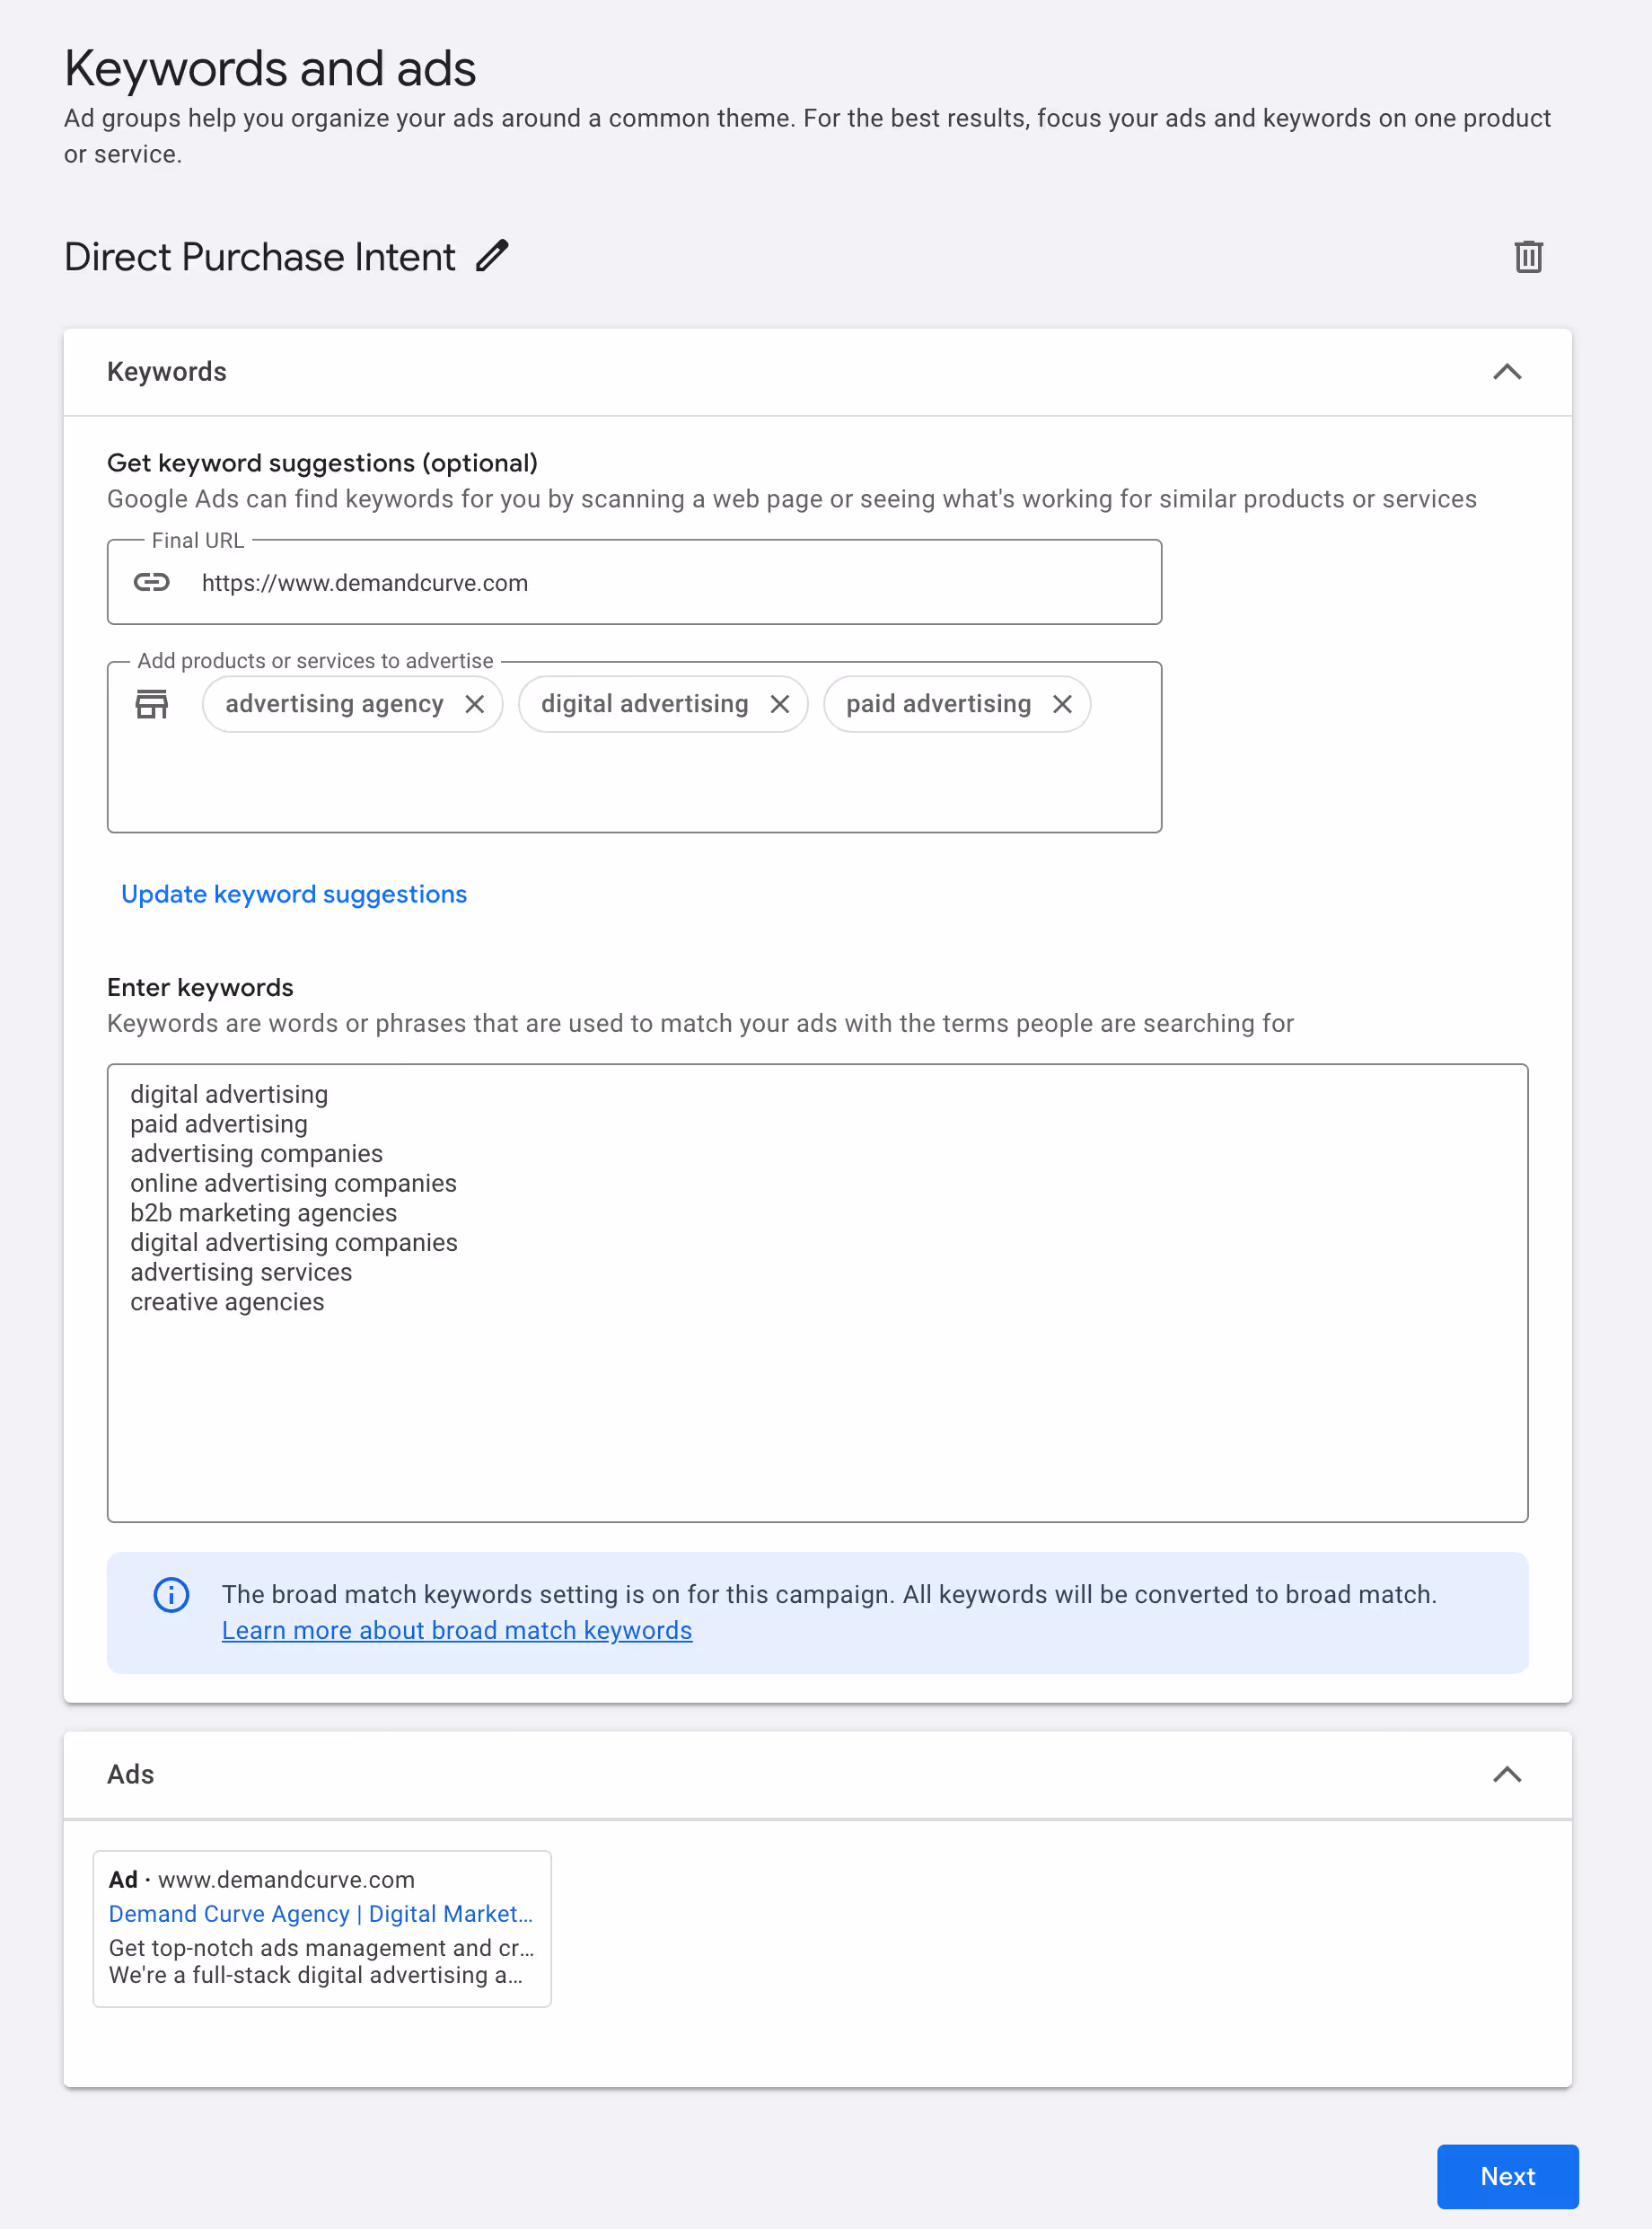
4d. Configure ad groups, keywords, and ads
Google will then create a bunch products/services and some keywords associated to them:
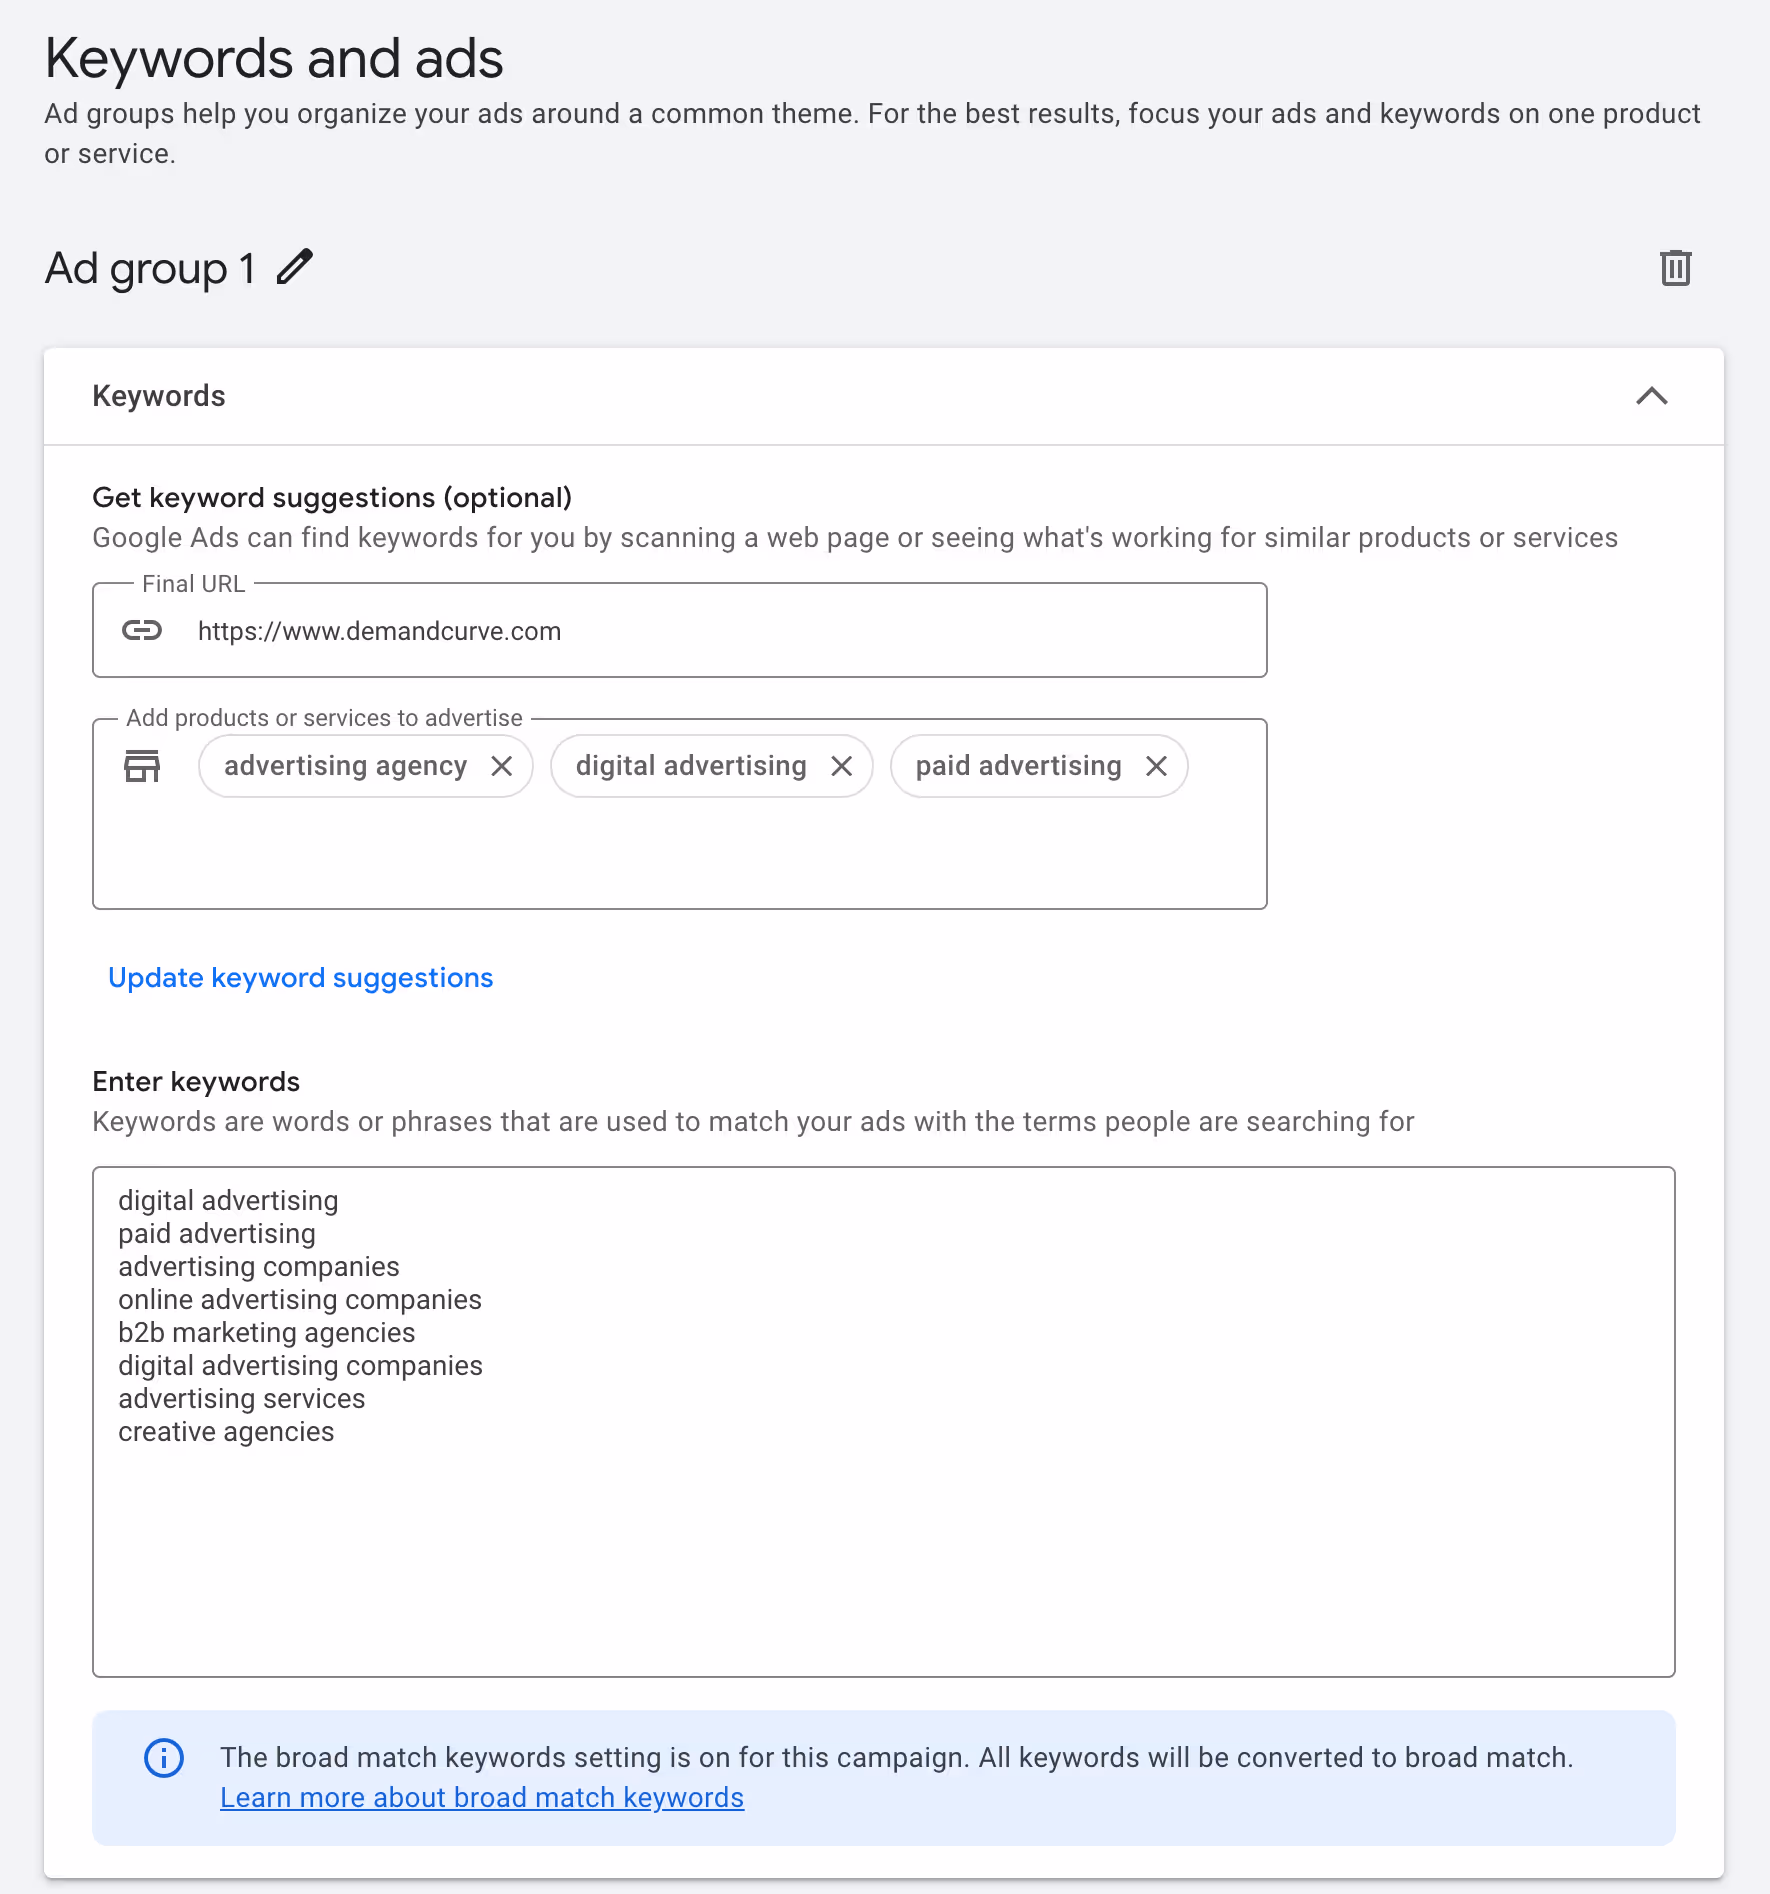
If it got anything wrong, or is missing anything major, change them now.
Otherwise, this might be a great starting point.
A reminder of the ad groups we plan to create:
- Ad Group 1: Direct Purchase Intent
- Ad Group 2: Problem-Solution Searches
- Ad Group 3: Competitor alternatives
What Google generated is likely Ad Group 1. So here's what I recommend for now (remember this is just a first quick pass):
- Rename "Ad Group 1" to "Direct Purchase Intent"
- Edit the keywords to add anything you feel is missing
- Accept the ad copy it generated
- Click Next.
We'll create the other ad groups and adjust the ads and keywords later.
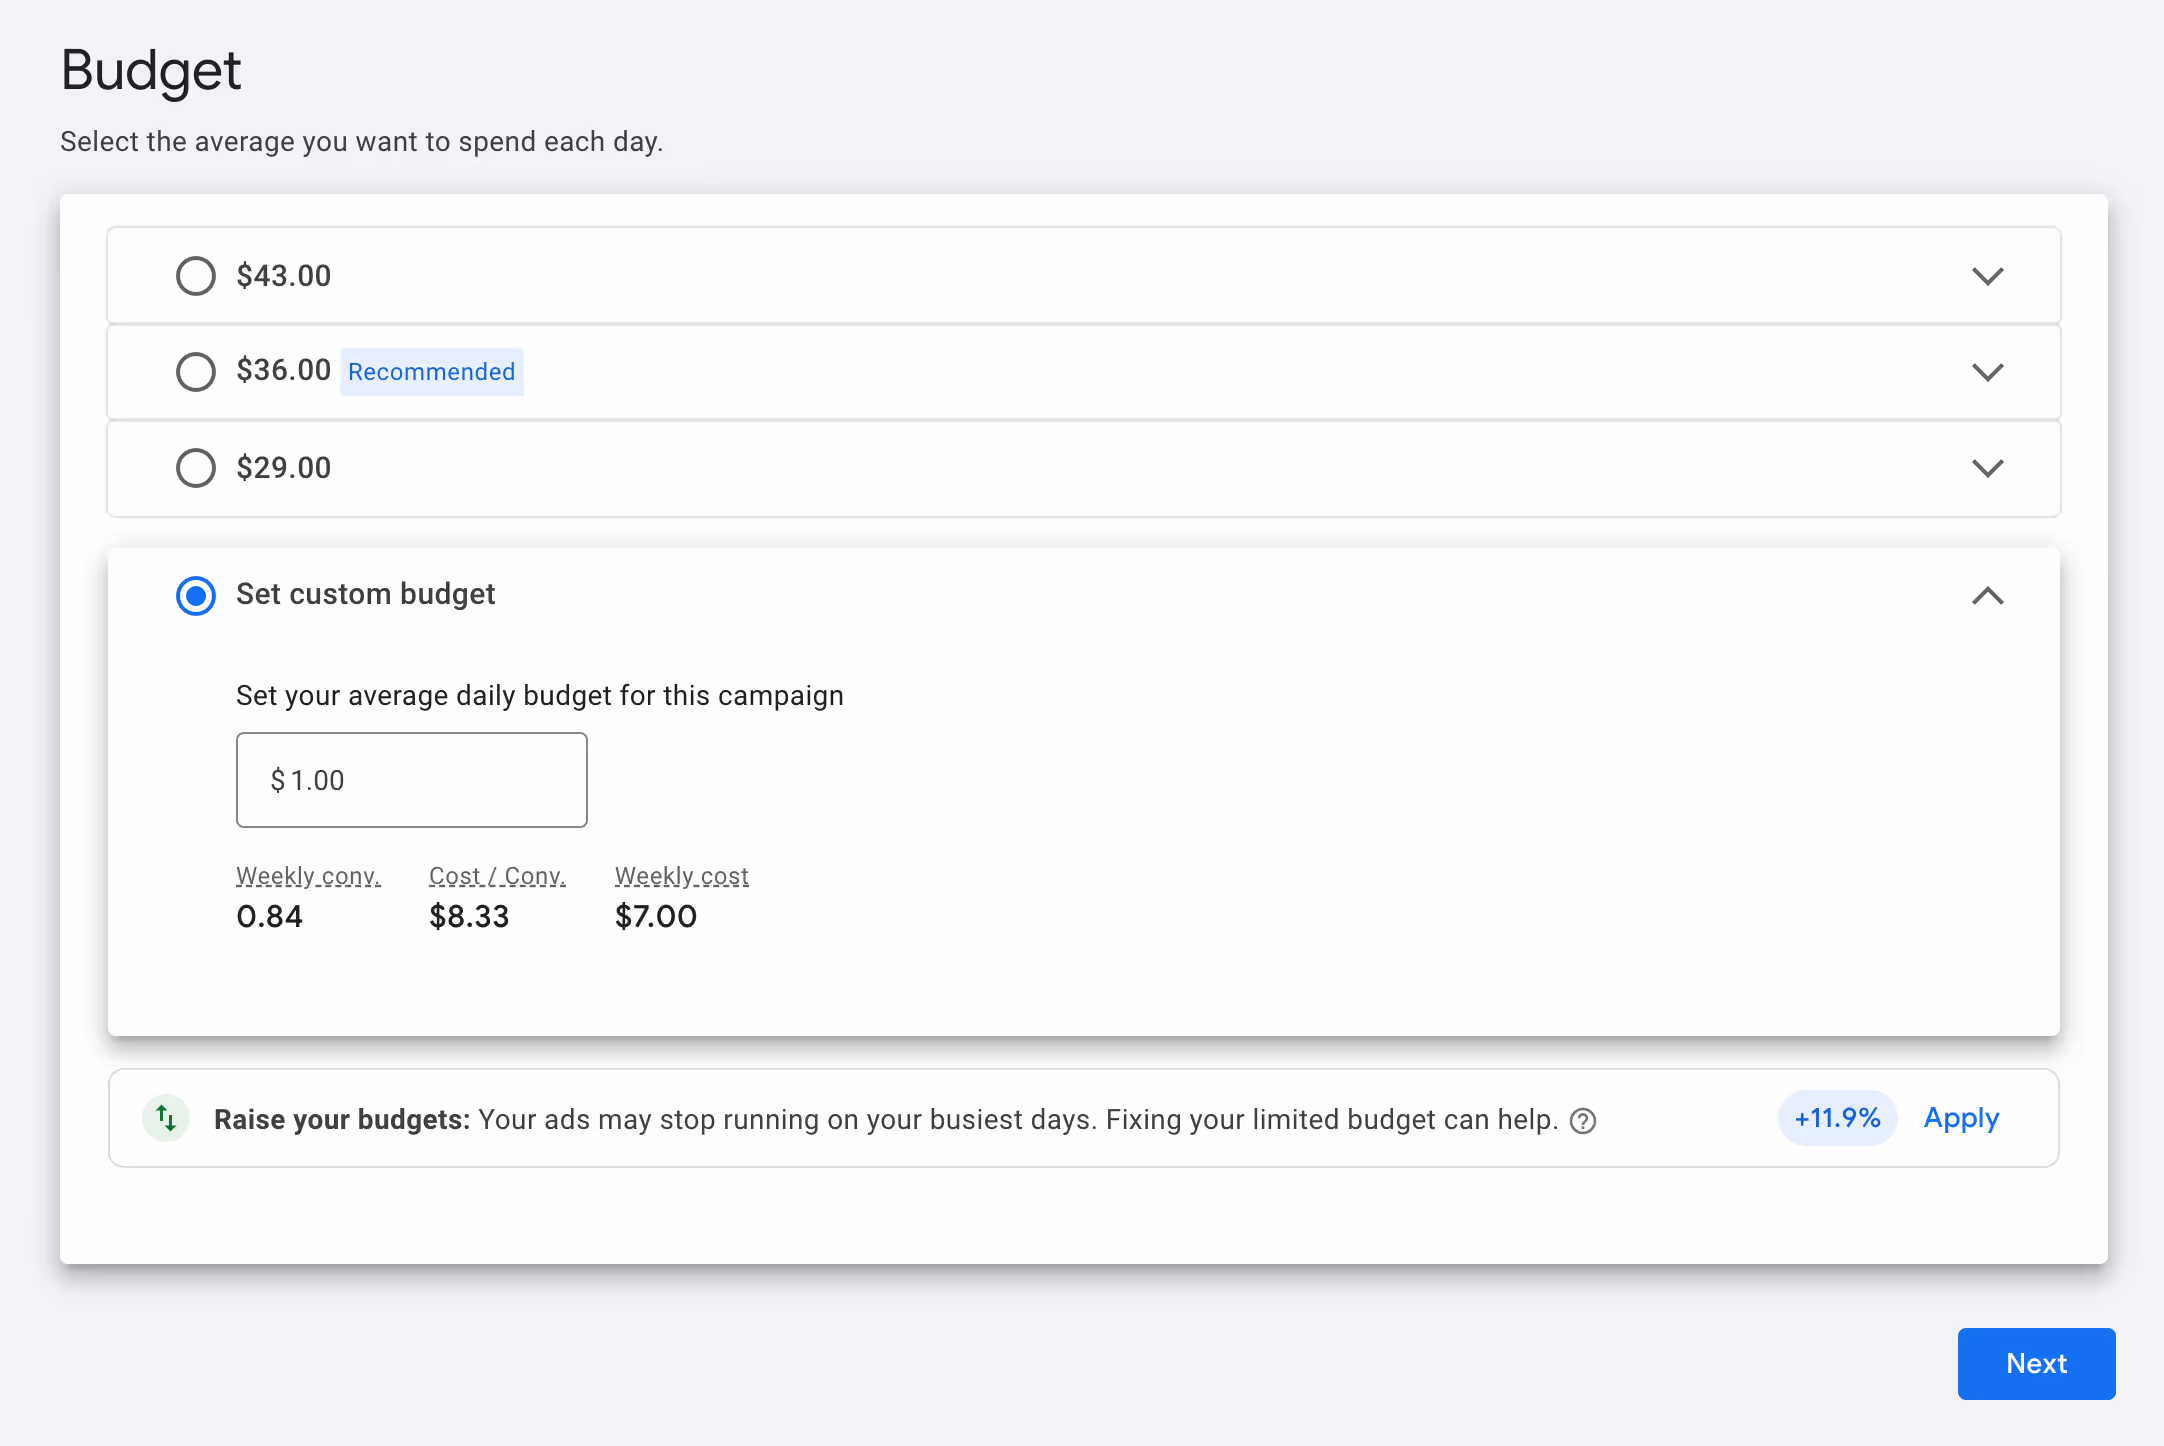
4e. Budget
Here you'll set how much you're willing to spend per day on this campaign.
Set your daily budget to $1 per day so we don't accidentally run a suboptimal campaign and waste your money.
(Note: this is a placeholder; you can and will change this later).
4f. Review and publish the campaign (we'll pause after)
Don't worry, we're just "publishing it" so it gets created. The next step will be to pause the campaign.
But take this opportunity to check over everything:
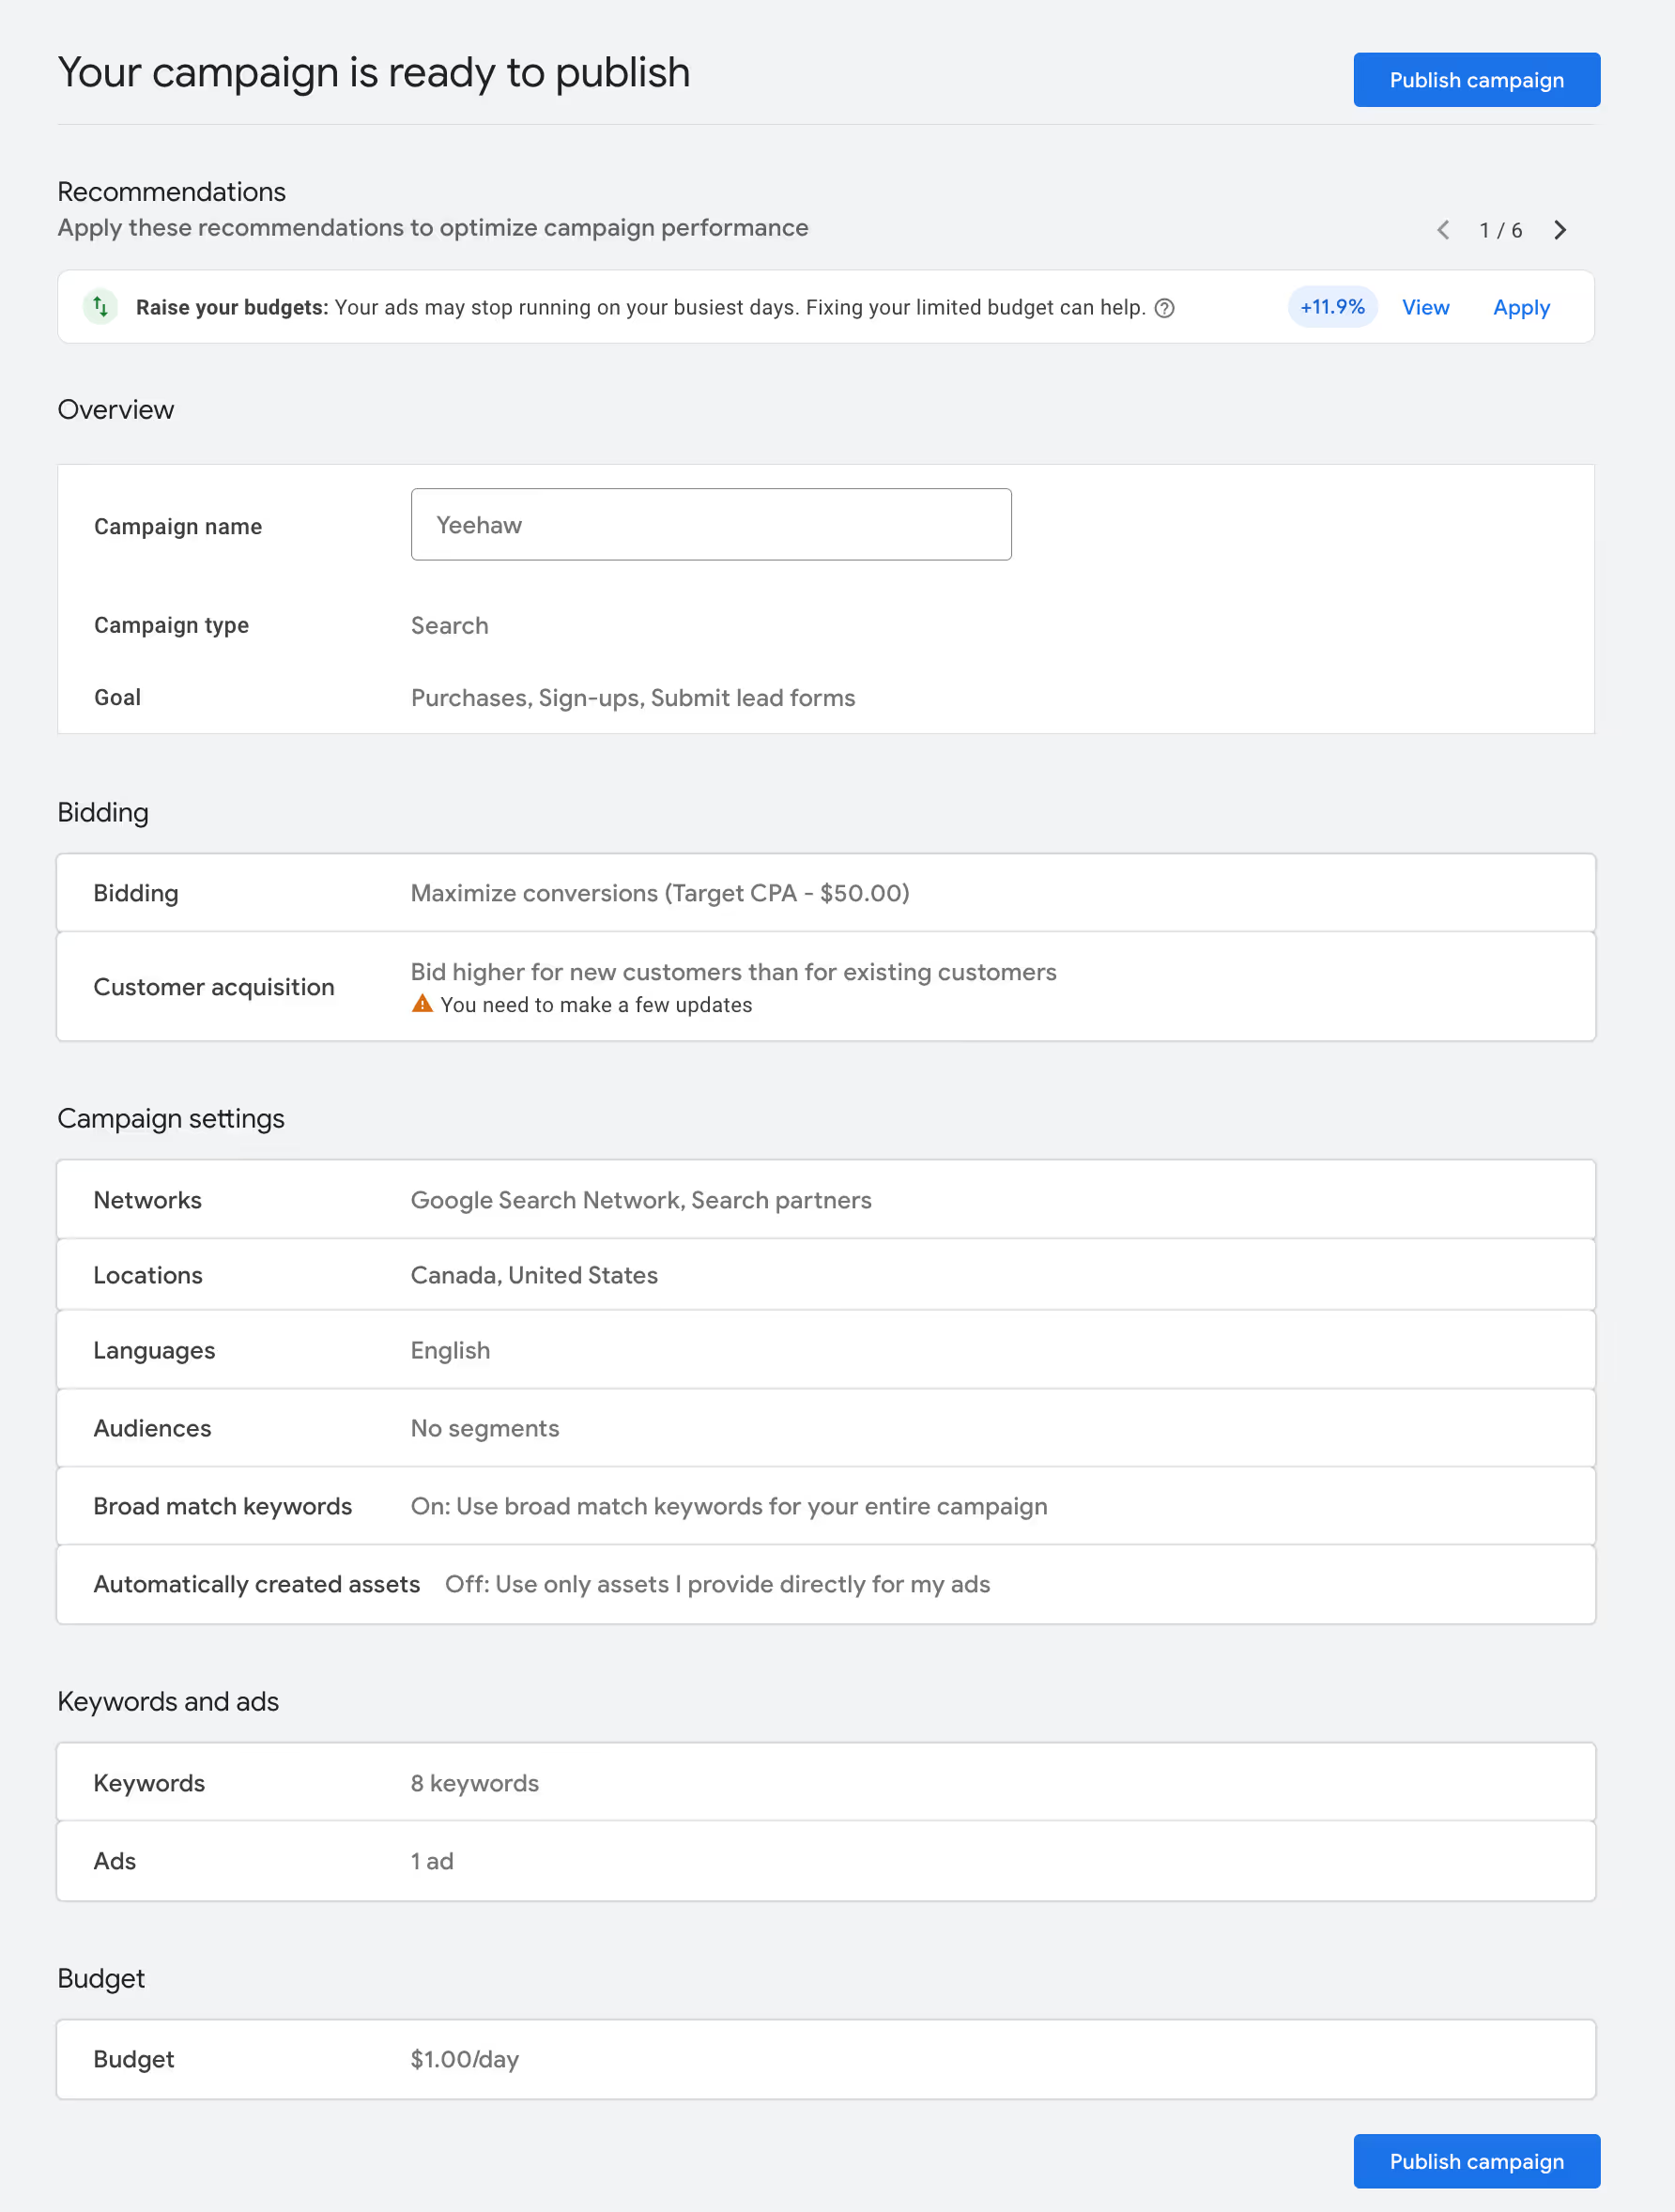
And then click Publish campaign.
Then you'll want to go Campaigns -> Campaigns -> Click the green dot, and then select Pause.
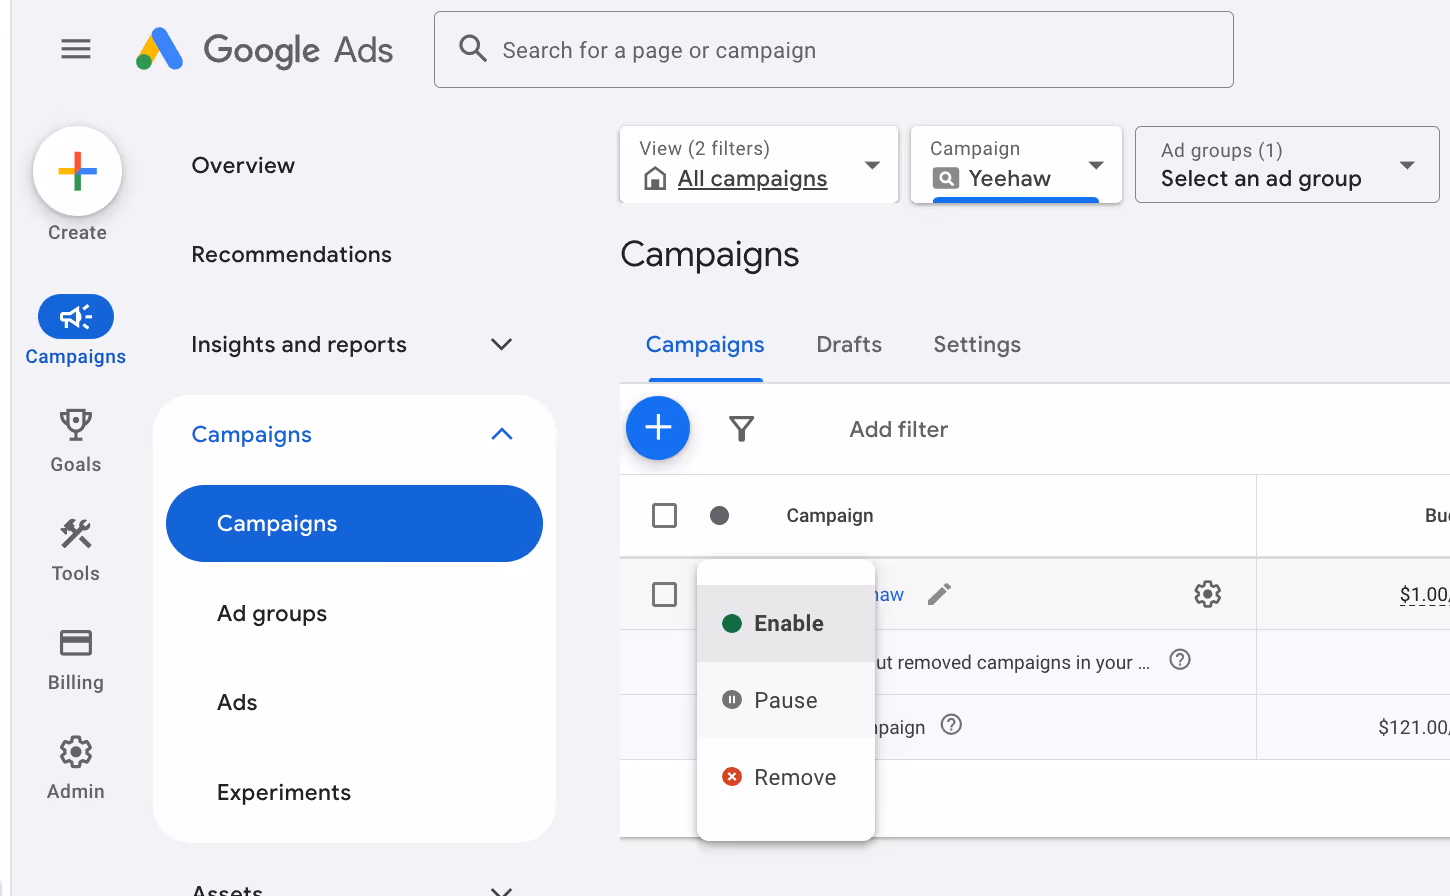
Pause the campaign so you don’t spend any money. Unless you really want to test running any ads that you may have created. (Don’t. Yet. Not worth it.)
To pause campaigns, in the campaign, click the Enabled dropdown in the top left, and select Pause.
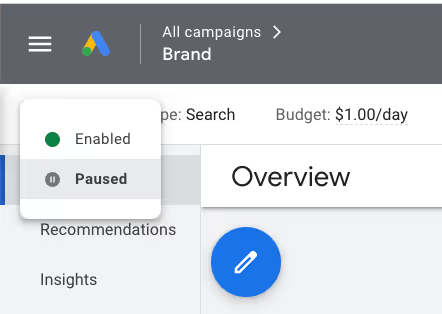
It should look like this after it's Paused:

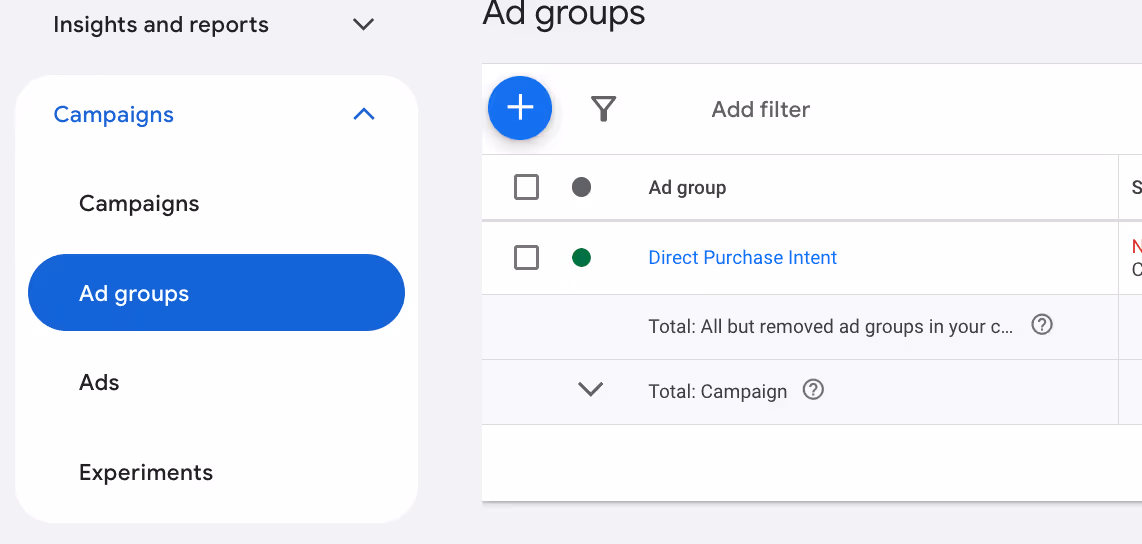
4g. Manually create the other ad groups
Okay now that you have one ad group made, let's make the others. Here's again the list of ad groups:
- Ad Group 1: Direct Purchase Intent
- Ad Group 2: Problem-Solution Searches
- Ad Group 3: Competitor alternatives
Navigate to Campaigns -> Ad Groups -> the big blue plus button to create a new ad group
Create an ad group
- Name the ad group
- Paste in some starting keywords, for example:
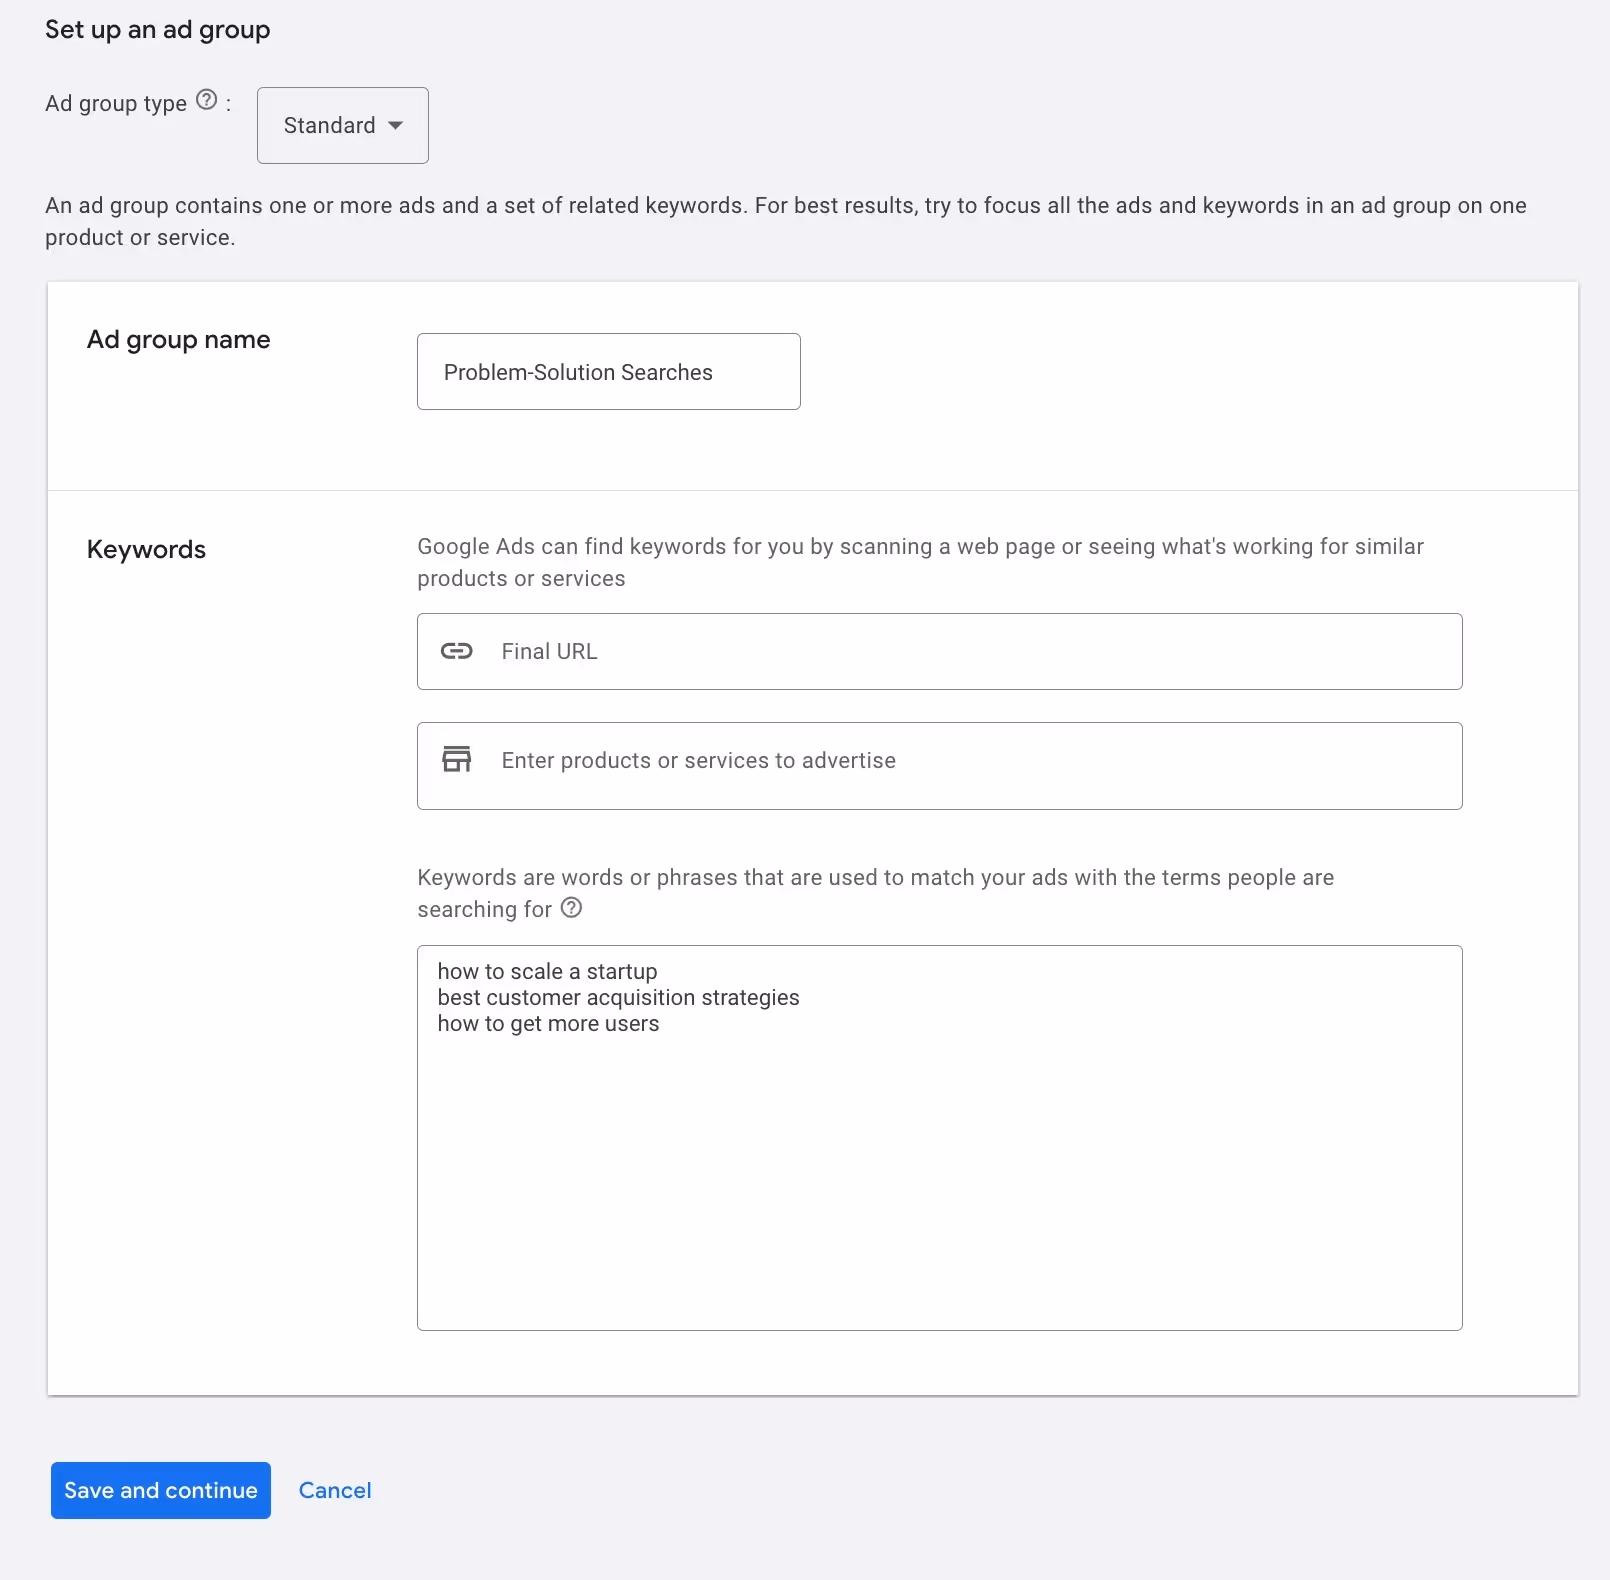
- Click Save and continue
- Select whatever default ad copy they generate (this is all placeholder)
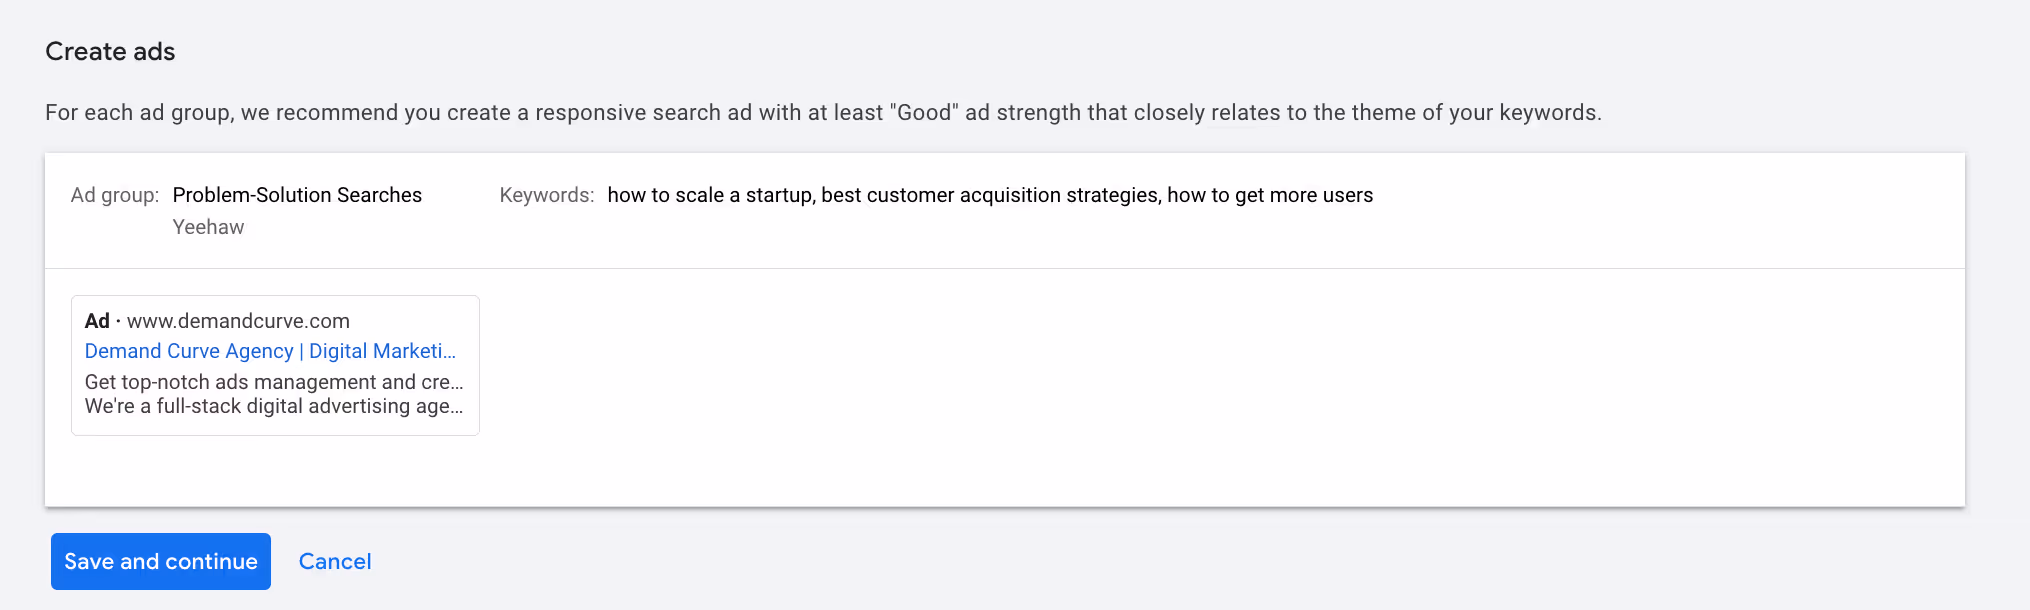
- Click Save and continue
- Repeat for other ad groups
Congrats, you have a placeholder campaign with ad groups, keywords, and ads
I know this was a lot, and I'm trying to reduce the overwhelm by breaking this up into stages.
For now we have a paused campaign with the skeleton in place, and from here on out we'll be adding better keywords, ad copy, and ad assets from here.
See you in the next lesson!